
QuinLED ESP32 v4
Board Details
The QuinLED ESP32 custom versions are based around the D1 Mini32 form factor that is for sale in a lot of places. It has a few differences though in philosophy and used components. This article will show the board limits and the pinout of the board (which is also labelled on the board itself).
Board Power limits
To try and protect the board from dying a premature death, the board employs two precautions:
- The USB port has a ESD protection chip first, this should protect the onboard circuits from any ESD power spikes.
- The QuinLED ESP32 boards further come with extra ESD and “some” overvoltage protection on their 3.3V and 5V lines
- The boards have load switches which switch between the available inputs that are current limiting and reverse current blocking
- General limit 1A
- 3.3V PIN in preferred over 5V source
- Automatically switches to this when running on a QuinLED Dig-Uno v4 / Dig-Quad v4 board
Board Pinout
Pinout tables for QuinLED ESP32 v4
Looking from the front:
| 9x Pins row | 9x Pins row | Antenna | 9x Pins row | 9x Pins row |
|---|---|---|---|---|
| GND | EN | IO12 | GND | |
| GND | I_36 | IO_4 | TXD | |
| I_39 | I_37 | IO21 | RXD | |
| I_35 | IO27 | IO22 | IO15 | |
| I_34 | IO26 | IO_8 | IO13 | |
| IO19 | IO25 | IO_2 | IO14 | |
| X | IO_7 | GND | IO_0 | |
| 3V3 | 3V3 IN | 5VPIN | IO33 | |
| 5V | IO20 | IO32 | x |
Looking from the back:
| 9x Pins row | 9x Pins row | Antenna | 9x Pins row | 9x Pins row |
|---|---|---|---|---|
| GND | IO12 | EN | GND | |
| TXD | IO_4 | I_36 | GND | |
| RXD | IO21 | I_37 | I_39 | |
| IO15 | IO22 | IO27 | I_35 | |
| IO13 | IO_8 | IO26 | I_34 | |
| IO14 | IO_2 | IO25 | IO19 | |
| IO_0 | GND | IO_7 | X | |
| IO33 | 5VPIN | 3V3 IN | 3V3 | |
| x | IO32 | IO20 | 5V |
Please see the following render for the pin reference, as seen from the back
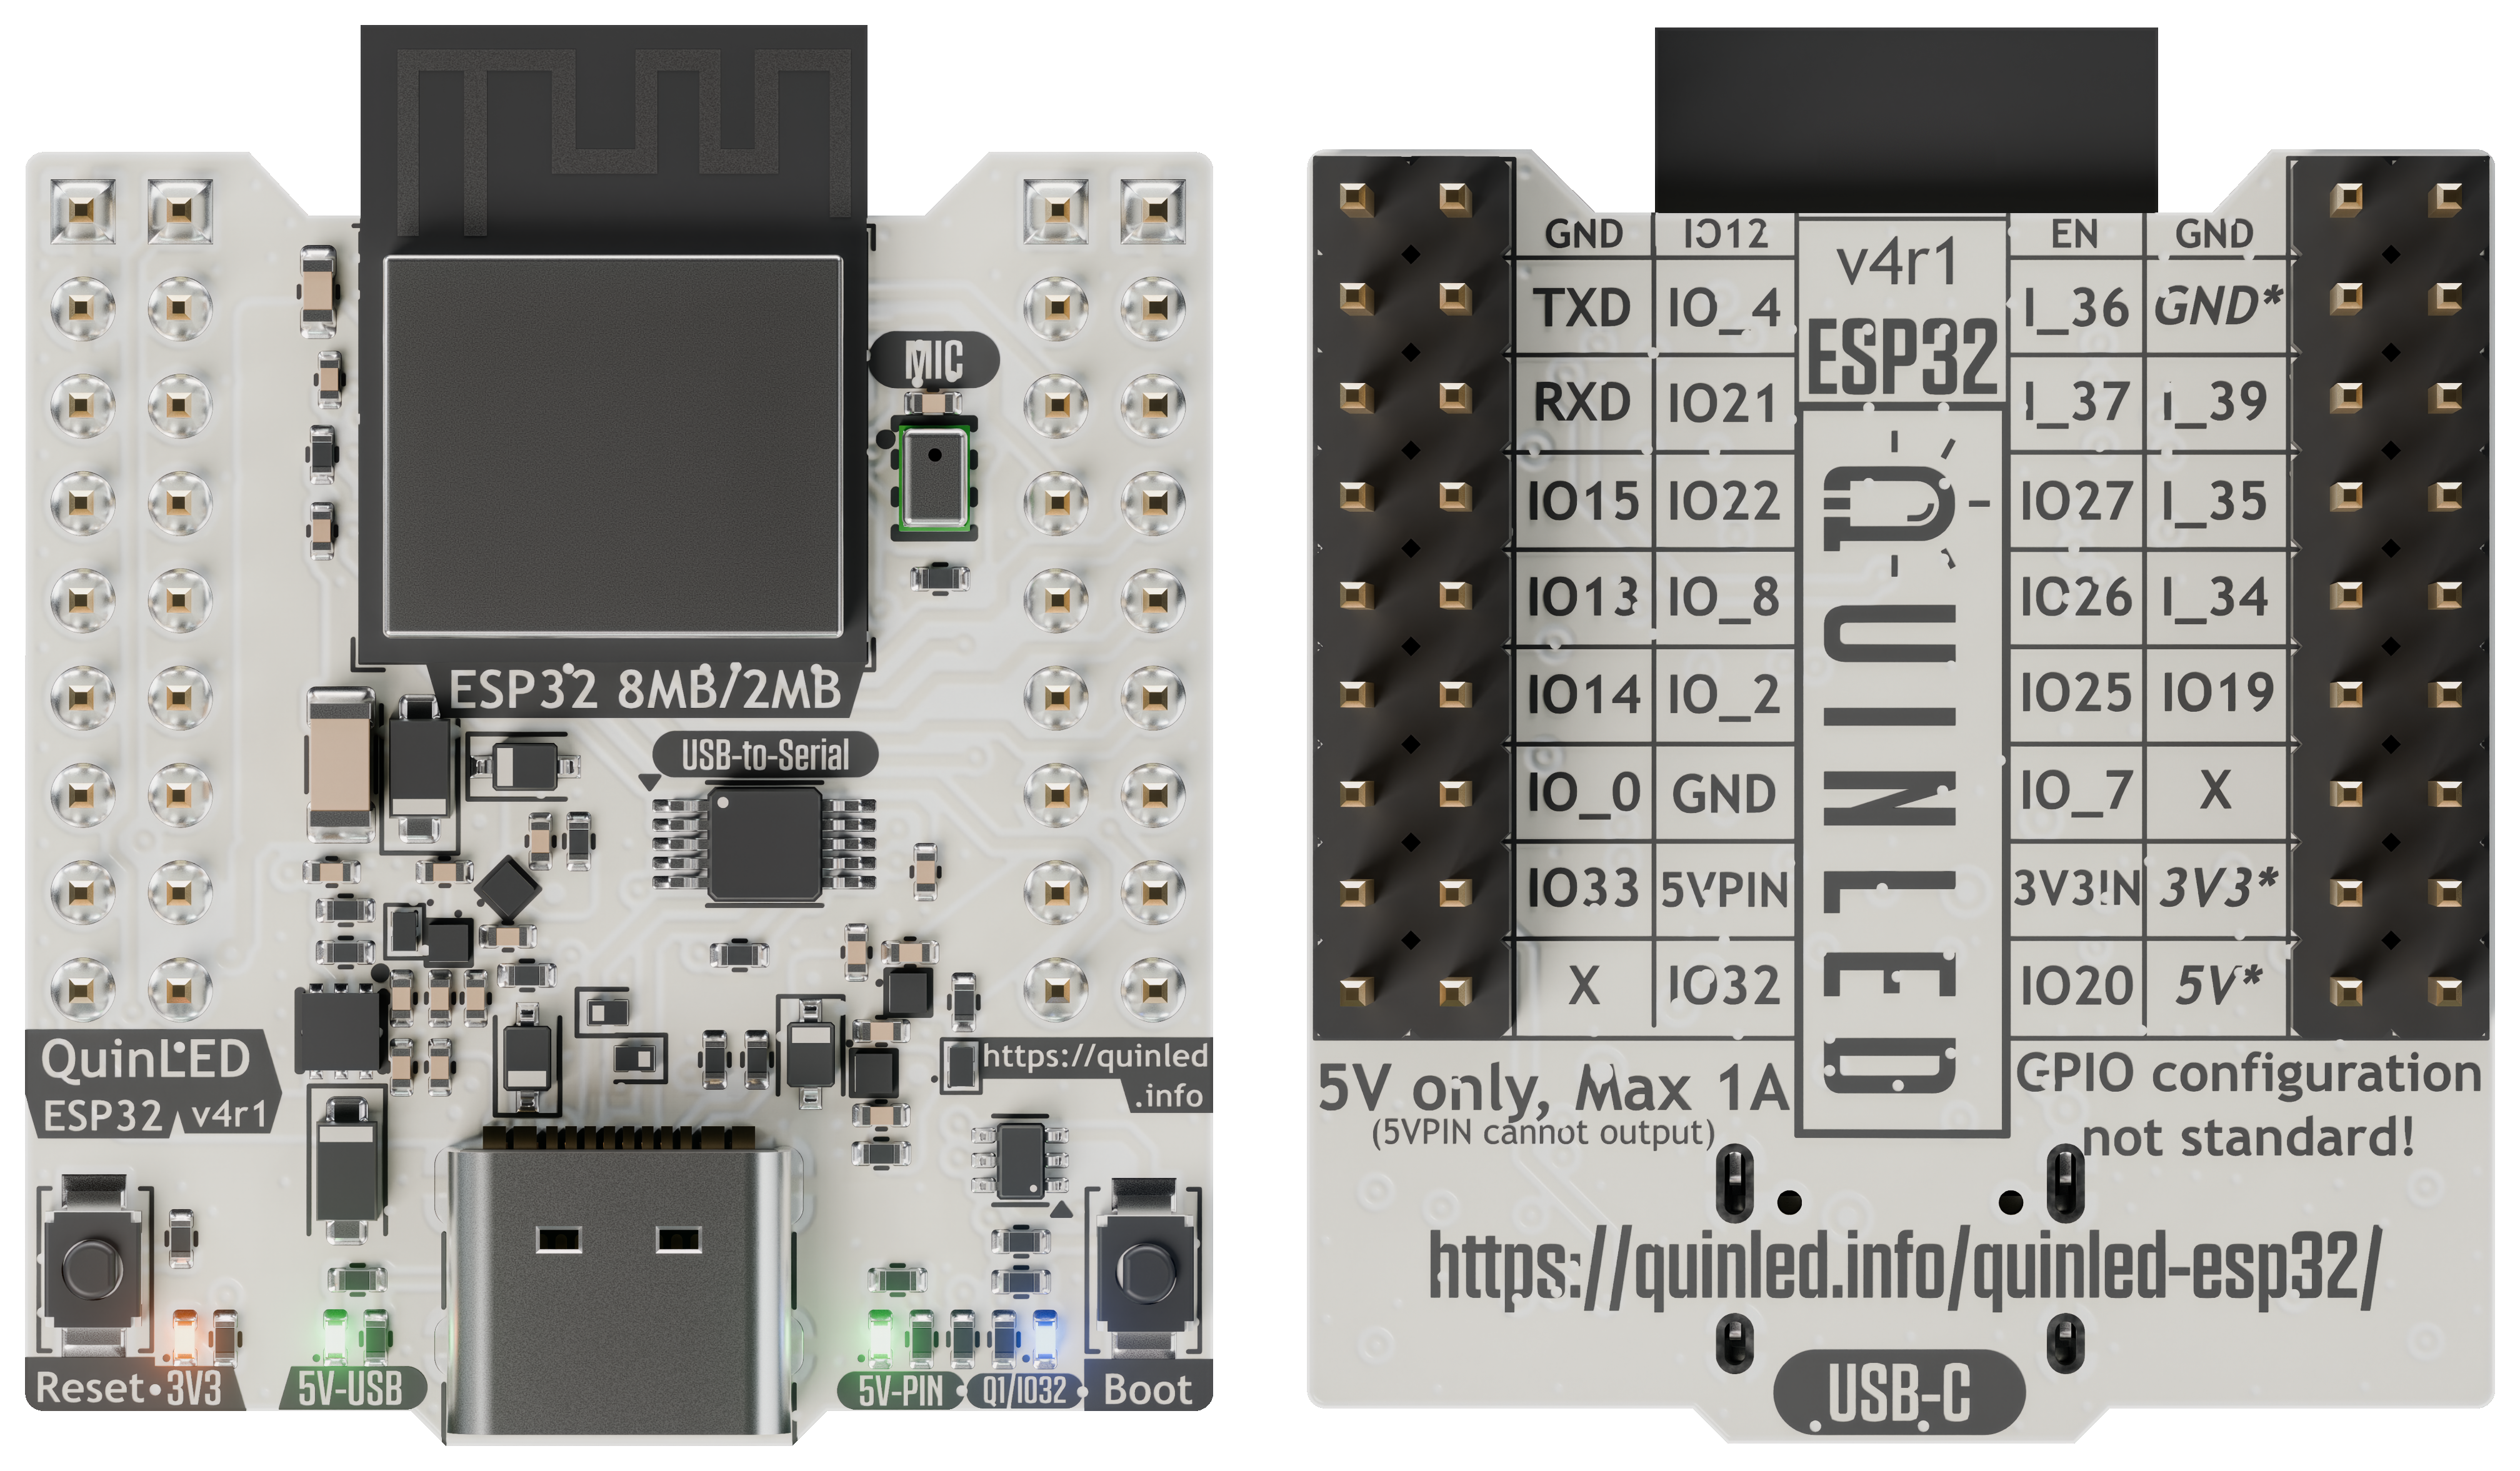
Custom pins and GPIO layout
4×9 pins, not 4×10 pins!
The board, by design, uses 4×9 pin headers instead of the commonly found 4×10 pins. The pins removed are connected to the internal flash memory of the ESP32 module and serve no real-world usage, this allowed more flexibility in the design of the board.
Be mindful that when plugging the board into a 10 pin socket you line up the pins at the antenna end of the board. This there will be one free pin on the socket at the USB end of the board.
End Conclusion
Although this board is tightly integrated with my custom boards I’m selling, they aren’t solely meant for that purpose, they are still general purpose development boards just with my twist on it and some uniquely added features!