
QuinLED-Dig-Quad DIY v3
Soldering guide
This guide is DIY v3! Please see revision history for changes
If you are looking for the previous v1r6 soldering guide, click here
To solder the QuinLED-Dig-Quad there are several resources here that will help you do so. Not all might be updated to the exact current board version but they should still help you get the task done!
The idea behind the board is that even the most beginner level person will be able to build the board with enough instructions, it’s great as a first try project! Make sure to also look at the other DIY guides such as the Hardware guide which will show you which components to get.
I know soldering seems daunting at first, but with some decent equipment I think anyone should be able to solder and build a working board!
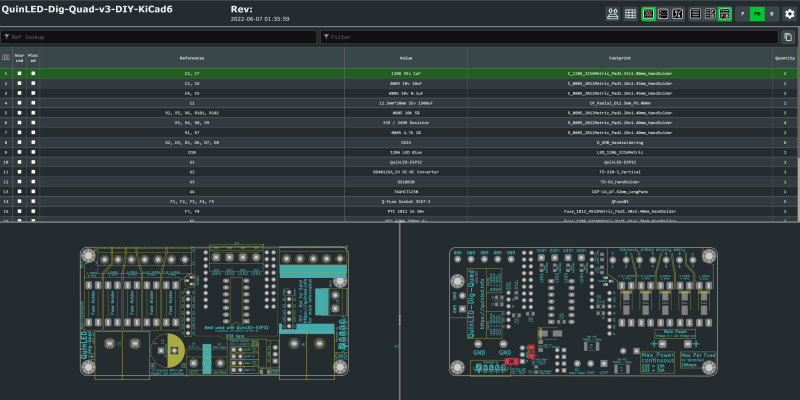
v3 DIY iBOM file
The best way to solder the board is using the iBOM file found here. This will show you a clear overview of the board and where all components are supposed to go. In the preferences you can even enable tickboxes for when you have ordered the components and while soldering which components you’ve placed.
The iBOM file also replaces the individual pictures method of the previous guide.
Soldering using the iBOM file
Although the iBOM basically gives all positions and such there is still a best order to solder on all components, the recommended order is below:
- Solder all SMD parts
- SMD Capacitors, SMD Resistors, SMD Diodes
- Most are on the back, 1206 Blue LED is on the front!
- Can be done using either iron or soldering paste and then re-flowing using hot plate or hot air gun
- Solder Level-Shifter
- Solder Fuse Holder
- Solder Male pin headers
- Solder Temperature sensor (optional)
- Solder screw Terminals
- Solder large bulk capacitor
- Solder DC-DC converter (optional)
- Solder female headers for ESP32 board
- Take headers, plug them into ESP32 board and then plug the combo into the Dig board, this will make sure everything lines up perfectly and makes it easy to solder
Generic tips
- Using a surface that you can “turn around” makes soldering some of the components a lot easier. For this I use a cork pad normally used for hot pans. Using this I can for instance put in all the pin headers then put the pad on top and flip it around. Then I solder 1 pin of each of the pin headers and check if everything is in straight. If not it’s fairly easy to correct and once everything is straight, solder the rest of the pins!
- Flux is your friend, are you having issues with the solder not taking or bridging a lot, add some extra flux and it will generally be a lot easier!
- A decent soldering station also helps a lot, check out my recommendations here, myself I use the Aixun T3A which is truly excellent if you are serious about this hobby!
 Populated front
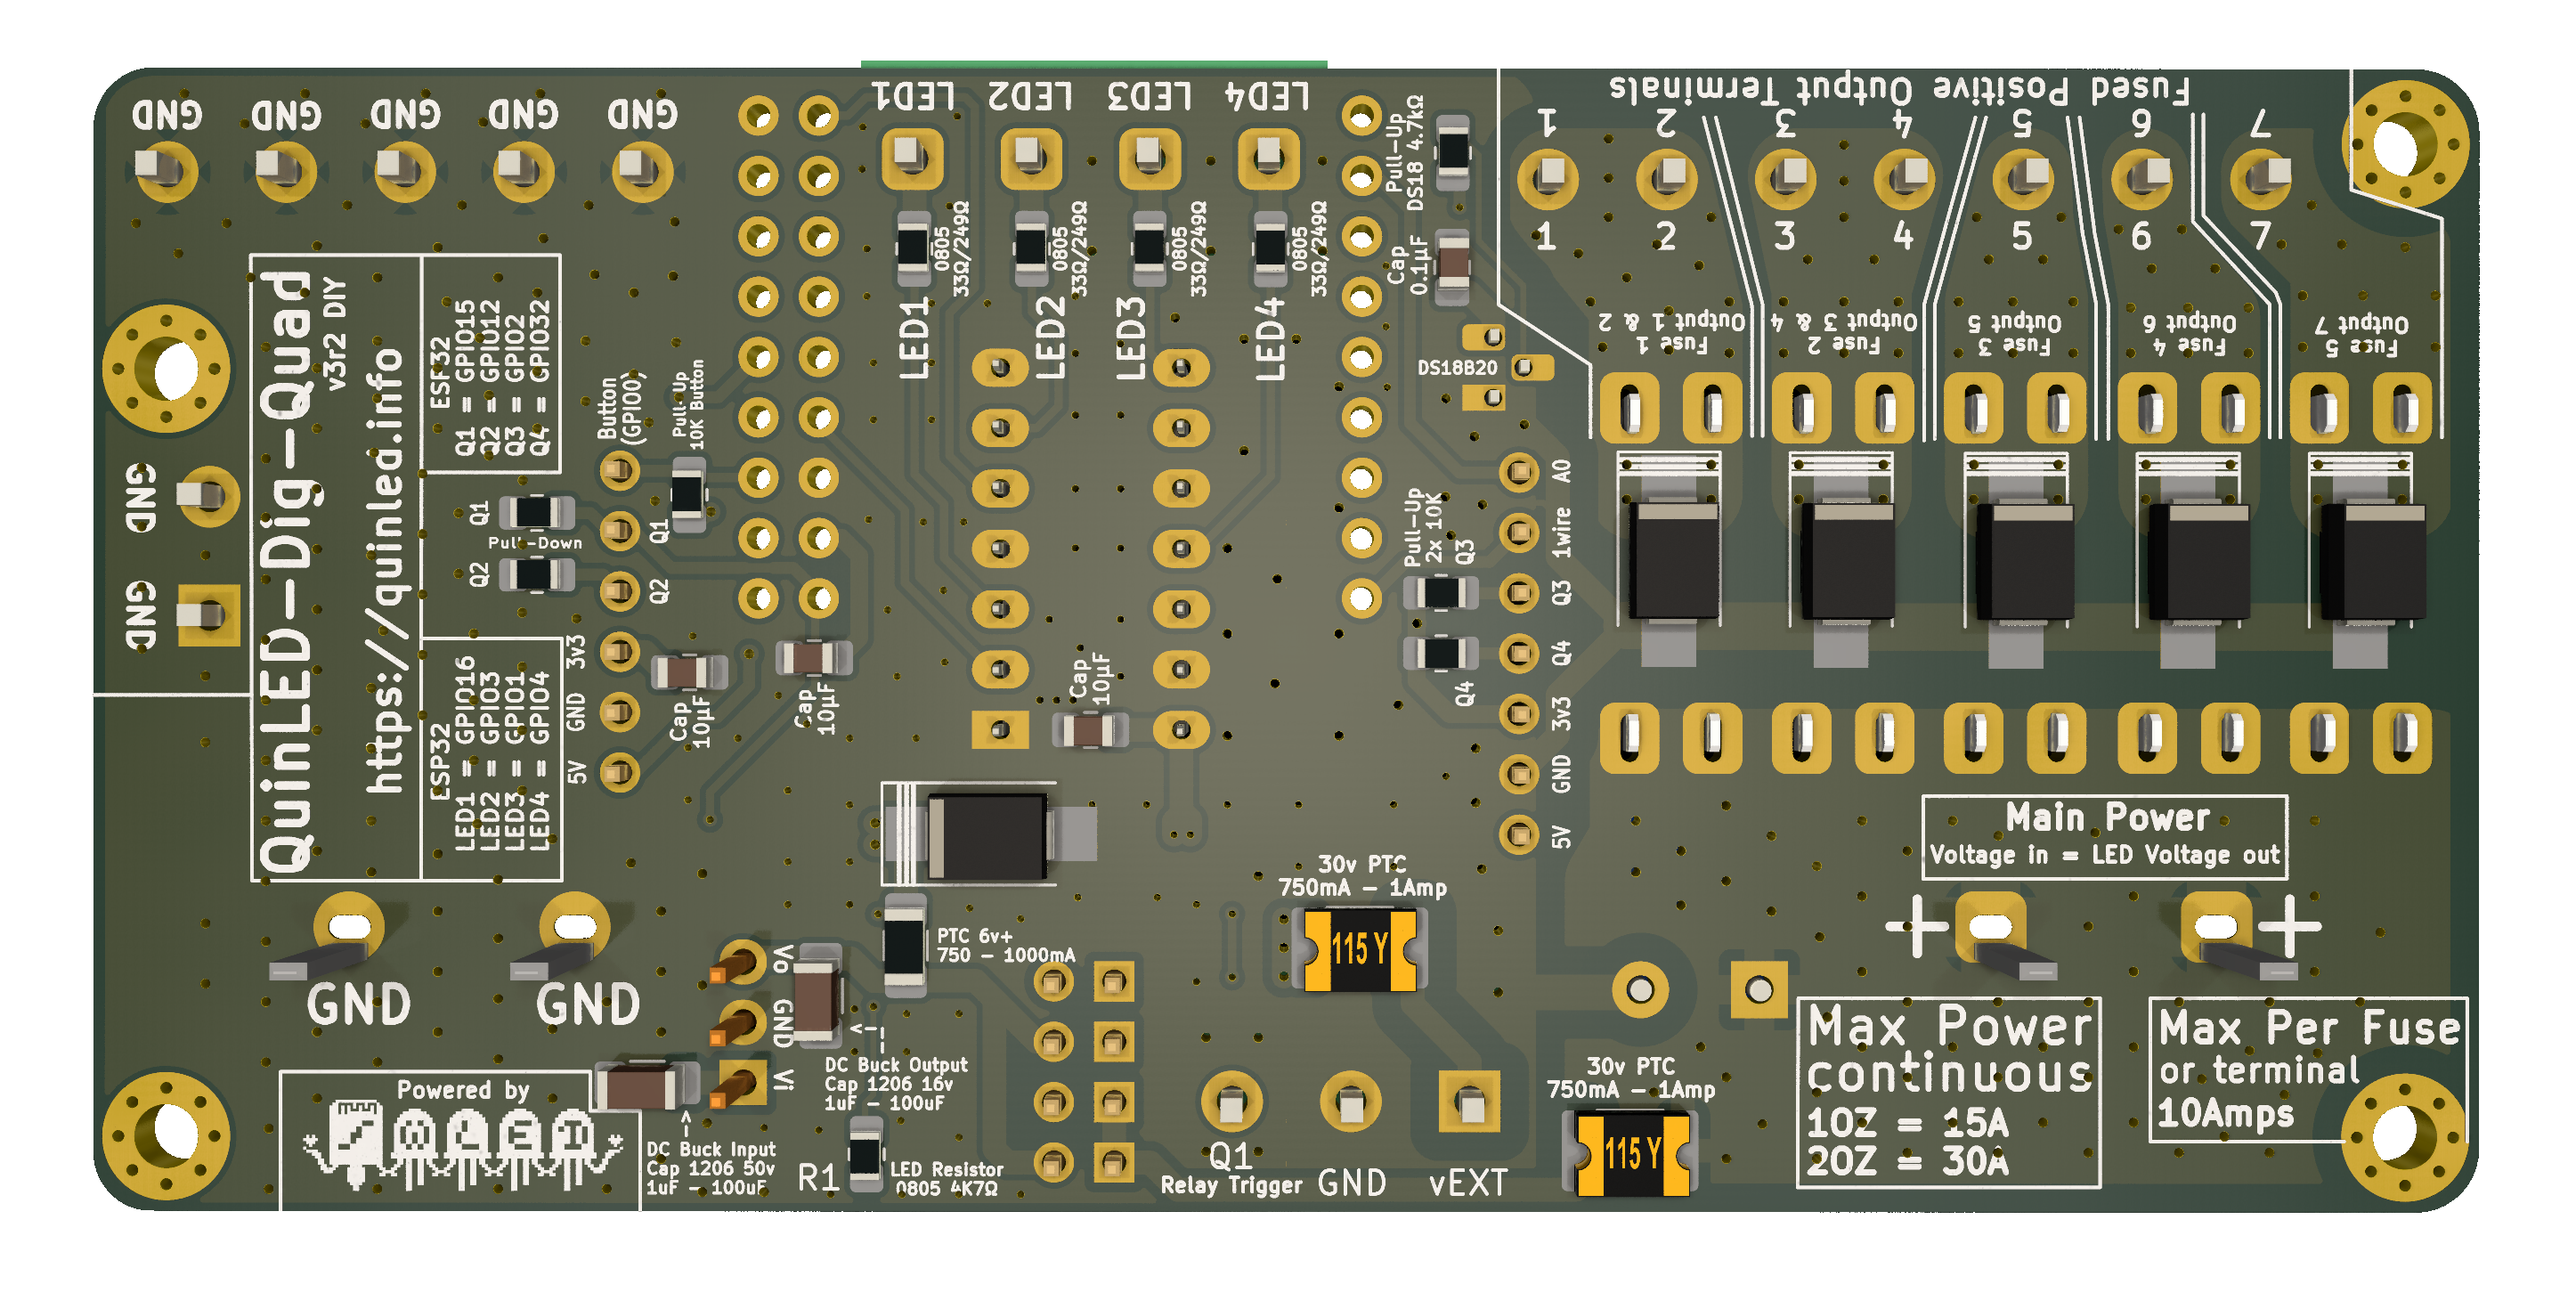 Populated back
Video “guide”
The version 3 of the QuinLED-Dig-Quad does not have a dedicated soldering video yet (older video below). There is a livestream where I built the newest prototype which you can find here. By skipping around this video you’ll see the complete build and programming of the board!
Ending remarks
Did all of the above? Great, you’re done, go on to either the wiring guide or one of the programming guides from the QuinLED-Dig-Uno index page.