
QuinLED-An-Penta DIY Hardware Guide
Back to QuinLED-An-Penta-DIY index page
To build the QuinLED-An-Penta you are going to need several components which are listed below. As a little disclaimer, please take a look at this article about my shopping links. After reading that, make sure to also take a look at the additional hardware and tools you might need to be able to complete this project. Then, once you’ve done all that, make sure to get some LED strips, for warm white visit the recommend Analog White LED strip guide since there are some things to watch out for, especially for white LEDs. If you are looking for Analog RGB LED strips, take a look here!
| QuinLED-An-Penta DIY Hardware Guide |
|---|
| Component List |
| PCB boards and Stencil |
| Additional Component Notes |
Advanced DIY reminder
This article and how components are listed is a bit more spartan then in my previous board articles, this articles assumes you have some basic knowledge of the components you are buying. For most items I will try to at least provide LCSC direct links but you are free to source them from anywhere you please!
Almost no Affiliate income, consider donating?
Since LCSC doesn’t have an affiliate program I won’t earn a little income such as my Aliexpress links normally do. That little income is a good push to keep spending (a lot) of time designing, testing and publishing these boards and guides. Please consider donating a small amount (even 5$ helps greatly) if you do decide to build and use the project! Word of mouth on public websites that you enjoy the boards and the project is also very much appreciated! 🙂
Total costs for a single board
What a single fully built QuinLED-An-Penta board will cost be about xx.xx$ per board. But these costs are based on planning making at least 10 boards since that is the amount of PCBs you get and often also components. If you build less, cost per board will raise a little bit.
For this board, since it’s a 4 layer PCB, especially those will be a higher cost then the base price most PCB houses charge.

Components needed
As mentioned above, this will be a much more “spartan” article then previous DIY hardware guides. Next to the below table the Interactive BOM (Awesome open source project), which will be used for the soldering guide, also has all needed components noted but without shopping links (Limitation in KiCad 6!).
You need the following components and quantities:
![]()
QuinLED-An-Penta PCB boards
These boards will only be available through PCBway. If you include shipping, their prices are very competitive although maybe not the bottom dollar price of some others. I also use their system to share my PCB design files and I know they know how to make the boards correctly.
Make sure to include a stencil with your order, this board will be very hard to impossible to build without it!
— If you do not have a PCBway account yet, consider creating one using this affiliate link! 🙂 After creating come back to this page and use order link above.
![]()
Order link PCBway for QuinLED-An-Penta DIY v1r2
Options to select
Once you click on “add to cart” for the PCB the following pop-up screen will appear:
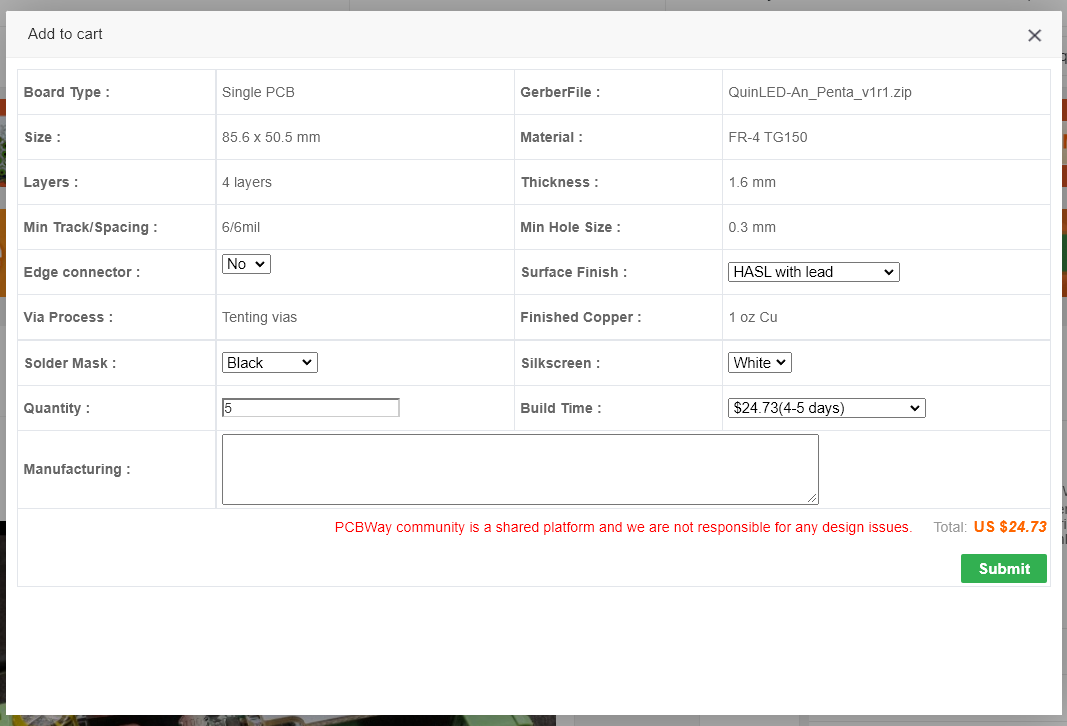 For this screen you can leave everything default, or change “Solder Mask” color and Quantity as you see fit
Then, once it’s added to your cart, click “PCB Instant Quote” in the top bar here: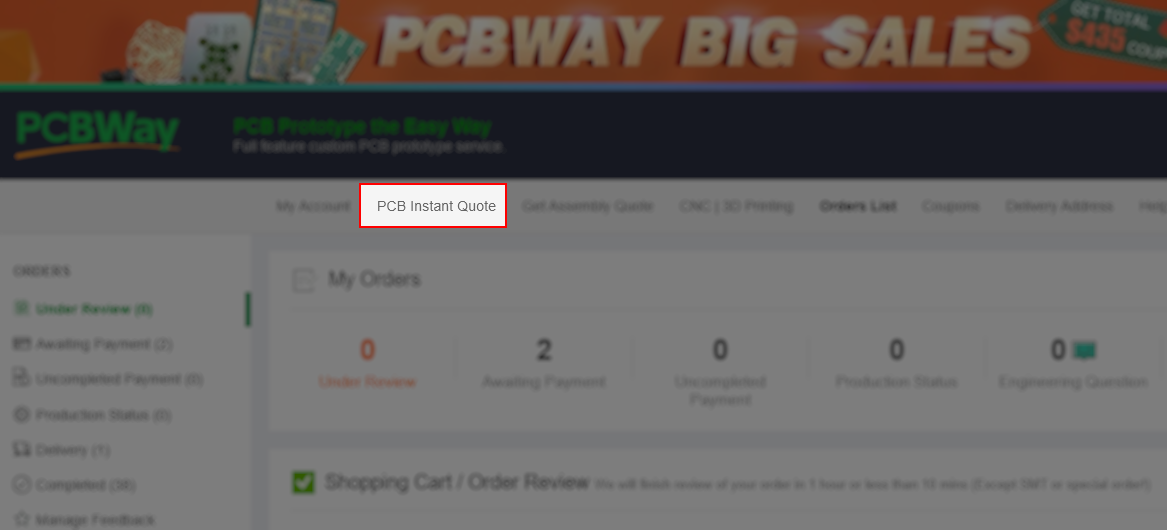
Once there, click on “SMD-Stencil” in the top picture bar:
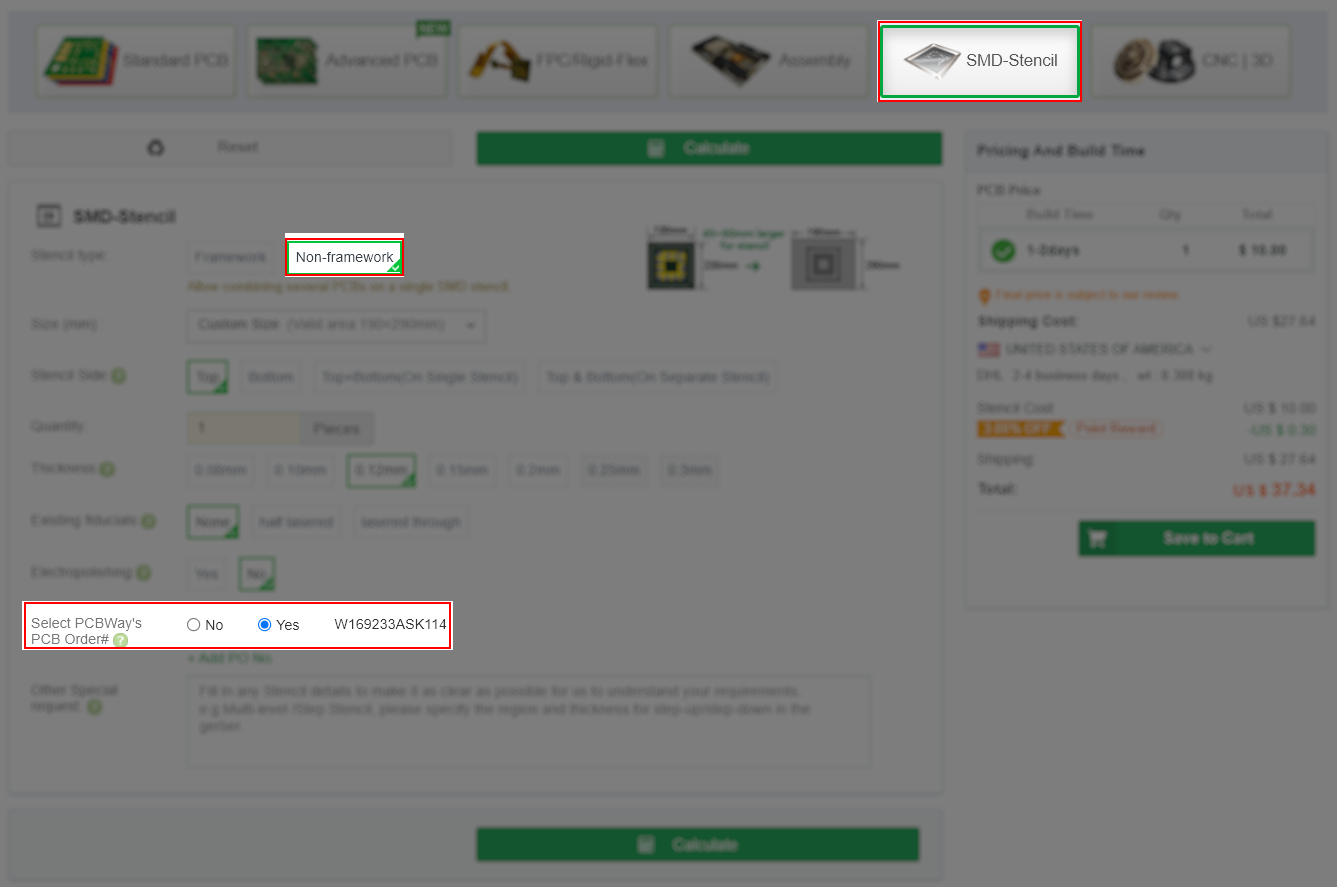 and select “Non-Framework” in the options. We only need a stencil for the top side, which is selected by default. Switch “Select PCBway’s PCB order#” from No to Yes and select the QuinLED-An-Penta PCB order you just made. Once that’s done, click “Save to Cart”
Once you pay for the order, shipping will combine both and you should get the PCBs including a stencil to use with your soldering paste!
I will not be making Gerber or Design files available!
I will also not provide files for automated SMT assembly, this is meant for DIY!
Getting multiple designs
If you would like to order more than one of my designs PCBway has a function to combine shipping so it would be best to do that before paying for your cart!
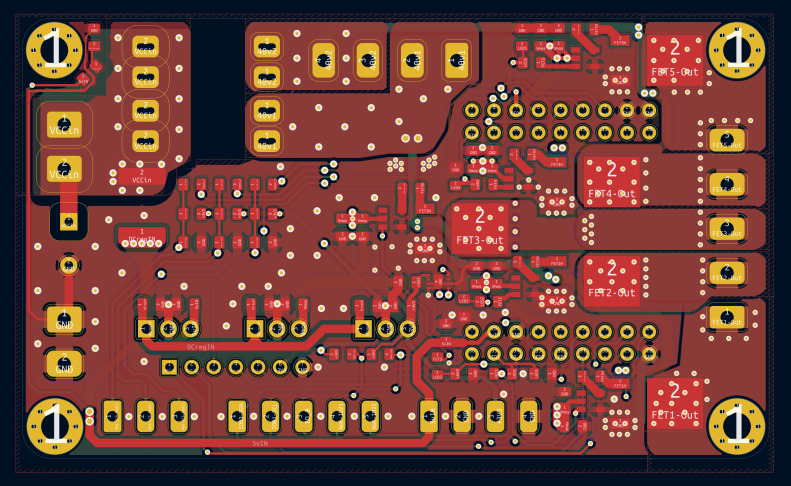
QuinLED-An-Penta v1r1 PCB Design
![]()
Additional hardware notes!
QuinLED-ESP32 or Wemos D1 Mini32 (ESP32) compatible
The main brains for the QuinLED-An-Penta is an ESP32 board, most tests and design have been done using the QuinLED-ESP32 boards and the QuinLED-An-Penta is compatible with the AB (board antenna), AE (External Antenna), ABE (Ethernet)!
However the design is also compatible with generic Wemos D1 Mini32 boards if you’d rather use those. In theory all board features will work with those (except Ethernet) but they are not the boards that I use for my own testing and validation and also not available with External Antenna or an Ethernet connection.
Don’t forget to get the 2x 18pins (2×9 pin rows) female headers the ESP32 sockets into!
![]()
Optional OLED screen
The board has a 7 pin 2.54mm female pin header on the board configured to accept a SPI connected SSD1306 0.96″ 128×64 OLED screen. This screen can be used to display various information from IP address to board temperature or individual channel dimming levels.
When the OLED screen is not in use dupont wires can be used on these female header pins giving you more GPIO pins to connect additional sensors beyond what is available on the screw terminals.
*OLED screen not usable together with Ethernet option!
**I2C version will not work!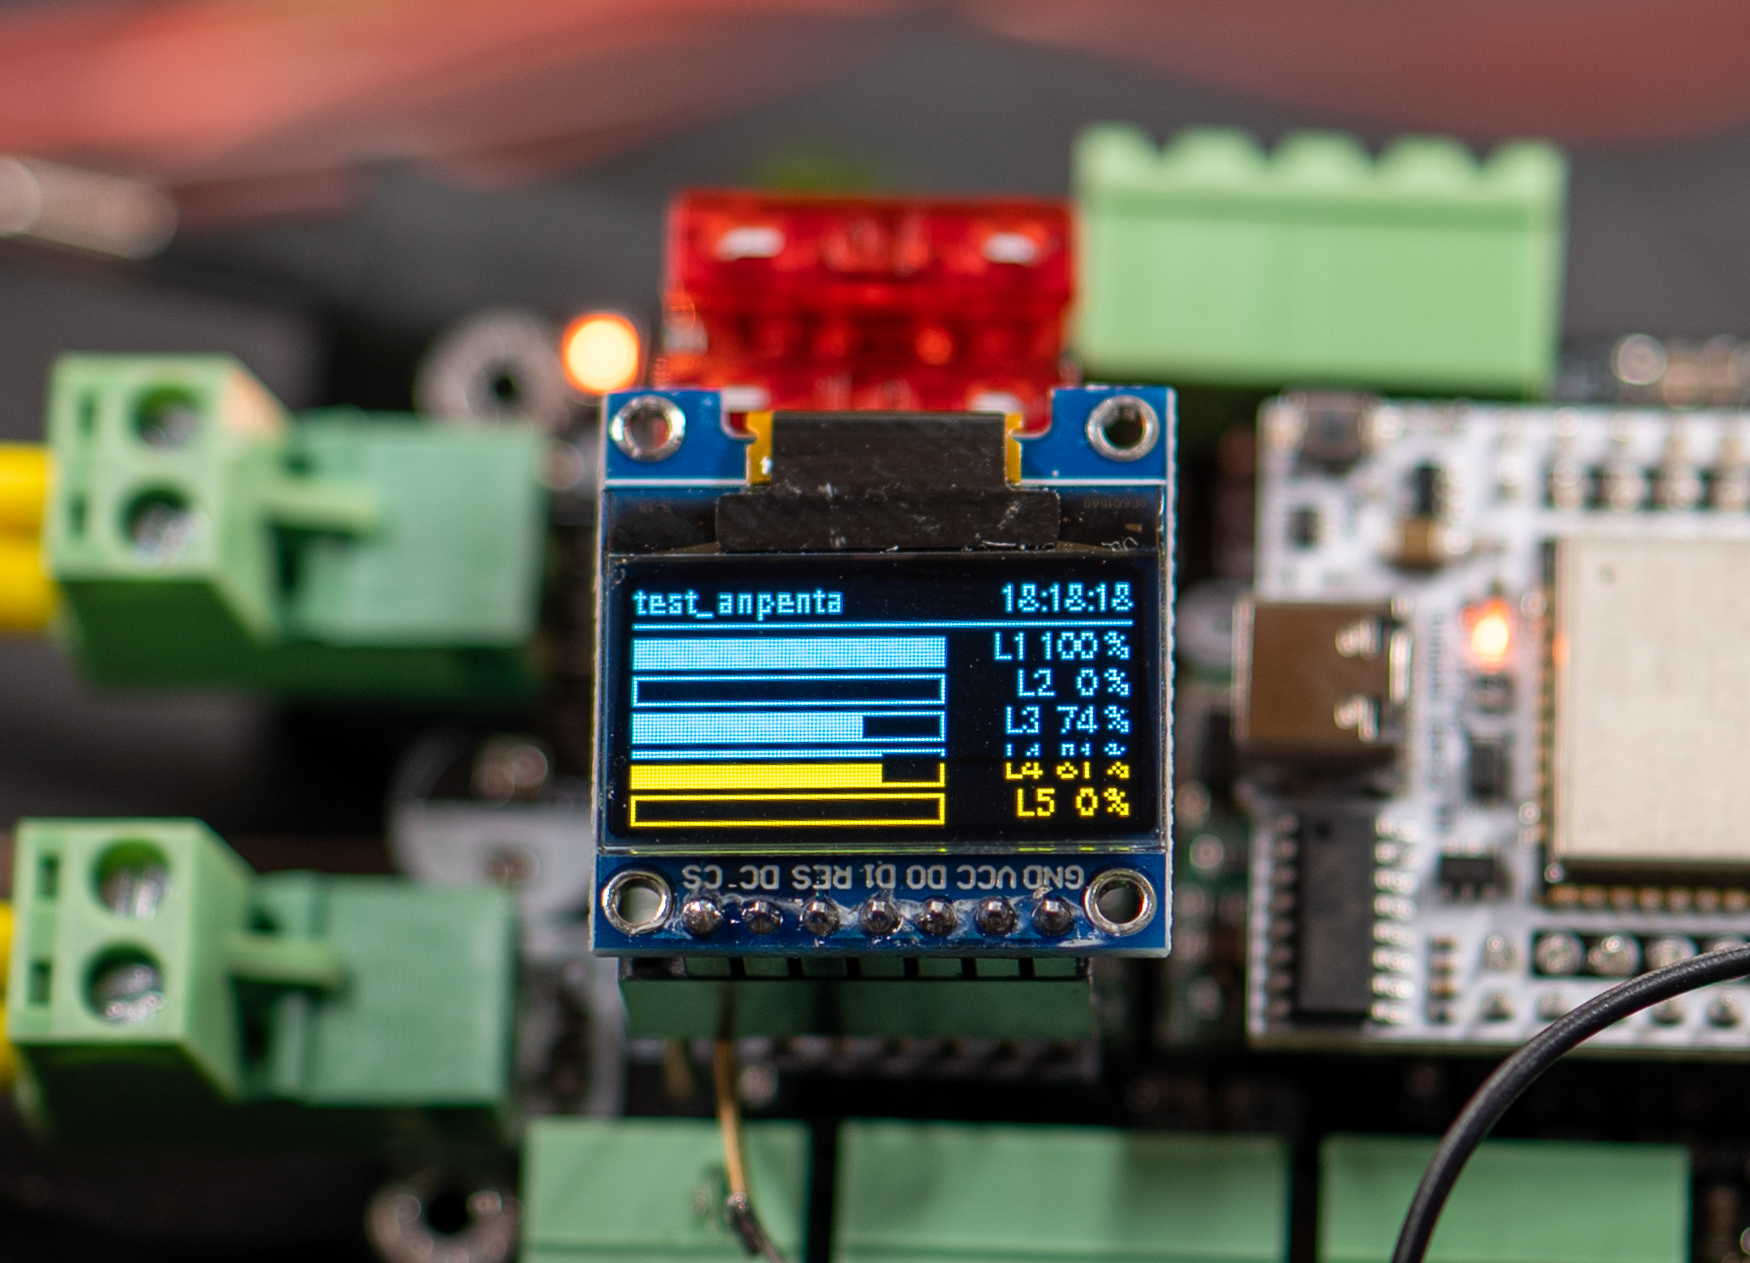
![]()
Much more MOSFET options
The circuit on the board uses MOSFET drivers which run at ~10.5v to 12v (10.5v with 12v in and 12v with 24v in) to the MOSFET gate providing high VGS compatibility and also a quick gate charge. What this means is that a lot more MOSFET can be used! I have personally tested 8447L, LR3636, LR2905Z, LG045R055, LNG06R079 and from my tests these all seem to perform fine and output voltage at 100% output and basically function equally well. These are still all low gate voltage MOSFETs but in theory MOSFETs that require a higher gate threshold should not be a problem!
Here is a list of MOSFETs available at LCSC which should work (not all tested personally):
- YJD60N04A (40v max, Highly Efficient and high power, good if you want to run up to 10Amps on a single channel)
- WSF60100 (60v max, Highly Efficient and high power, good if you want to run up to 10Amps on a single channel)
- DMTH6004SK3-13 (60v max, Ultra Efficient and high power, great if you want to run up to 10Amps on a single channel)
SMD Power LED and Resistor
There is a single power LED which you can solder to the board, I like using an Orange one but you can choose any color you’d like. There is a small dot on the PCB noting which side is connected to GND.
Then there is a single 0805 resistor “R1” which will determine how bright the power LED will shine. The LED is connected to 5v through the resistor. The default 4K resistor will make the LED not shine too bright but still clearly visible. Using a 3K resistor instead will make it brighter or changing it to a 4.7K will make it less bright so choose the value you want!
Terminals
The board has specifically been designed with pluggable phoenix style connectors in mind both in the 5.08mm and 3.81mm variant. I did try to at least incorporate the possibility of using normal type screw terminals on the board so in theory there is clearance for those too. If you do decide to get other terminals then suggested, please make sure they can handle all specified loads!
Optional Large Capacitor and SS36 diodes
Inductive loads
The QuinLED-An-Penta has one spot for a “big” capacitor near the input terminals and 5 spots for SS36 diodes on the back of the board. For generic use (dimming LED strips) these are not required!
However if you are planning on running some form of inductive loads through the board (fans, etc.) it is recommended to fit the big capacitor and the SS36 diodes on the back. These will provide a path for excess inductive voltage being generated using such device to flow back to. For this use case also pay attention which output channel is linked to which fuse to make sure the power has an optimal flow back path. For driving LEDs this is again not important.
PWM noise
Sometimes (if PWM frequency is too low) PWM noise can be heard, adding the large capacitor and SS36 diodes can sometimes reduce this noise, especially if it’s coming from the power supply.
PCB Fuse holder
The specific PCB fuse holders are not available on LCSC and can generally best be bought on Aliexpress. They are however an official type also available from Mouser or Digikey for instance.

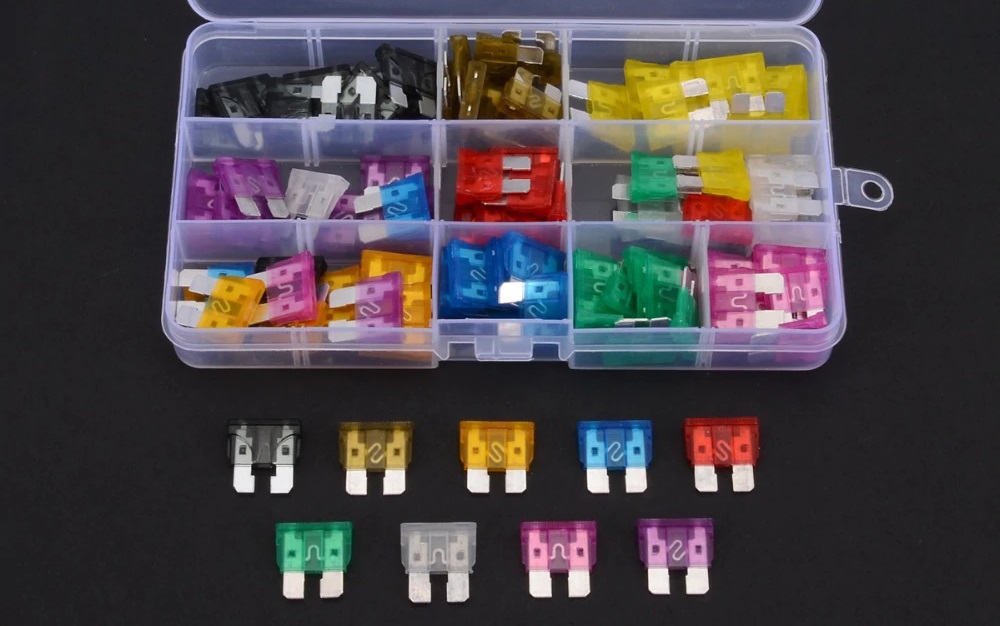
Fuses!
The board has 2 fuse holders for a ATO style (car) fuse each, since these are generic fuses used in cars worldwide so should be plentily available everywhere! You will need to have these fuses present to see any output on the LED channels! It’s recommend to size the fuses in regards to expected amount of current that’s going to be used by your LED strips but to at least make sure the value of the fuse is below the current carrying capability of your connected wires!
LED strips on the 5 channels can easily be divided over the 2 fuses on the board and you are free to do so based on load (for example). There is one exception and that is when using an inductive load, then it’s better to use the fuse channel indicated next to the LED channel on the board!
![]() 1x ATO standard size fuse assortment kit
1x ATO standard size fuse assortment kit
Get some LED strip and check out additional hardware components, tools and equipment
Hopefully the above tips help you get the right hardware to build your own QuinLED-An-Penta board!
If you don’t already own the tools to build this board (at least a soldering heat gun, preferably a hotplate, soldering paste, etc.) but also additional things like wire, wire ferrules, connector blocks and more of those things scroll through this article to see what you might also need so you don’t get frustrated if you don’t have it while building!
Looking to buy Analog RGB LED strip or especially when buying white LED strips, give those articles a read!
And to power it all, check out this article about power supplies!
[Another image of the board installed and wired]