
The ultimate LED strip power injection guide
One of the most popular topics with addressable LED strip is power injection (or sometimes also wrongly referred to as voltage injection). This is the practice of running extra wires next to your LED strip to add extra power injection points. Especially with 5v strip this quickly becomes very important to have a correctly functioning installation.
Mainly for addressable LED strip/pixels but can also be applied to Analog LED strip
This guide will focus primarily on addressable LED strips (of various voltages) but the same principle applies to addressable LED pixels and even Analog (PWM) LED strip although there of course you don’t have a data channel to take into account and since they generally already run at 24v it is much less of an issue generally. Still, the same principles apply!
Video Guide
The main part of this guide is in the following video. Don’t get scared off because it’s a little bit longer then an hour, it goes through everything you want to know and actually teaches you how to calculate your own setup. Even if you have no clue right now, by following along with one of the 3 examples and filling in your numbers in the text file I’m pretty sure you’ll be able to figure it out!
The calculation rules!
- All power values are taken from the Real-World Power sheet
- We’re going to calculate with a nominal current (RGB White 50%) (*some exceptions will be shown!)
- An edge injection can deliver a max of 4Amps into an LED strip and a middle injection about 8Amps
- A power injection wire should not have more then 10% voltage drop for the current we are calculating with
Come to the Discord server!
If however you still can’t or would like to have your work verified, come to the Discord server! Although we won’t design your LED setup for you, if you have the numbers calculated like in the video and maybe a little schematic, we’ll happily help you verify that and give you some tips where we can!
Text file
You can find the text file used during the video (with some small updates and corrections) over here. Please use it to create similar calculations for your own setup!
Links used in the video:
The Old Power Injection Article is right here! This article you are reading has replaced it. 🙂
Mentioned and shown in the video:
- Real-world power sheet
- How much can a single injection point handle?
- What size fork/ring crimps do I need for QuinLED-Dig or Meanwell PSU?
- What is the max amount of Addressable LEDs per controller?
- The Myth of the LED Data Resistor or Data Signal Cable Conditioning!
Extra:
Helpful websites
Controller boards:
Shopping links:
Schematic drawings
Below are the schematic drawings that I have shown in the video. I can help you figure out how to wire your LED setup correctly and this way you can study them without them disappearing after a few seconds again.
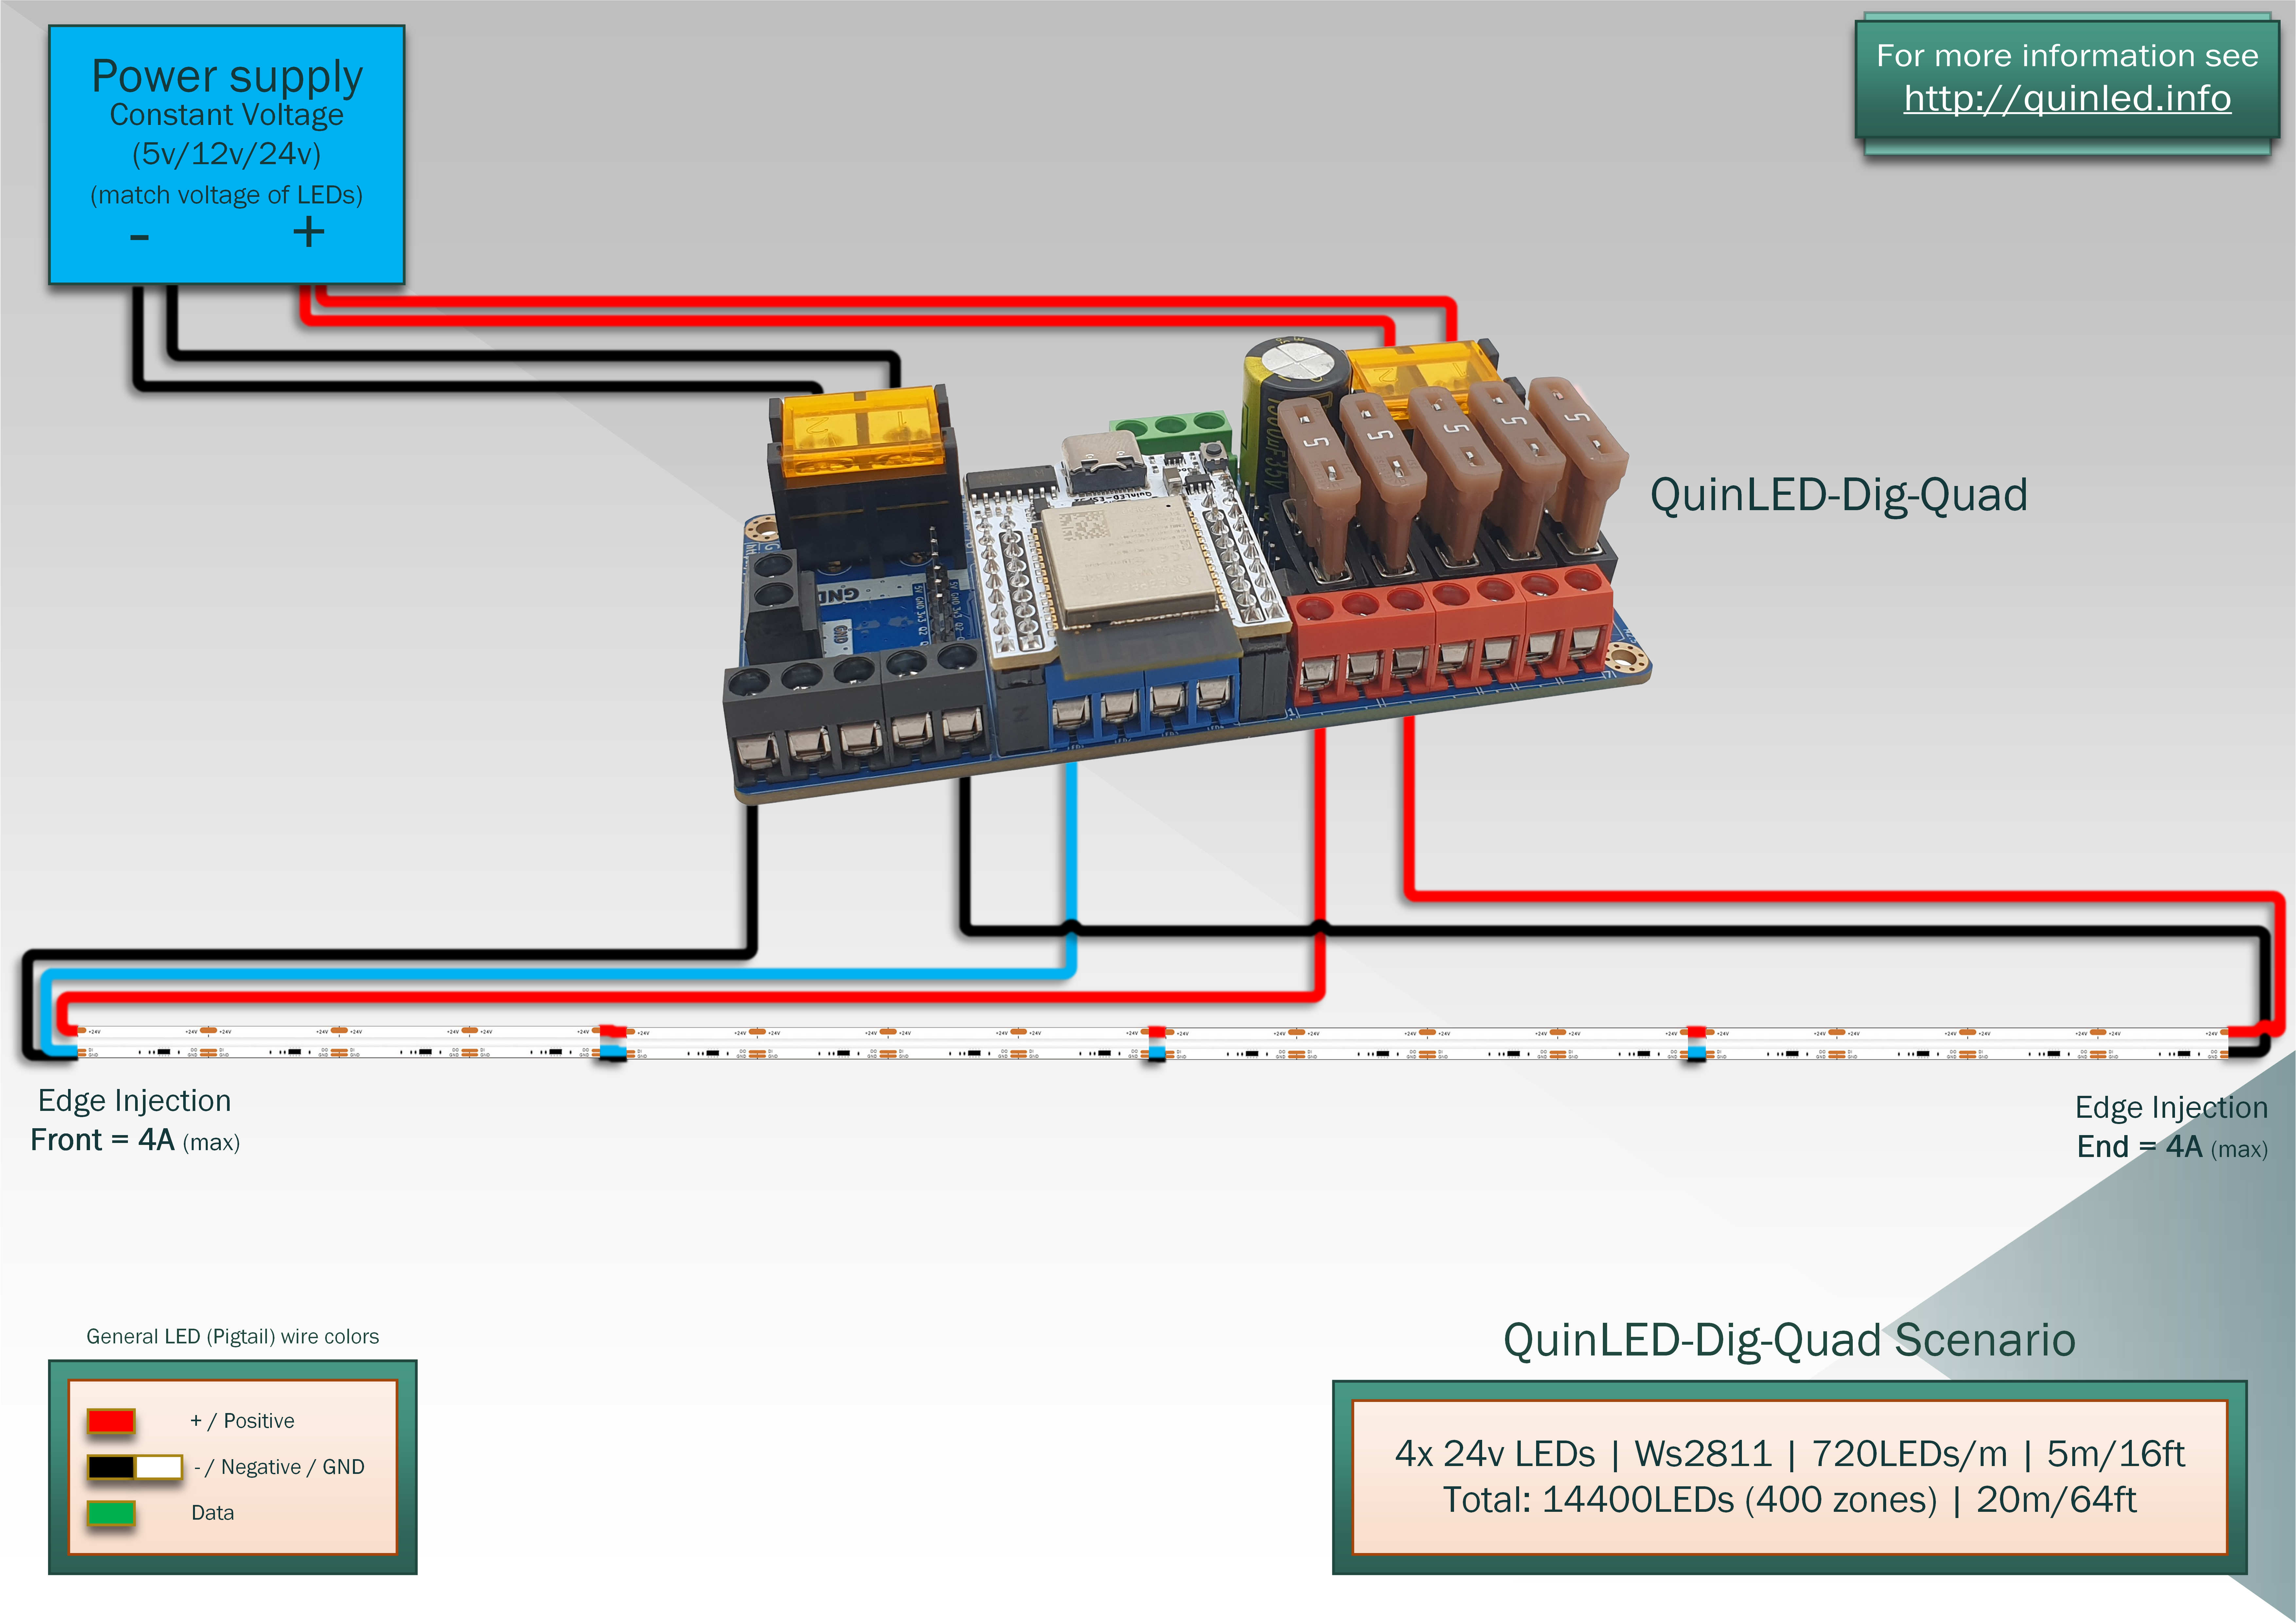
For the below schematics a QuinLED-Dig-Quad was used since it has built-in power distribution and fusing making that task a whole lot easier. For all scenarios a QuinLED-Dig-Octa system can also be used! Although the QuinLED-Dig-Uno and QuinLED-dig2go are great controllers on their own, they are a bit less suited for these “20m” install scenarios and are better for shorter installations.
Illustrating 2x edge injection
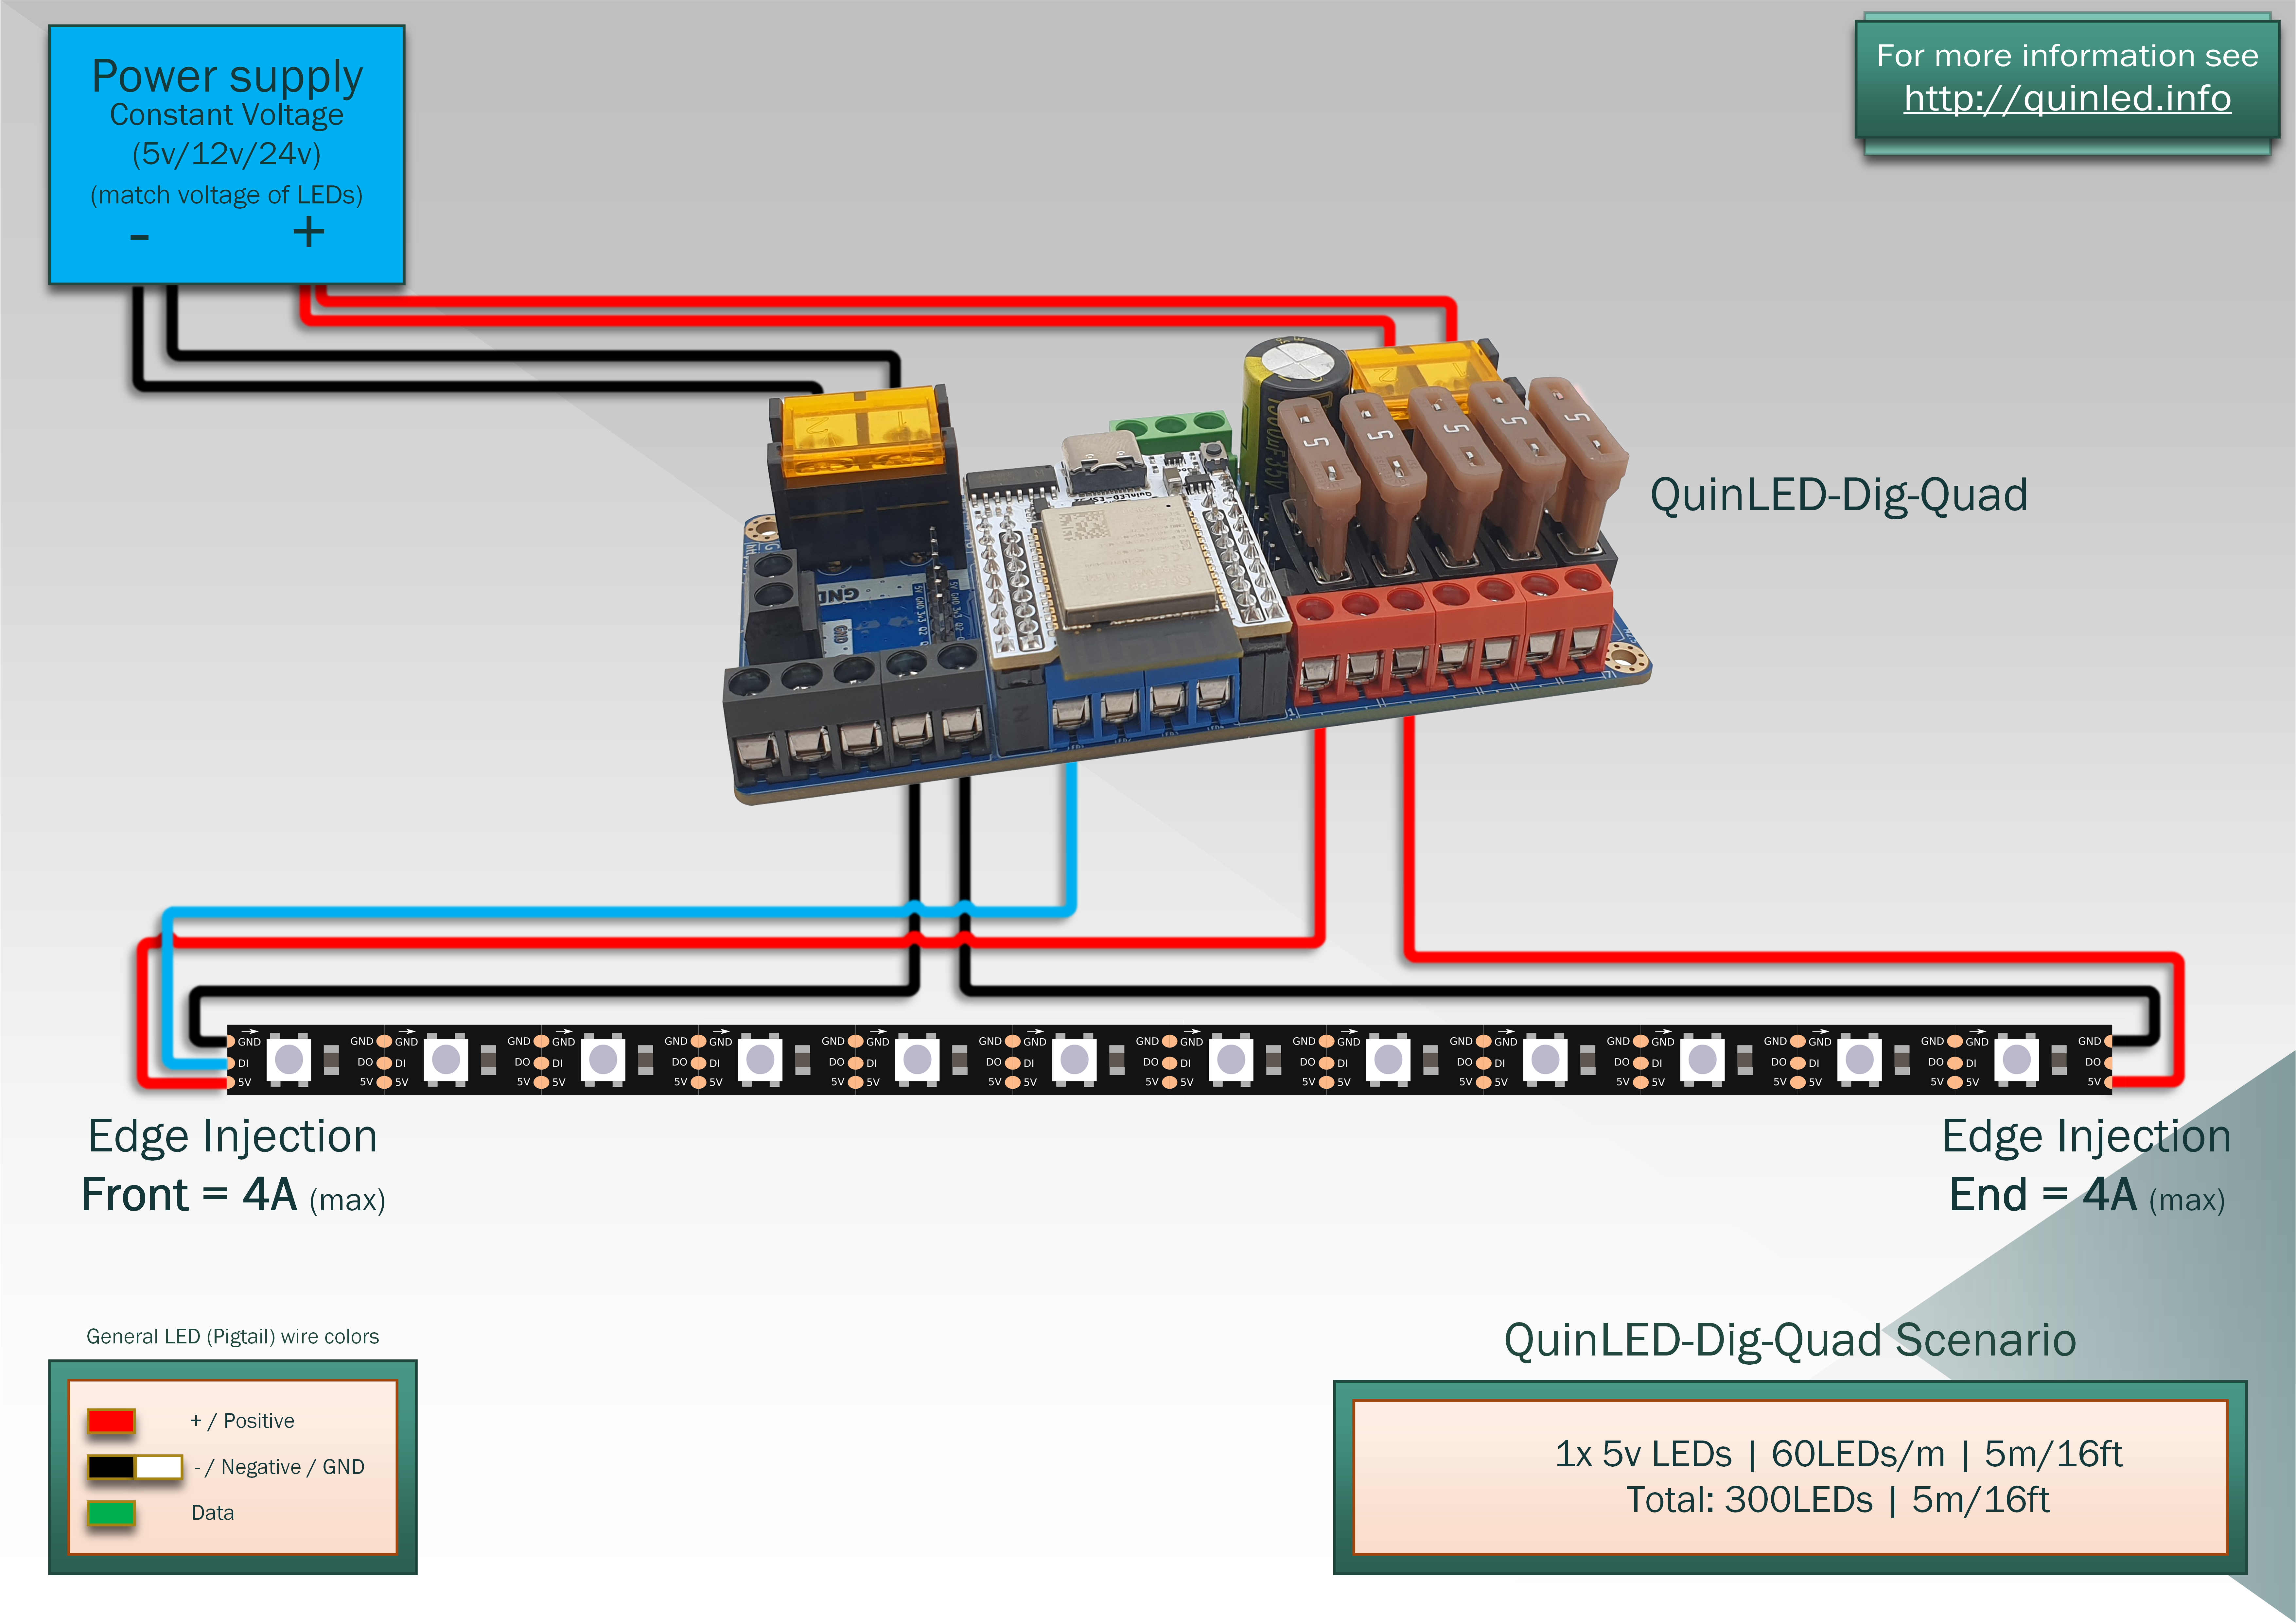 Total power available to the strip = 4A + 4A = 8A
Illustrating 2x edge + 1x middle injection
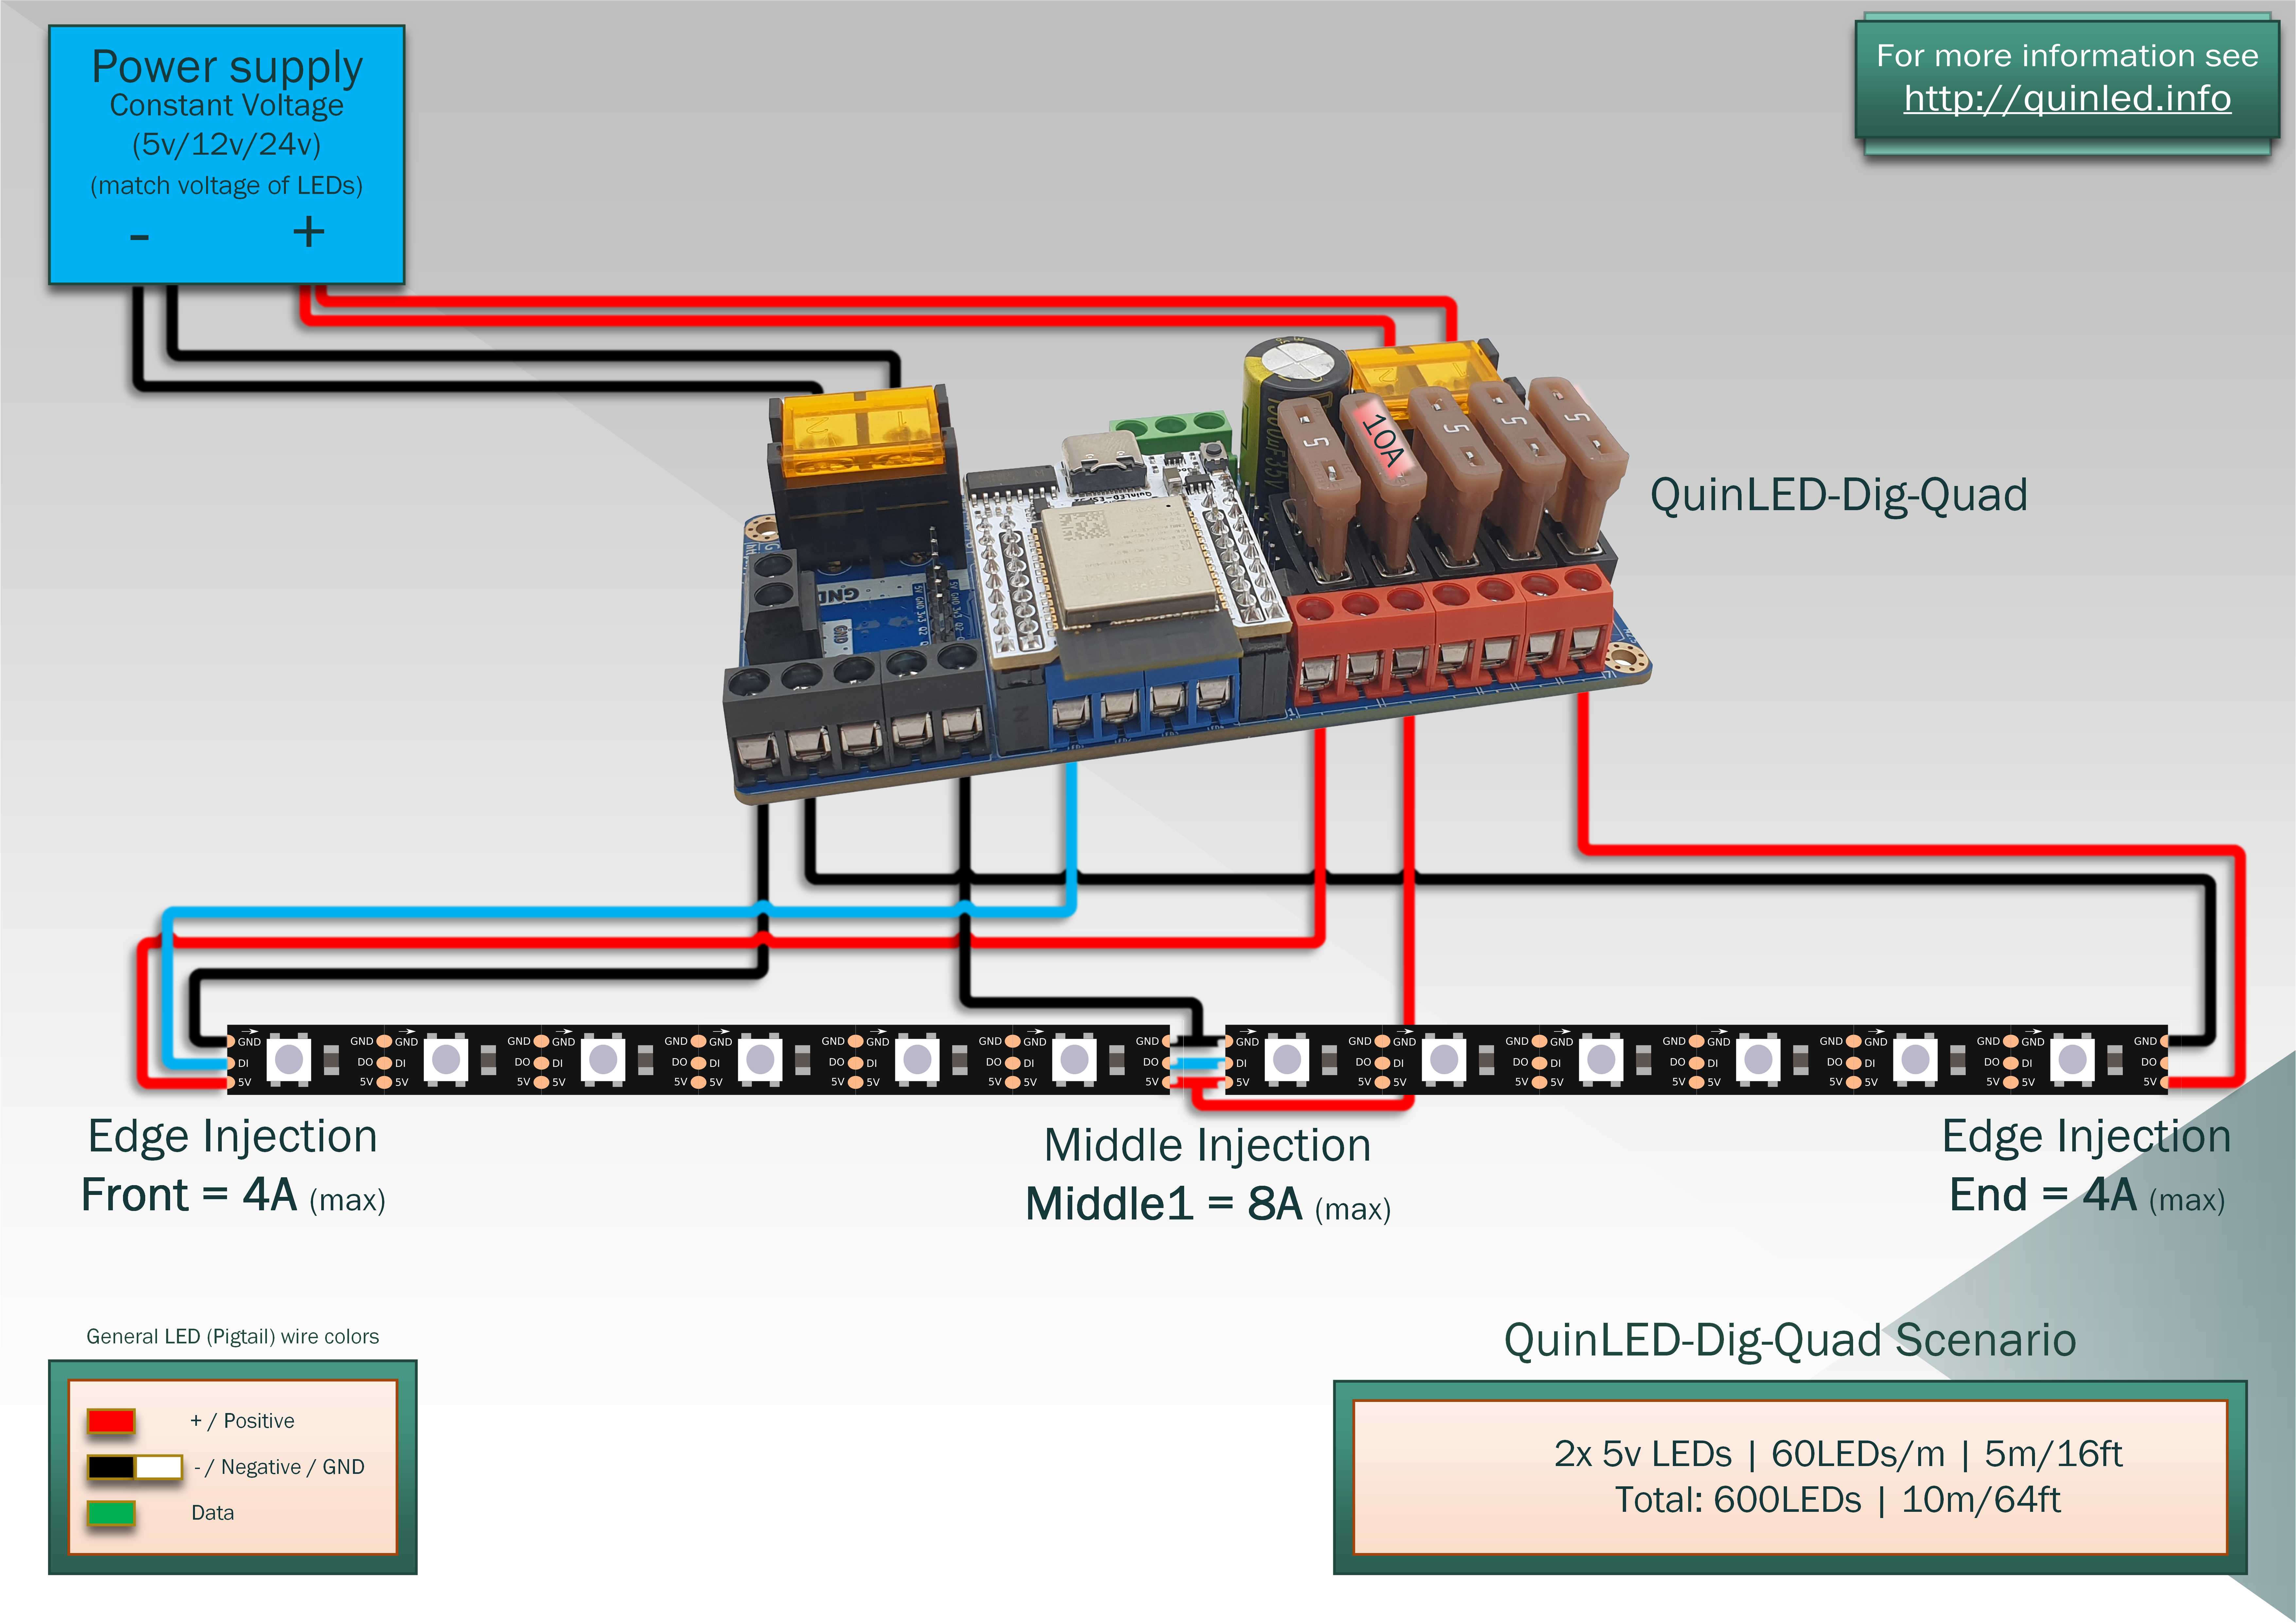 Total power available to the strip = 4A + 8A + 4A = 16A (16A x 5v = 80w)
5v 20m scenario, lots of injections along the strip!
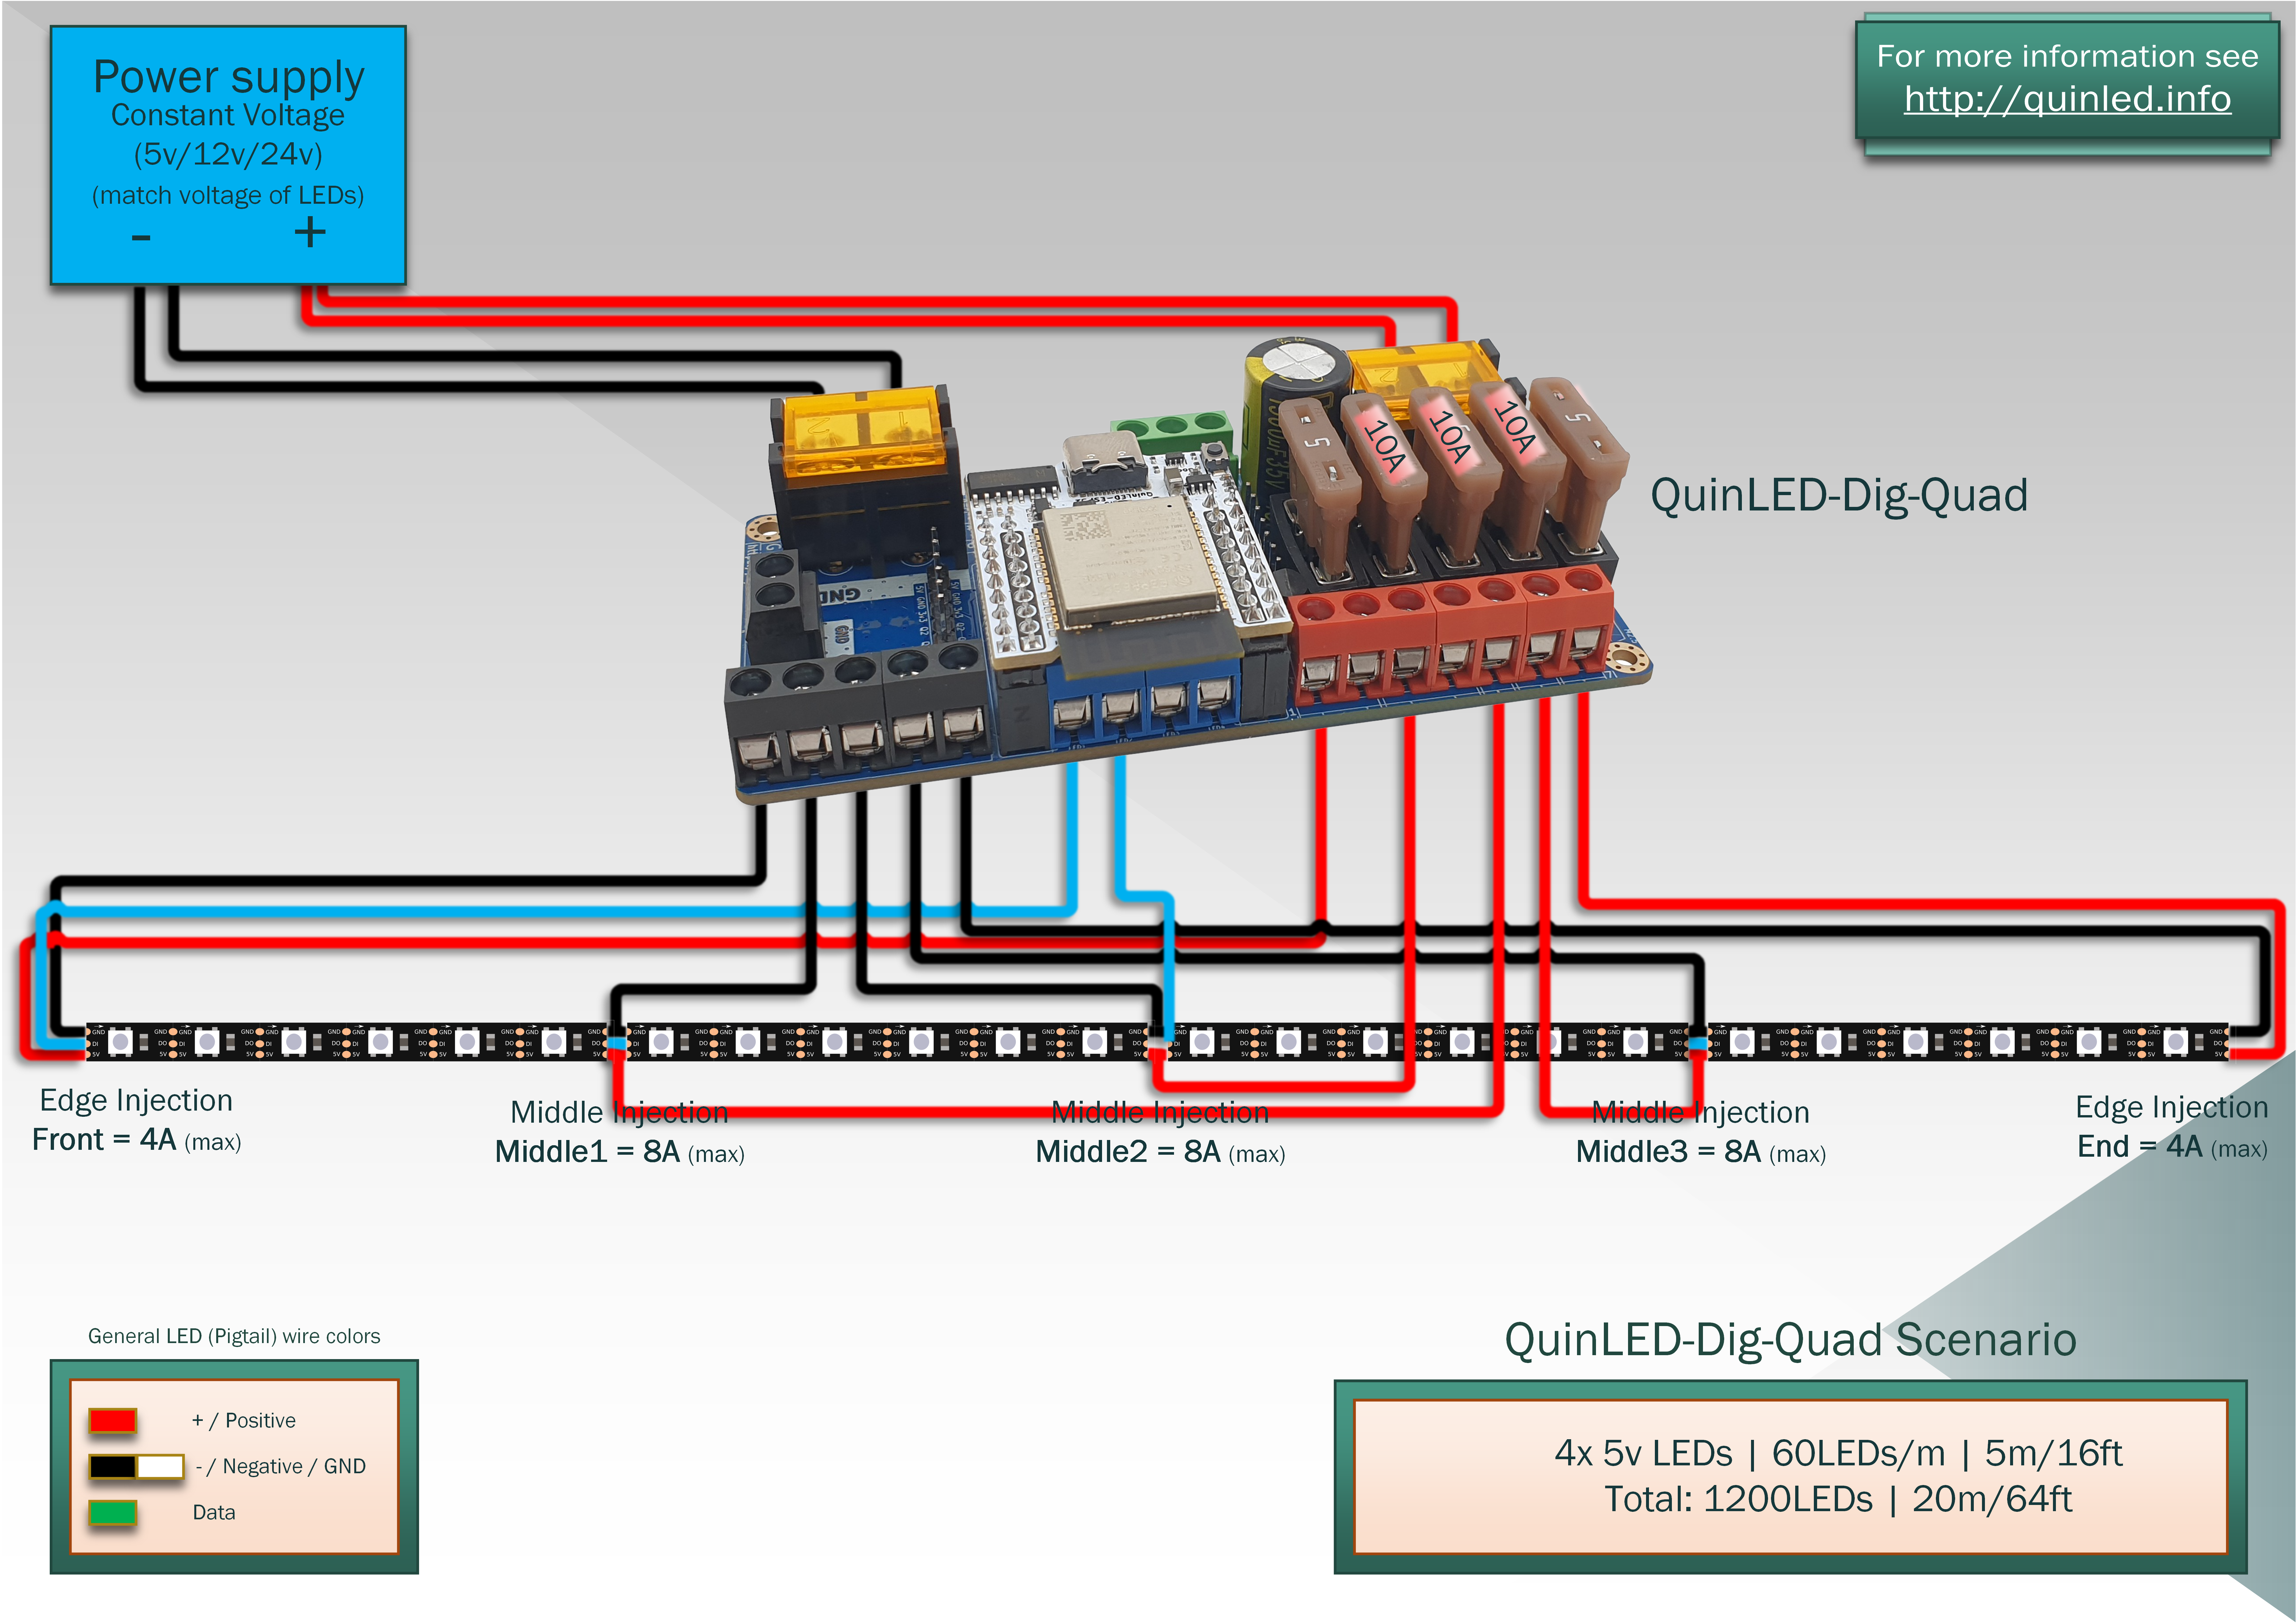 Total power available to the strip = 4A + 8A + 8A + 8A + 4A = 32Amps
12v 20m scenario can do with a lot less
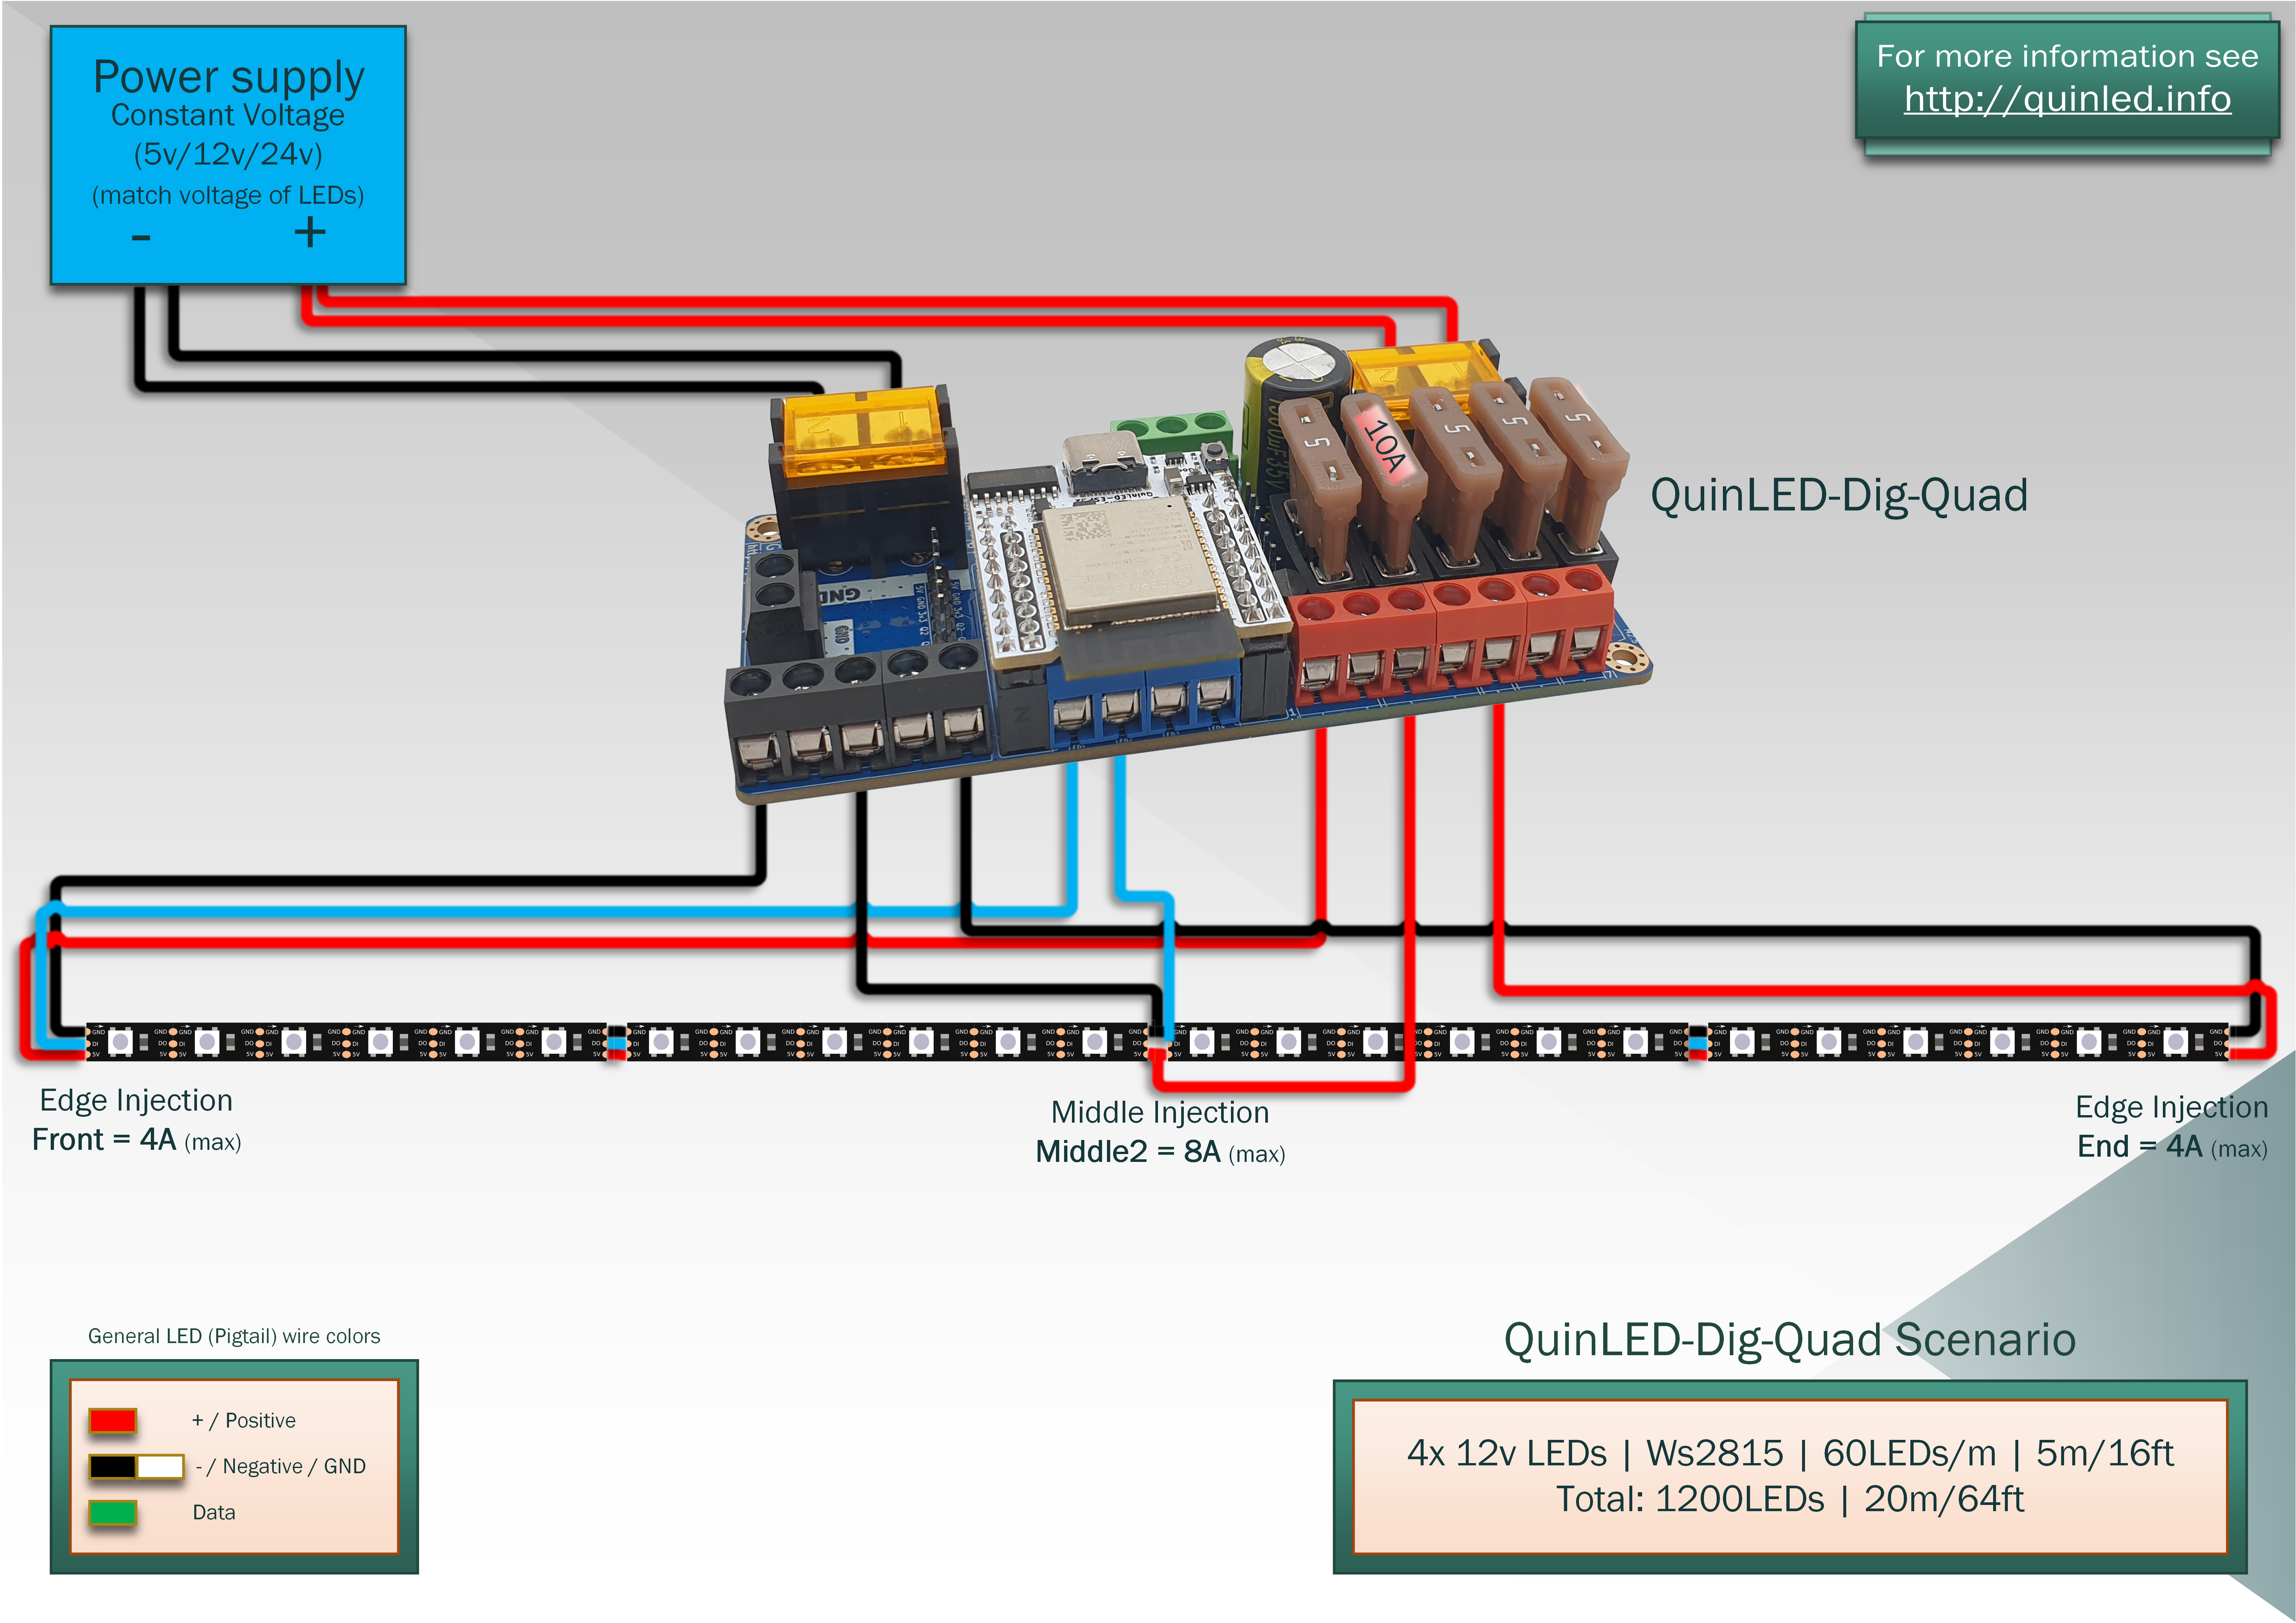 Total power available to the strip = 4A + 8A + 4A = 16A (16A x 12v = 192w)
24v 20m scenario in cheat mode is easiest!
 Total power available to the strip = 4A + 4A = 8A (8A x 24v = 192w)
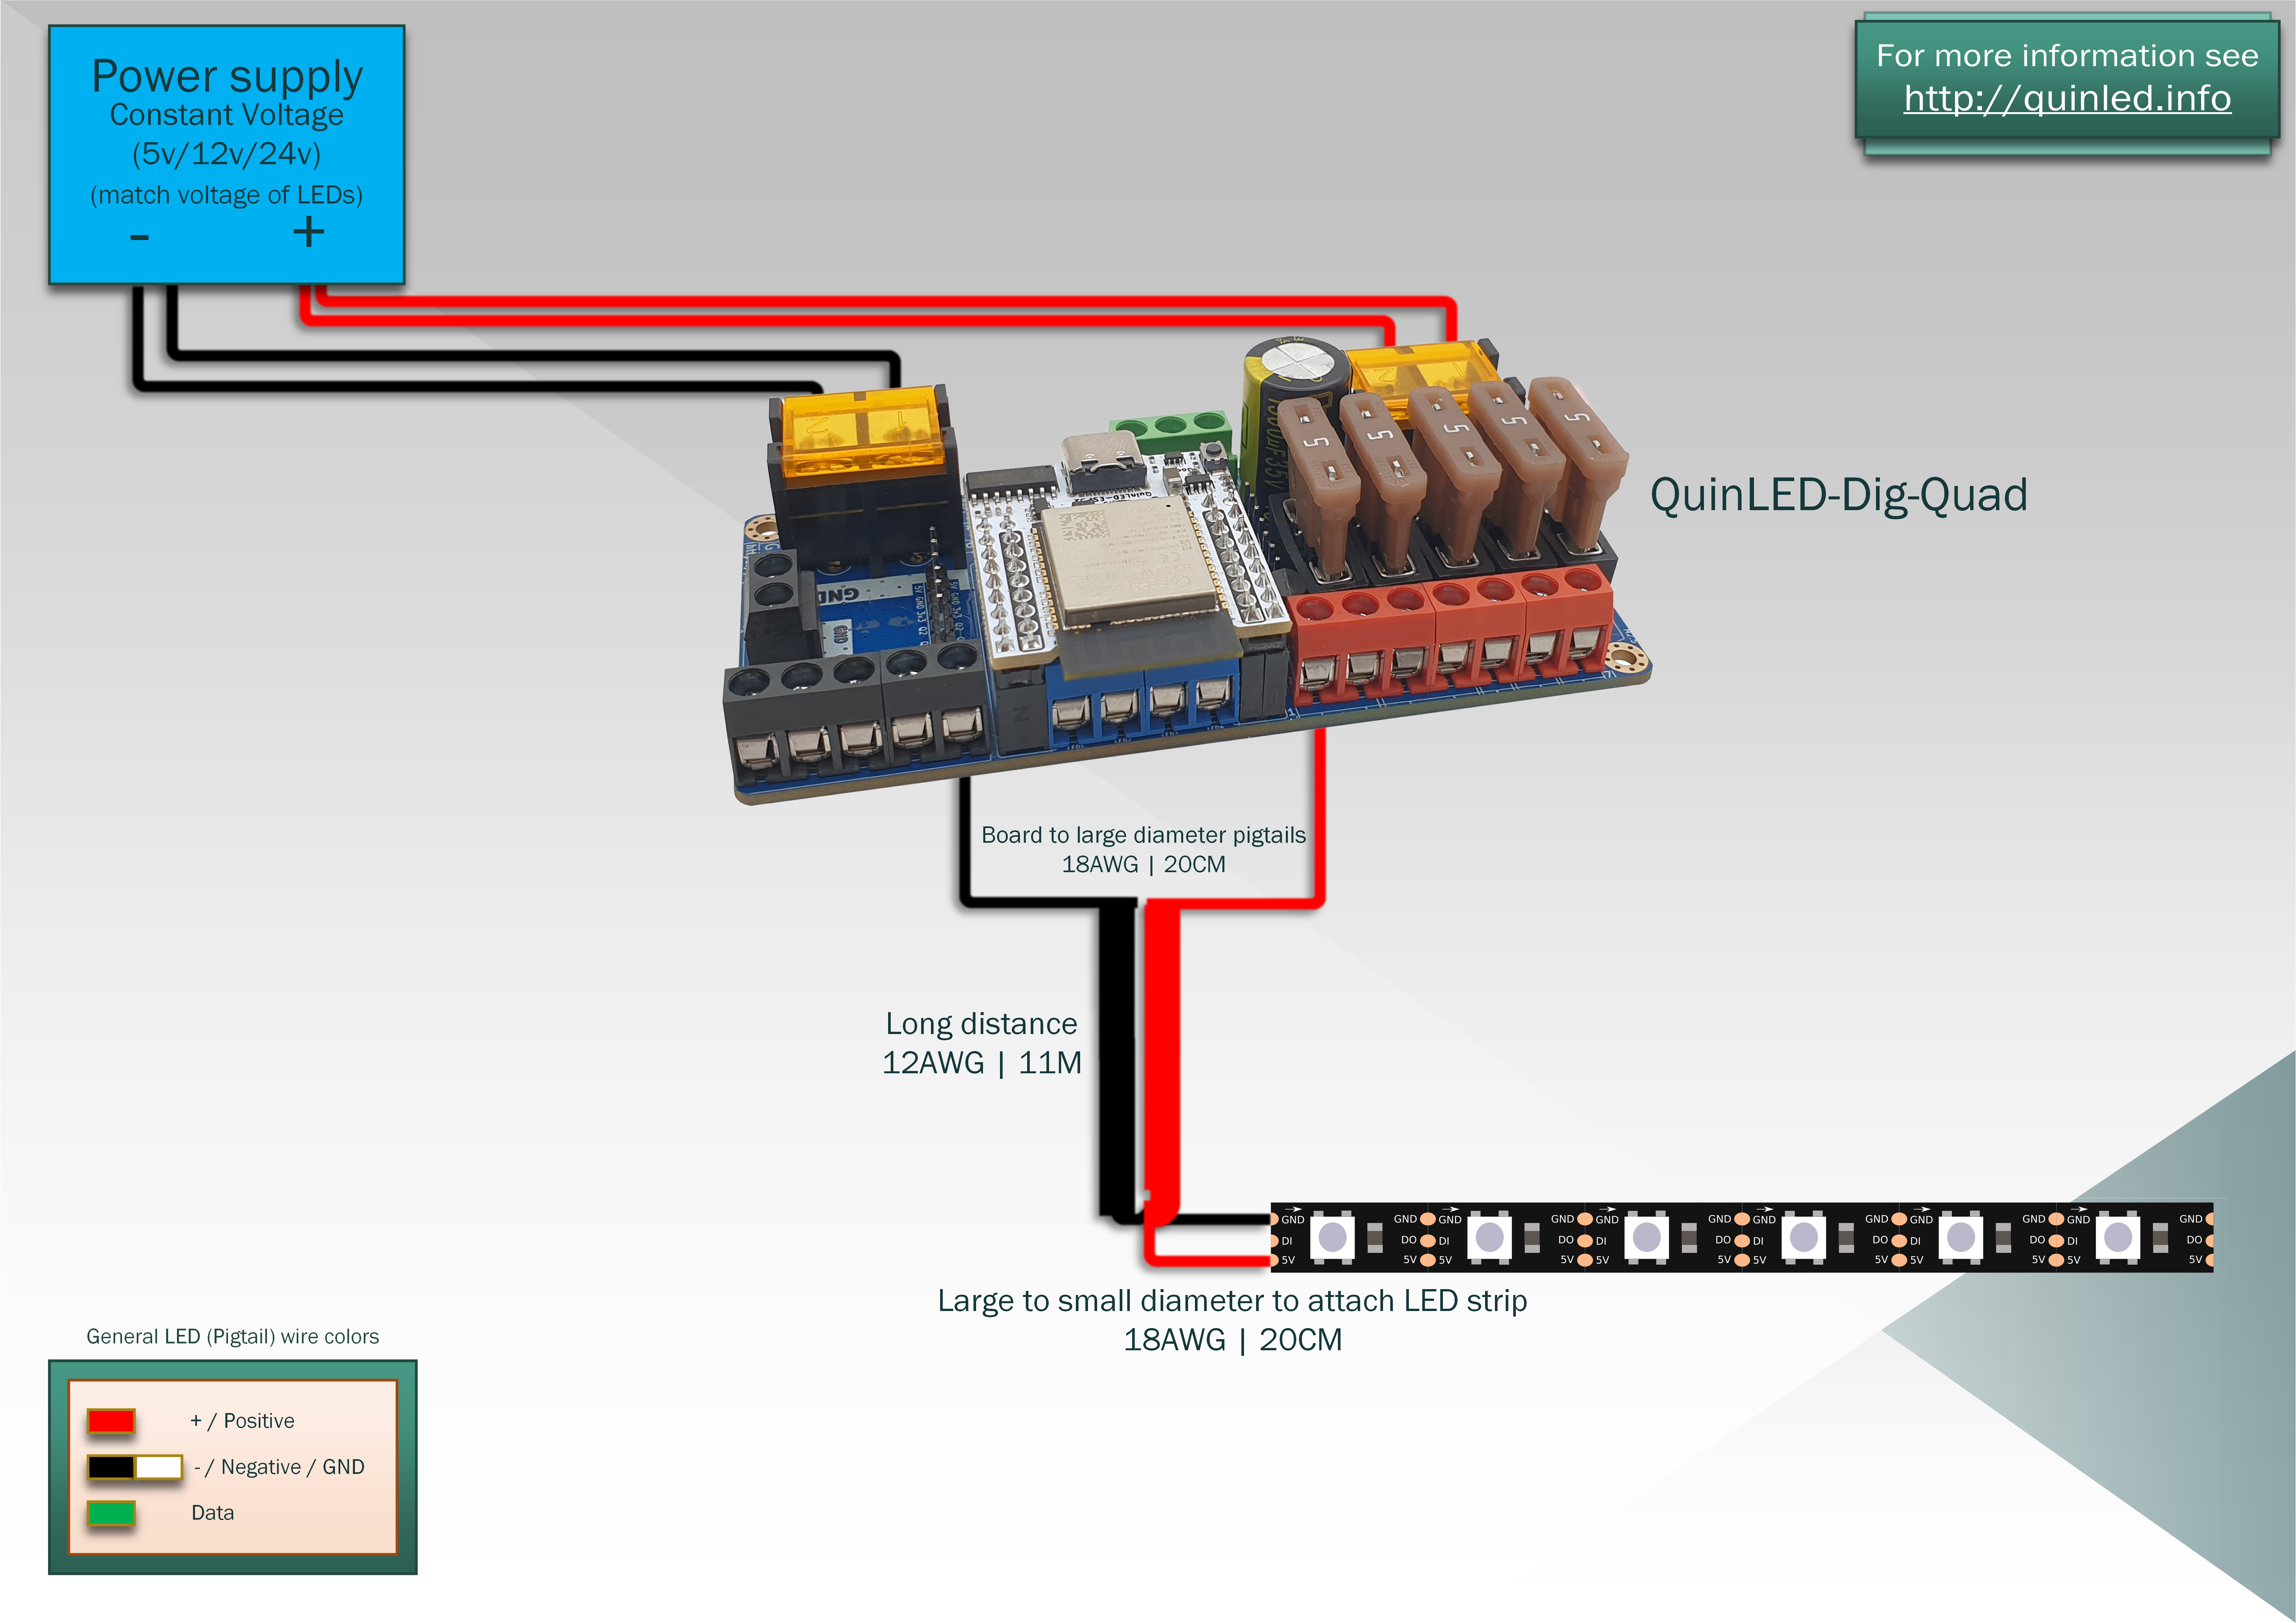
Long Distance large diameter cable with 2 sides pigtails to connect
End conclusion
Hopefully this helps you design your own LED setup correctly. No overkill in regards to 100% white, no bullshit “60mA” per LED value like you see online often (please please let this go to the Internet graveyard already) but actual data and then that data used to calculate real-world scenarios.
I know a lot of videos and other places will tell you “oh you can just use 20AWG for everything” or “I run mine through CAT5e cable, it’s cheap”! That might be so, and I don’t doubt it’s working for them, physics doesn’t lie either. Most often if you start asking questions these same people will tell you “oh, I run power limited to 3Amps” or “I don’t ever set it beyond 20% brightness”. And while that is fine, they should really lead with that and make it clear.
The numbers are the numbers and especially for 5v LEDs this quickly becomes problematic (and expensive). Luckily we have lots of other options! Like using 24v PSU and on the power distribution wires and then using local buck-converters from 24v -> 5v! This will save you a lot on your wiring in money but also certainly in hassle!
Next to that new 12v and 24v variants such as the recent “Addressable Neon” are starting to appear and those can also be a great choice in many situations.
Good luck calculating!
Why shouldn’t we call it voltage injection?
Basically the reason that the voltage is dropping is because of the resistance on the copper, this builds up with the amount of current you are trying to push through. The harder you push, the lower the voltage will drop as a result. So to alleviate this we are actually current injecting at different points of the strip to prevent this effect from happening and this keeps the voltage at the point where we need it. I believe because of that “power injection” is the right term to use!