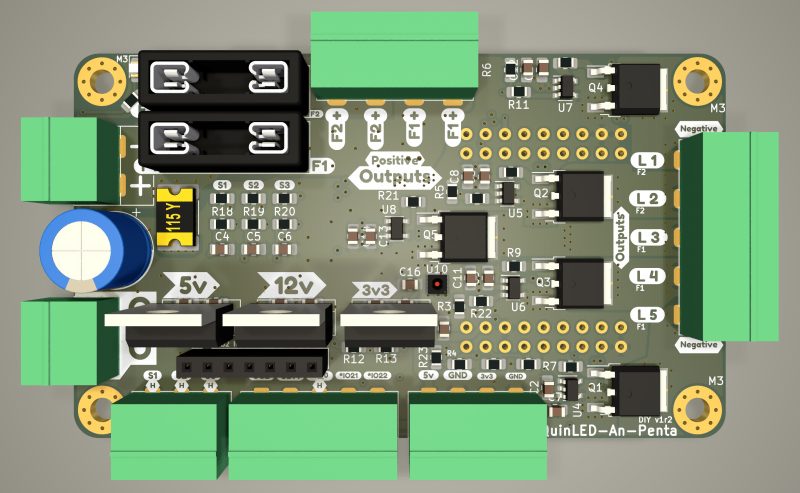
QuinLED-An-Penta DIY Soldering Guide
Back to QuinLED-An-Penta-DIY index page
If you’ve got all your components ready to build your own QuinLED-An-Penta boards and have the right tools, you’ve come to the right place! As normal I have a soldering guide video down below which guides you through building the board, but since this is much more Advanced DIY we’re also using a new method to build it!
Interactive BOM method
This new method is using something called the Interactive BOM plugin which is available for Kicad and can also be seen within the video since I use it myself all the time while building (prototype) boards! It gives you a great overview of all components that need to be placed and shows you the exact values and where on the board they go and even includes some little tick boxes which you can tick once you’ve placed the components and the overview clearly shows which components have been placed and which still need to be placed, it’s really excellent!
Click here for the Interactive BOM page for the QuinLED-An-Penta DIY
Building phases
As can be seen in the videos building the boards consists of 2 phases:
Phase 1: SMD Components
- Paste board with Stencil
- Place all SMD components
- Reflow components using hot air or preferably hot plate
- Check if all reflowed correctly
- Optional: Back side diodes
Phase 2: Through-Hole Components
Through-hole you generally start with the least high components and go taller and taller, there are a lot of hints in the videos but generally this means:
- Fuse Holders
- Male 2.54mm headers + Female headers
- Hint: Solder on the DC-DC converters before you solder on the female header for the OLED screen!
- 3.81mm terminals
- 5.08mm terminals
- Optional: Large Capacitor
![]()
No dedicated soldering video is currently available but I do go through the whole build process in this livestream, have a look to make sure you are willing to “take on the challenge”!

