
Introducing Ethernet boards
To buy the QuinLED-ESP32, please go here
Ethernet combined with certain Home Automation and LED projects can be a worthwhile upgrade over using WiFi. WiFi isn’t as always as usable as you’d like. Maybe you have a crappy provider router or live in a very WiFi congested area. Another possible reason is that you want to run real-time LED shows, streaming a large amount of pixel data using E1.31 or Artnet which can sometimes overwhelm WiFi, especially if we’re talking multiple boards running at the same time. For these situations, where WiFi is not 99.9% reliable, I’m introducing a custom Eternet ESP32 variant, built on top of my recently introduced QuinLED-ESP32 development board and adding Ethernet to it!
These Ethernet version carry all the upgrades that come with the QuinLED-ESP32 board (Like USB-C!). Since we make everything in house, we’ll also have a much better hand at quality control then currently possible with buying externally made Mini 32 boards.
And the best news, ESPhome and WLED both support Ethernet already and work perfectly, so you can use it with your favorite software out of the box! It doesn’t matter if you are buying a board to go onto one of my QuinLED controllers or are going to use it for your own project, if you are looking for a Ethernet enabled ESP32, this might be the board you’ve been looking for!
Ethernet board can only go on top of QuinLED-ESP32 and always comes bundled with one!
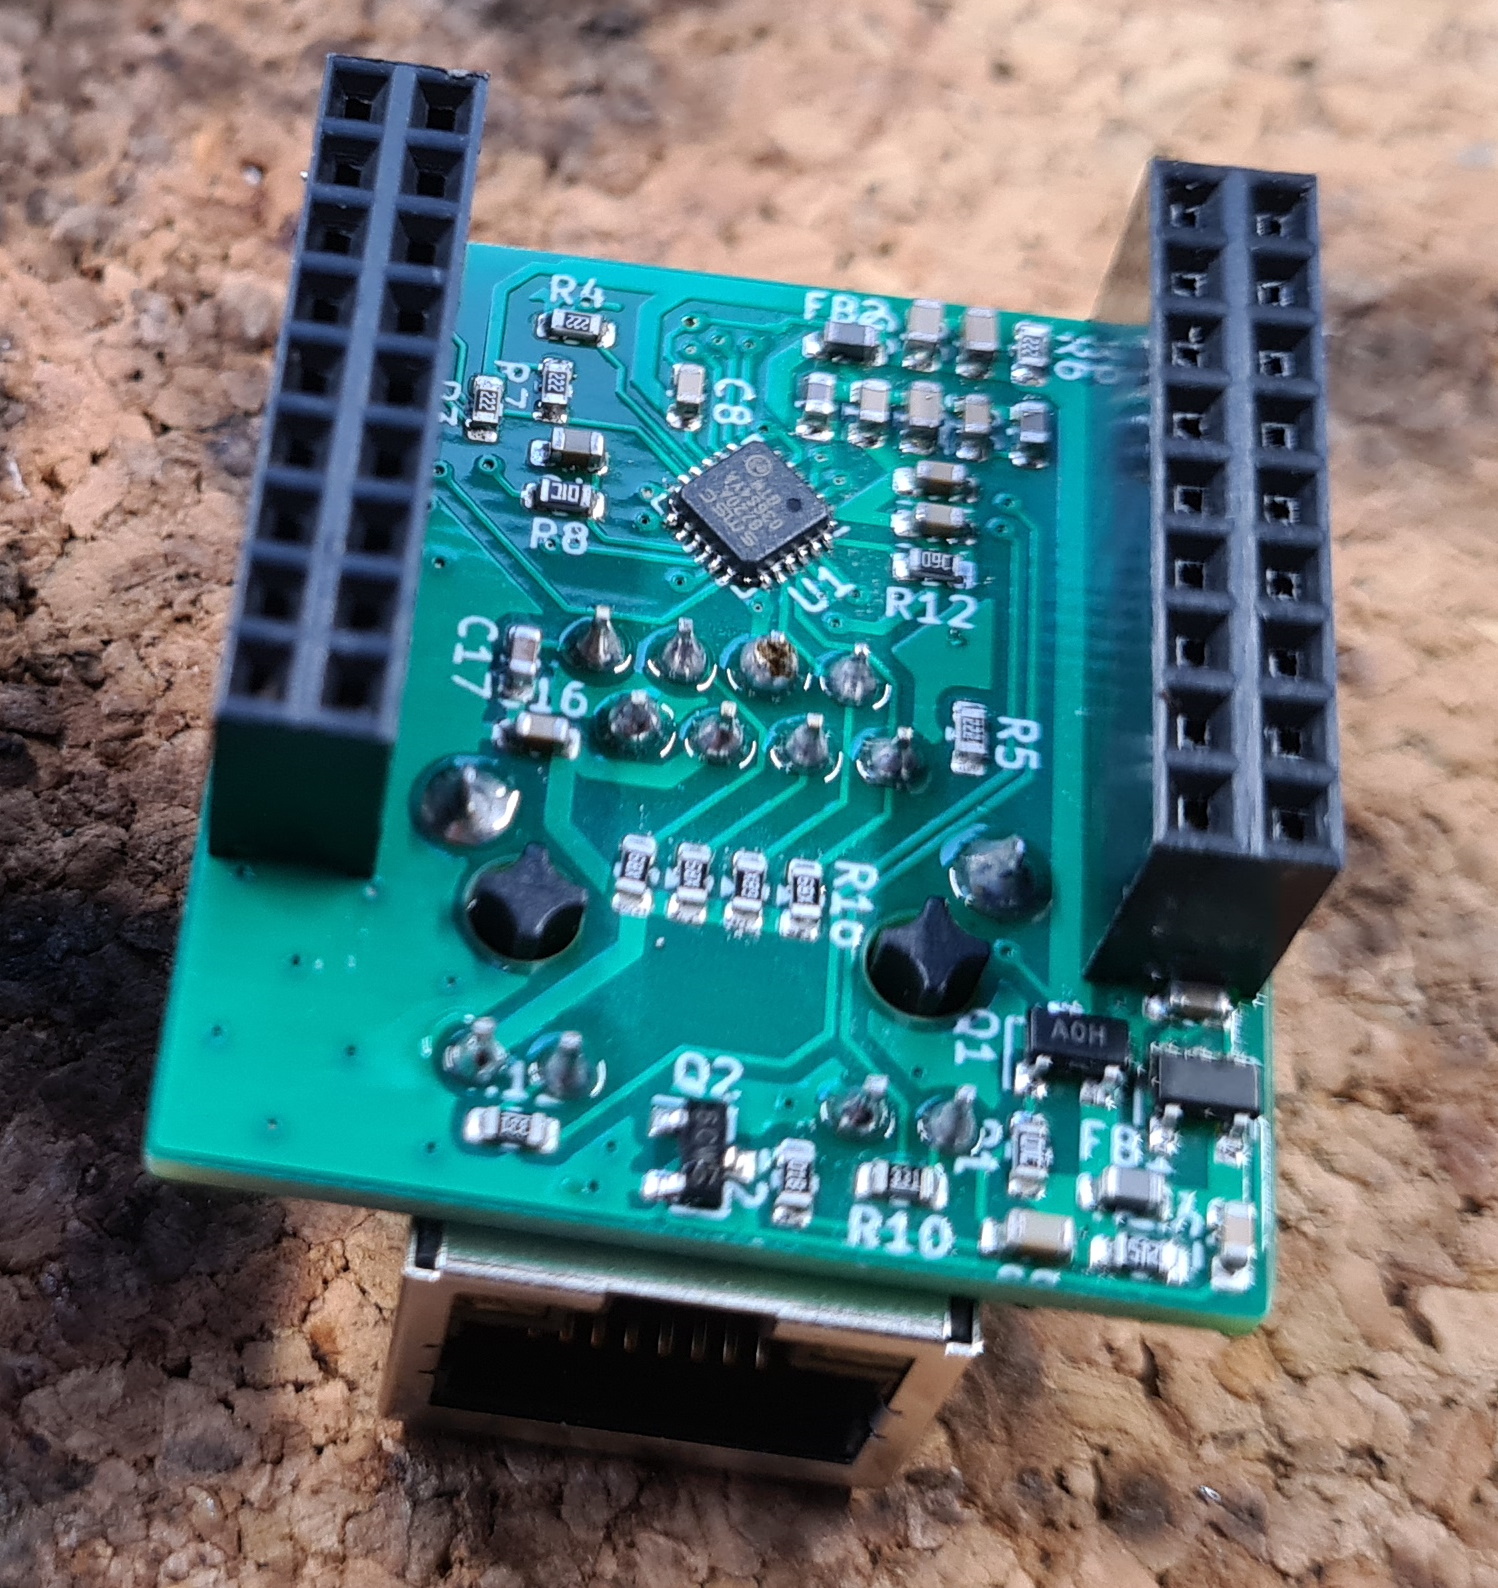
 Pre-production version
Ethernet board features
The Ethernet board will only be sold combined with an the custom QuinLED-ESP32 board and the pins all pre-soldered. Although the Ethernet is an add-on top board, I don’t feel comfortable selling it as a separate upgrade option without an the QuinLED-ESP32 because of the pinout involved and the custom features it uses from the underlying board, you need this exact match to make it all work.
There isn’t too much to write about the features of the board, it carries all the features of the regular QuinLED-ESP32 board but adds a 10/100 Mbit RJ45 Ethernet port on top of it! The board features it’s own 5v -> 3.3v Linear regulator and draws power through the QuinLED-ESP32 onboard PTC fuse. That means that if you power the QuinLED-ESP32 either using the 5vIN pin on the bottom of the board both the ESP32 and the Ethernet board will be provided with power.
Ethernet cable length has been tested up to 50m without issues, I am current assuming the signal will remain fine up to the specified 100m distance with decent CAT5e Ethernet cable.
No it does not have POE support! 😉
Ethernet Pin out and limitations
The LAN8720A Ethernet Transceiver chip is used and interfaces with the ESP32. This is done over 10x GPIO pins of the ESP32 with a tightly optimized layout to work perfectly together with the QuinLED-ESP32 board.
The following pins are used for the integration and cannot be used in your projects:
| ESP32 GPIO | Function |
|---|---|
| GPIO_5 | Power IC Enable trigger (3.3v High for On) |
| GPIO17 | Clock Signal (from ESP32) |
| GPIO18 | Ethernet (PHY_MDIO) |
| GPIO19 | Ethernet (TXD[0]) |
| GPIO21 | Ethernet (TX_EN) |
| GPIO22 | Ethernet (TXD[1]) |
| GPIO23 | Ethernet (PHY_MDC) |
| GPIO25 | Ethernet (RXD[0]) |
| GPIO26 | Ethernet (RXD[1]) |
| GPIO27 | Ethernet (CRS_DV) |
Please make sure to avoid using these pins!
Some other useful information:
- Type is LAN8720A
- Clock is taken from the ESP32 internally and connected over GPIO17
- The onboard regulator is turned off by default, send a High signal over GPIO5 to turn on the board and with it the Ethernet chip
- Physical address of the chip is 0
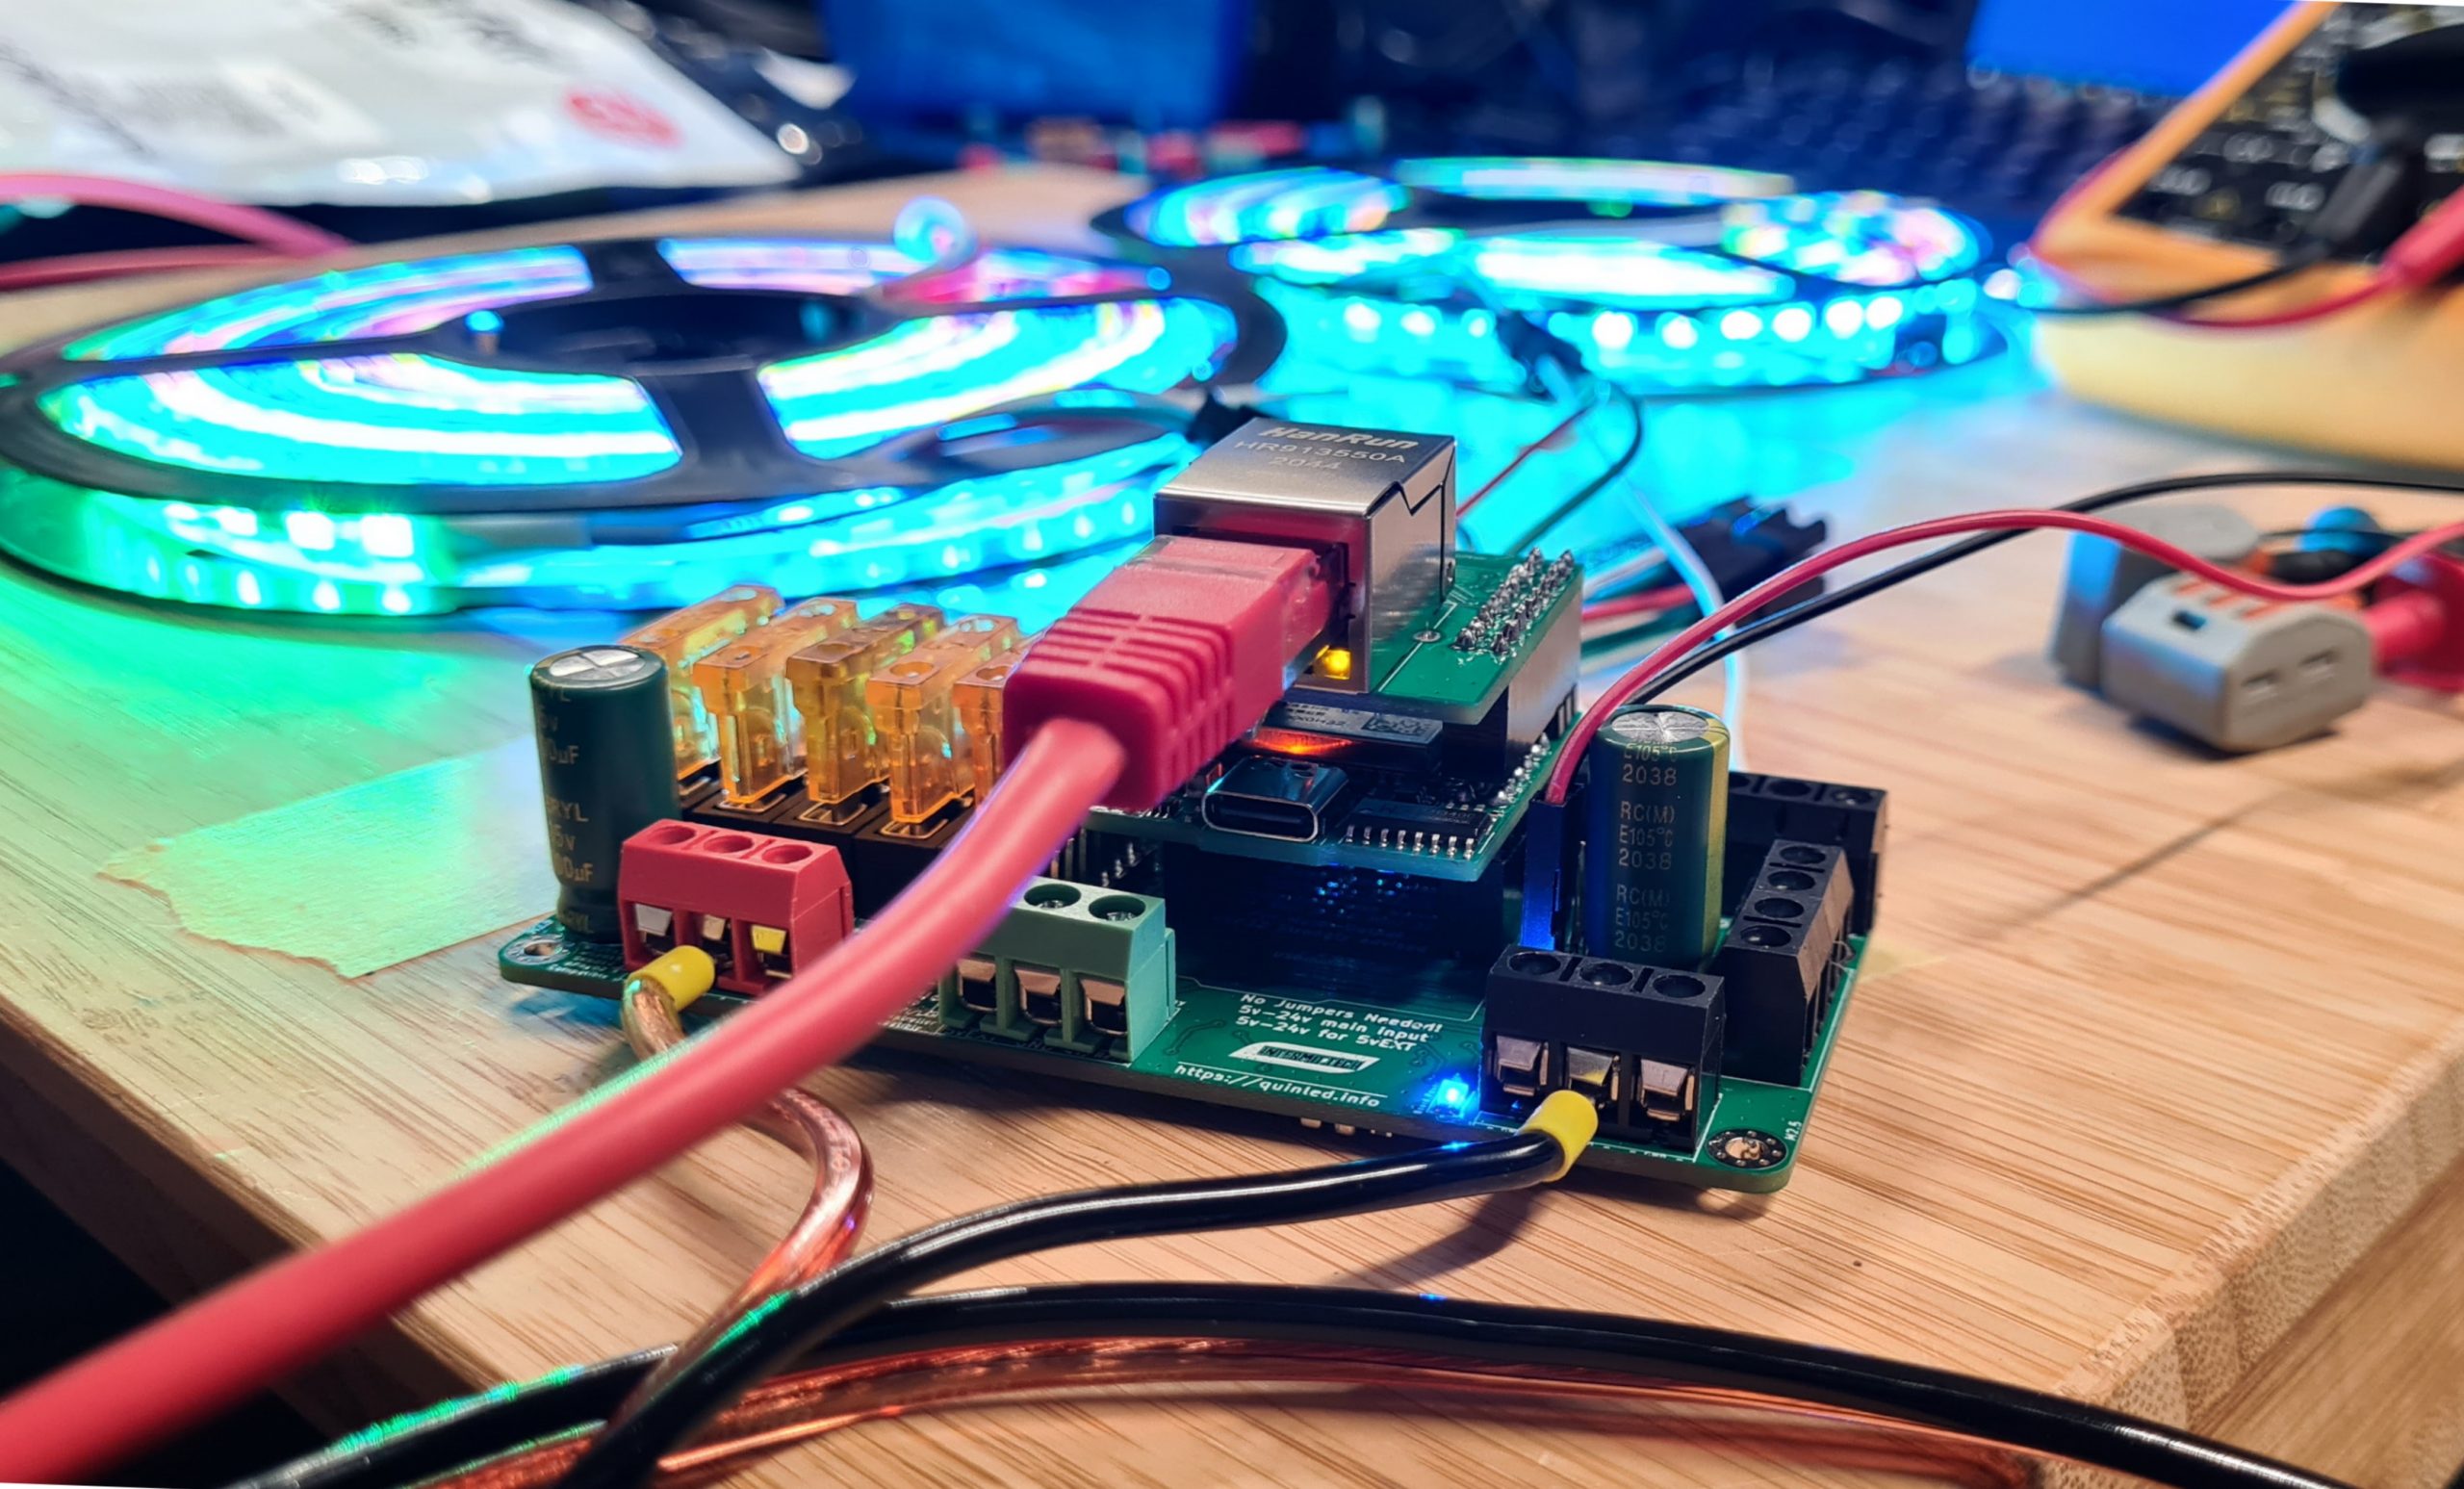
 Pre-production version
Compatibility with older version Dig boards
You might have noticed that some of the pins mentioned conflict with pins available on the QuinLED-Dig-Uno_v2 or QuinLED-Dig-Quad_v1. Because of this new versions where introduced (with some upgraded features), please see the following article detailing the exact limitations for your configuration.
Example configurations
Here are some examples configurations to help you along!
ESPhome
For ESPhome you can use these configuration values.
ethernet:
  type: LAN8720
  mdc_pin: GPIO23
  mdio_pin: GPIO18
  clk_mode: GPIO17_OUT
  phy_addr: 0
  power_pin: GPIO5
WLED
Since WLED 0.12 the QuinLED-Ethernet is included in the Ethernet version! After booting WLED, connect to it’s WiFi access-point, go to WiFi settings and on the bottom of the page select the “QuinLED-Ethernet” and press save&reboot. This should automatically turn on the LAN module and it will ask for a DHCP address to which you can then connect!
When you custom compile WLED, please use the following settings:
 -D WLED_USE_ETHERNET
 -D PHY_ADDR=0 -D ETH_PHY_POWER=5 -D ETH_PHY_MDC=23 -D ETH_PHY_MDIO=18
 -D ETH_CLK_MODE=ETH_CLOCK_GPIO17_OUT
Arduino Espressif32 ETH library
To use the Ethernet feature in your own custom Arduino code, please use the following settings:
ETH.begin(
        (uint8_t)      phy_addr,       # 0
        (int)             power,       # 5
        (int)               mdc,       # 23
        (int)              mdio,       # 18
        (eth_phy_type_t)   type,       # ETH_PHY_LAN8720
        (eth_clock_mode_t) clock_mode  # ETH_CLOCK_GPIO17_OUT
        );
End conclusion
Ethernet can bring stability back to your Home Automation or LED setup where wireless was failing before. Because of the complexity of these modules, just like the QuinLED-ESP32 itself these modules will only be sold pre-assembled and as mentioned above, combined with an ESP32 board! Please visit the buying page here if you’d like to purchase one (thank you!).