
QuinLED Diff-Adv Power Handling Guide
Receiver-Midpoint-2
Back to QuinLED-Diff-Adv main page
Some quick notes:
- As is the case with most LED controller boards, input voltage = output voltage so select your power supply to have the same voltage as the LEDs you are going to run.
- Sender boards and Receiver board do not share power and thus can be used with either the same power supply or two totally separate ones, running different voltages, etc..
- The board supports 5v up to 48v with automatic detection (no jumpers required)
Power Handling capabilities
The QuinLED Diff-Adv Receiver-Midpoint-2 is a bit more complex regarding power vs the Receiver-Midpoint-1 because it has built-in power distribution.
The board features a 2p barrier style terminal to this you can connect up to 10AWG (5.5mm2) wire with a fork crimp. When you are running near the maximum current supported by the board (20A) it’s highly recommended to use that wire diameter!
That kind of already gave it away but the maximum continuous current for the board is 20A. The board comes delivered with 2x 5A and 2x 10A which fuses which in theory can exceed this but generally speaking the real current used is well below the maximum of the fuses.
Onboard power distribution
The board has been designed around running LED setups that require power injection, especially if you are running 5v but also 12v and sometimes even 24v LED strings or strips you can’t avoid needing more then a single power injection. Since the QuinLED Diff-Adv Receiver-Midpoint-2 has 2 data outputs this also means you can have 2 such setups on the single board and thus it was equipped with 4x red positive and 4x black negative output terminals, each individually fused (with broken fuse indicators!). These 6.35mm terminals can accept up to 12AWG wire with a wire ferrule.
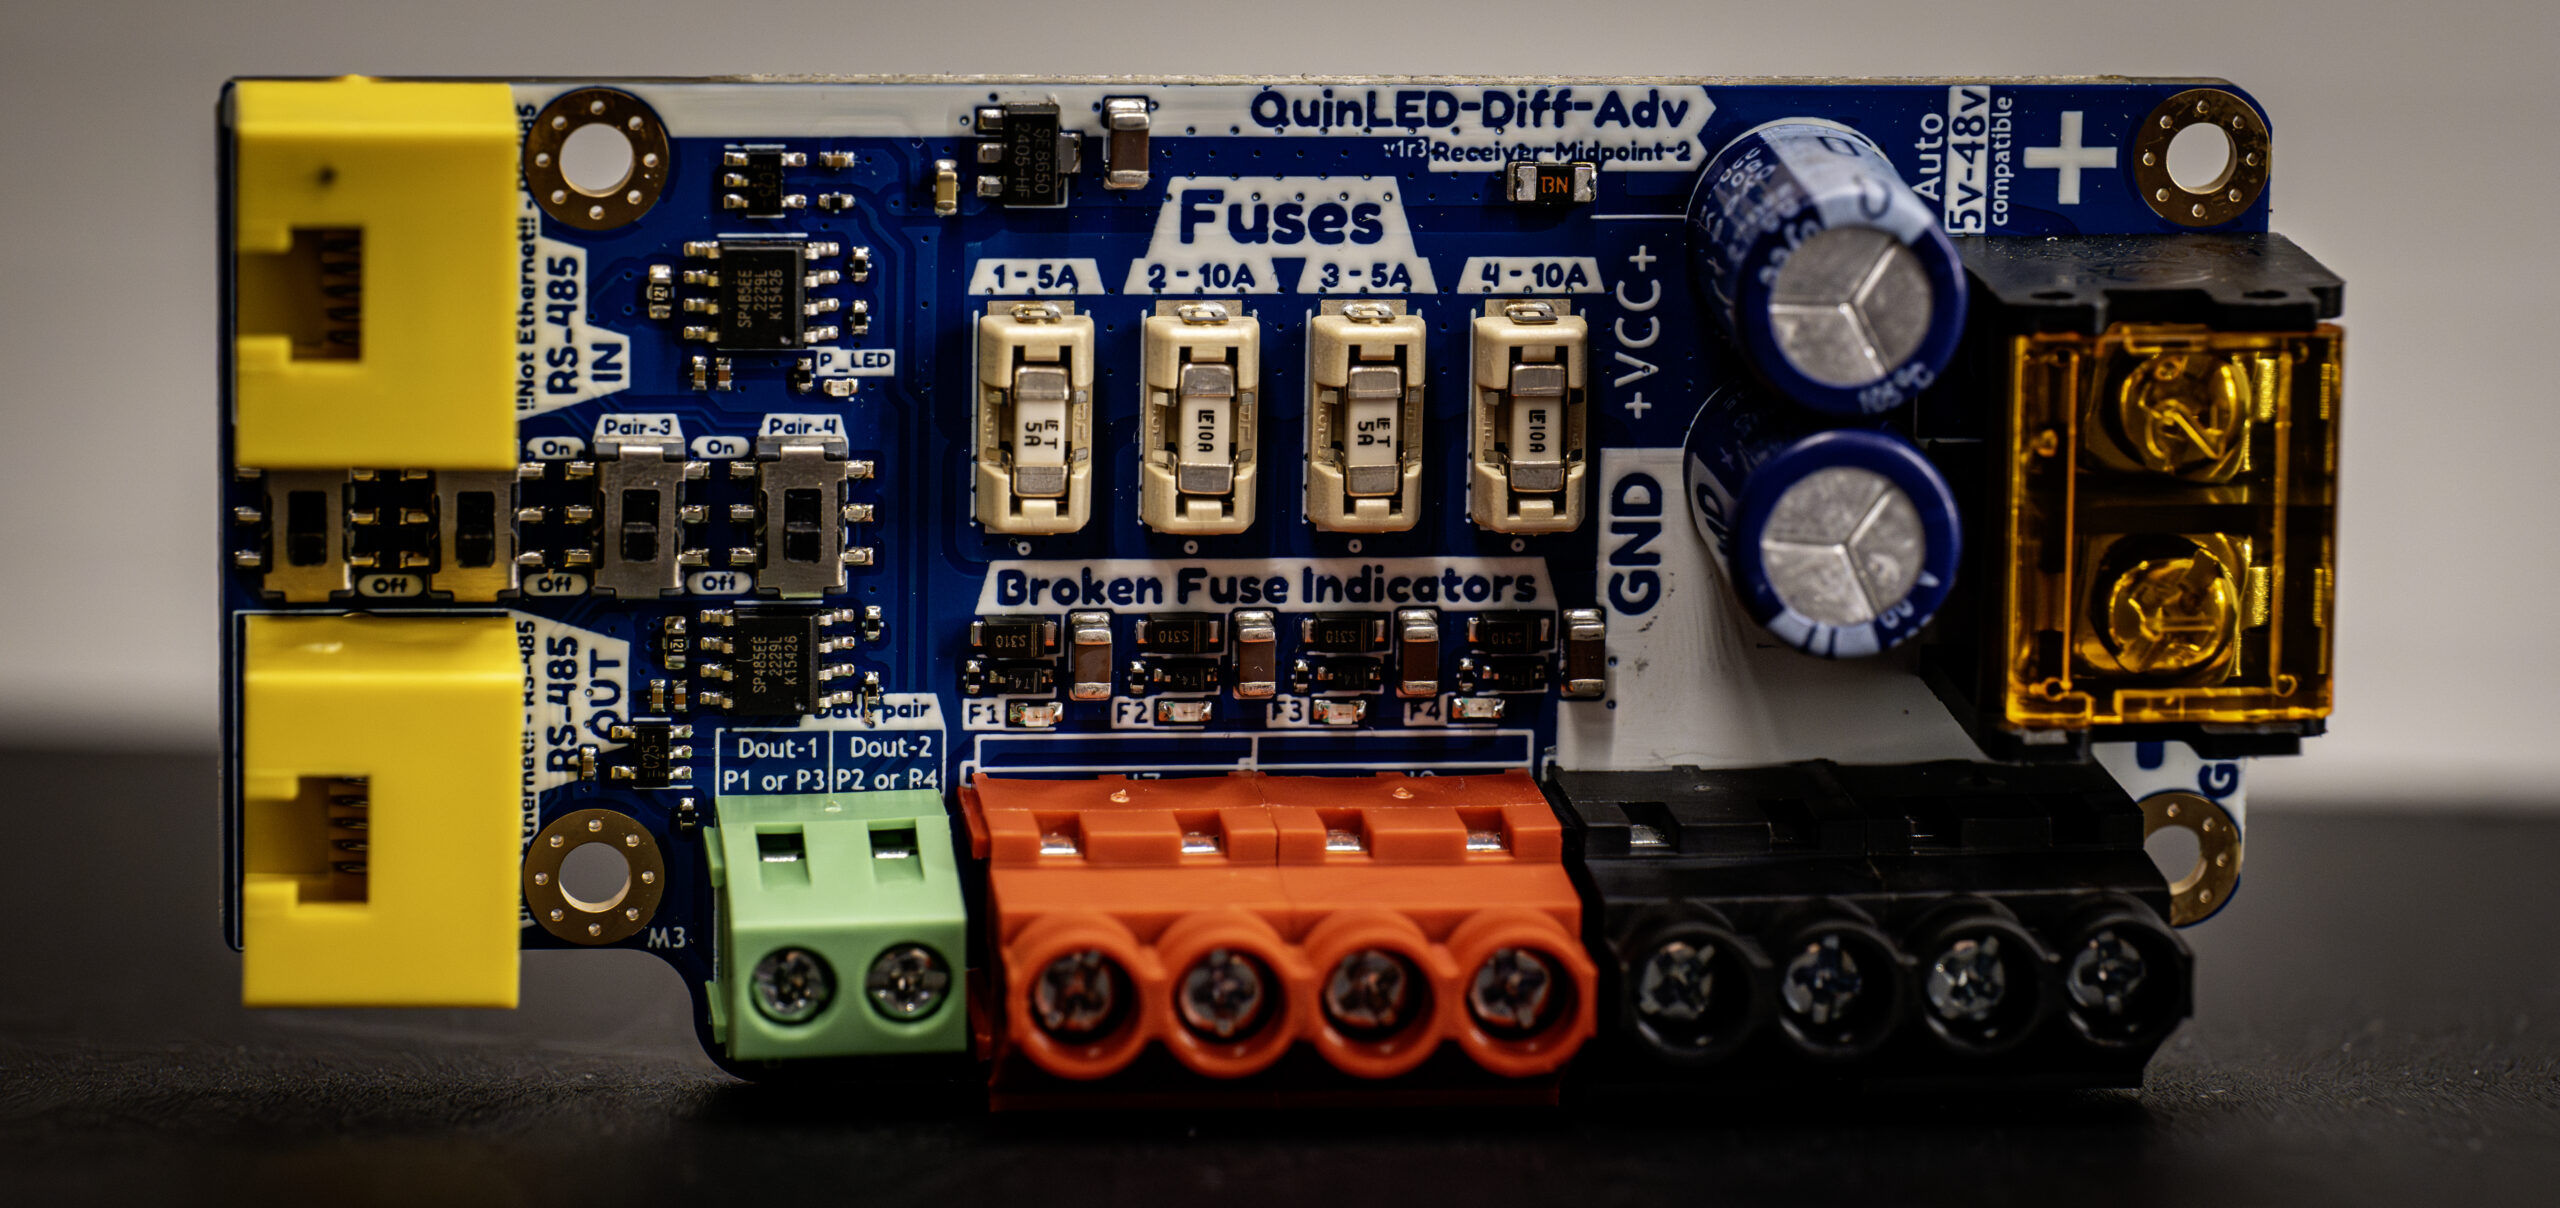
The red terminals labelled VCC-F each correspond to the fuse directly above it with the same number. The board will come delivered with the staggered 5A | 10A | 5A | 10A fuse layout for heat distribution purposes. Although you are allowed to change this around as desired, it’s suggested to leave them as is. Use the 5A fuses for an edge injection and the 10A fuses for a middle injection.
It’s not recommended to upgrade the fuse of any output above 10A.