
Addressable LEDs + Christmas Tree
= Great Match!
Pairing Addressable LEDs with a Christmas tree makes for an excellent looking match. This is the second year of using the very small “fairy light” type LEDs in our Christmas tree and although setting them up takes a while (we spent about 2 hours putting them in), it’s well worth the effort!
This article will be a guide, in part using the videos I made last year but also adding some more information from this year for the people who want to do this themselves!
 2021 version!
 2020 version
Special “Fairy Light” type LEDs
I featured these LEDs last year for the first time, they are a special kind of LED, they are fully digitally addressable, run at 5v and are very tiny, including their “bare” wires. The wires are coated in some kind of varnish making them less electrically conductive, but not fully. So best to handle them when no power is running through them.
Sometimes, when handling them while powered on, they can also spasm but in principe running them in a tree like this, it generally works just fine. No special actions need to be take to separate wires or something like that, just try to prevent the wires getting into a pulled knot, that can cause issues.
You can find this type of LED string here: “Fairy” style pixel LED string
2020 update– For some reason, the strings of LEDs I bought this year did not want to cooperate with the strings I bought last year. When connected together, a single LED of the new string would light up, but that’s it.
Using only last year or only bought this year strings worked perfectly though, but the transition between the two caused issues!
I worked around this by having the strings from last year on LED1 data output port and the strings from this year on LED2 of my QuinLED-Dig-Quad controller. This worked fine and with the multi-channel firmware it acts like it’s a single strip, it made power injection even easier too!
2021 update– Make sure to buy the version linked here, there are other “3 wire milky” versions which have a fixed address so you can’t use more then 1 string and control them!
I also did a video about these specific LEDs which will give you a very good look at them:
Power Injection Requirements
As with all LEDs these also need some power injection! I do not have them in the power sheet but there are measurements in the video you can calculate with! They however don’t use a lot of power.
First, take a look at this video:
- If you are doing effects and colors, you can inject per 3 strings (front + back injection)
- If you want to be able to run full RGB White you need to inject per 2 strings (front + back)
In the case of our 2020 Christmas tree we have 450 LEDs and hooked up in the following way:
INJECTION – Front
string (~50LEDs)
string (~50LEDs)
string (~50LEDs)
INJECTION – Middle
string (~50LEDs)
string (~50LEDs)
string (~50LEDs)
INJECTION – Middle (we added our second data connection here)
string (~50LEDs)
string (~50LEDs)
INJECTION – Middle/End
string (~50LEDs)
So 4 injection points in total. We decided to change the last injection point inward 1 string because otherwise we’d be stuck with a bunch of cables in a spot they aren’t easy to hide. You can use a single string from an injection point without injecting the other side too.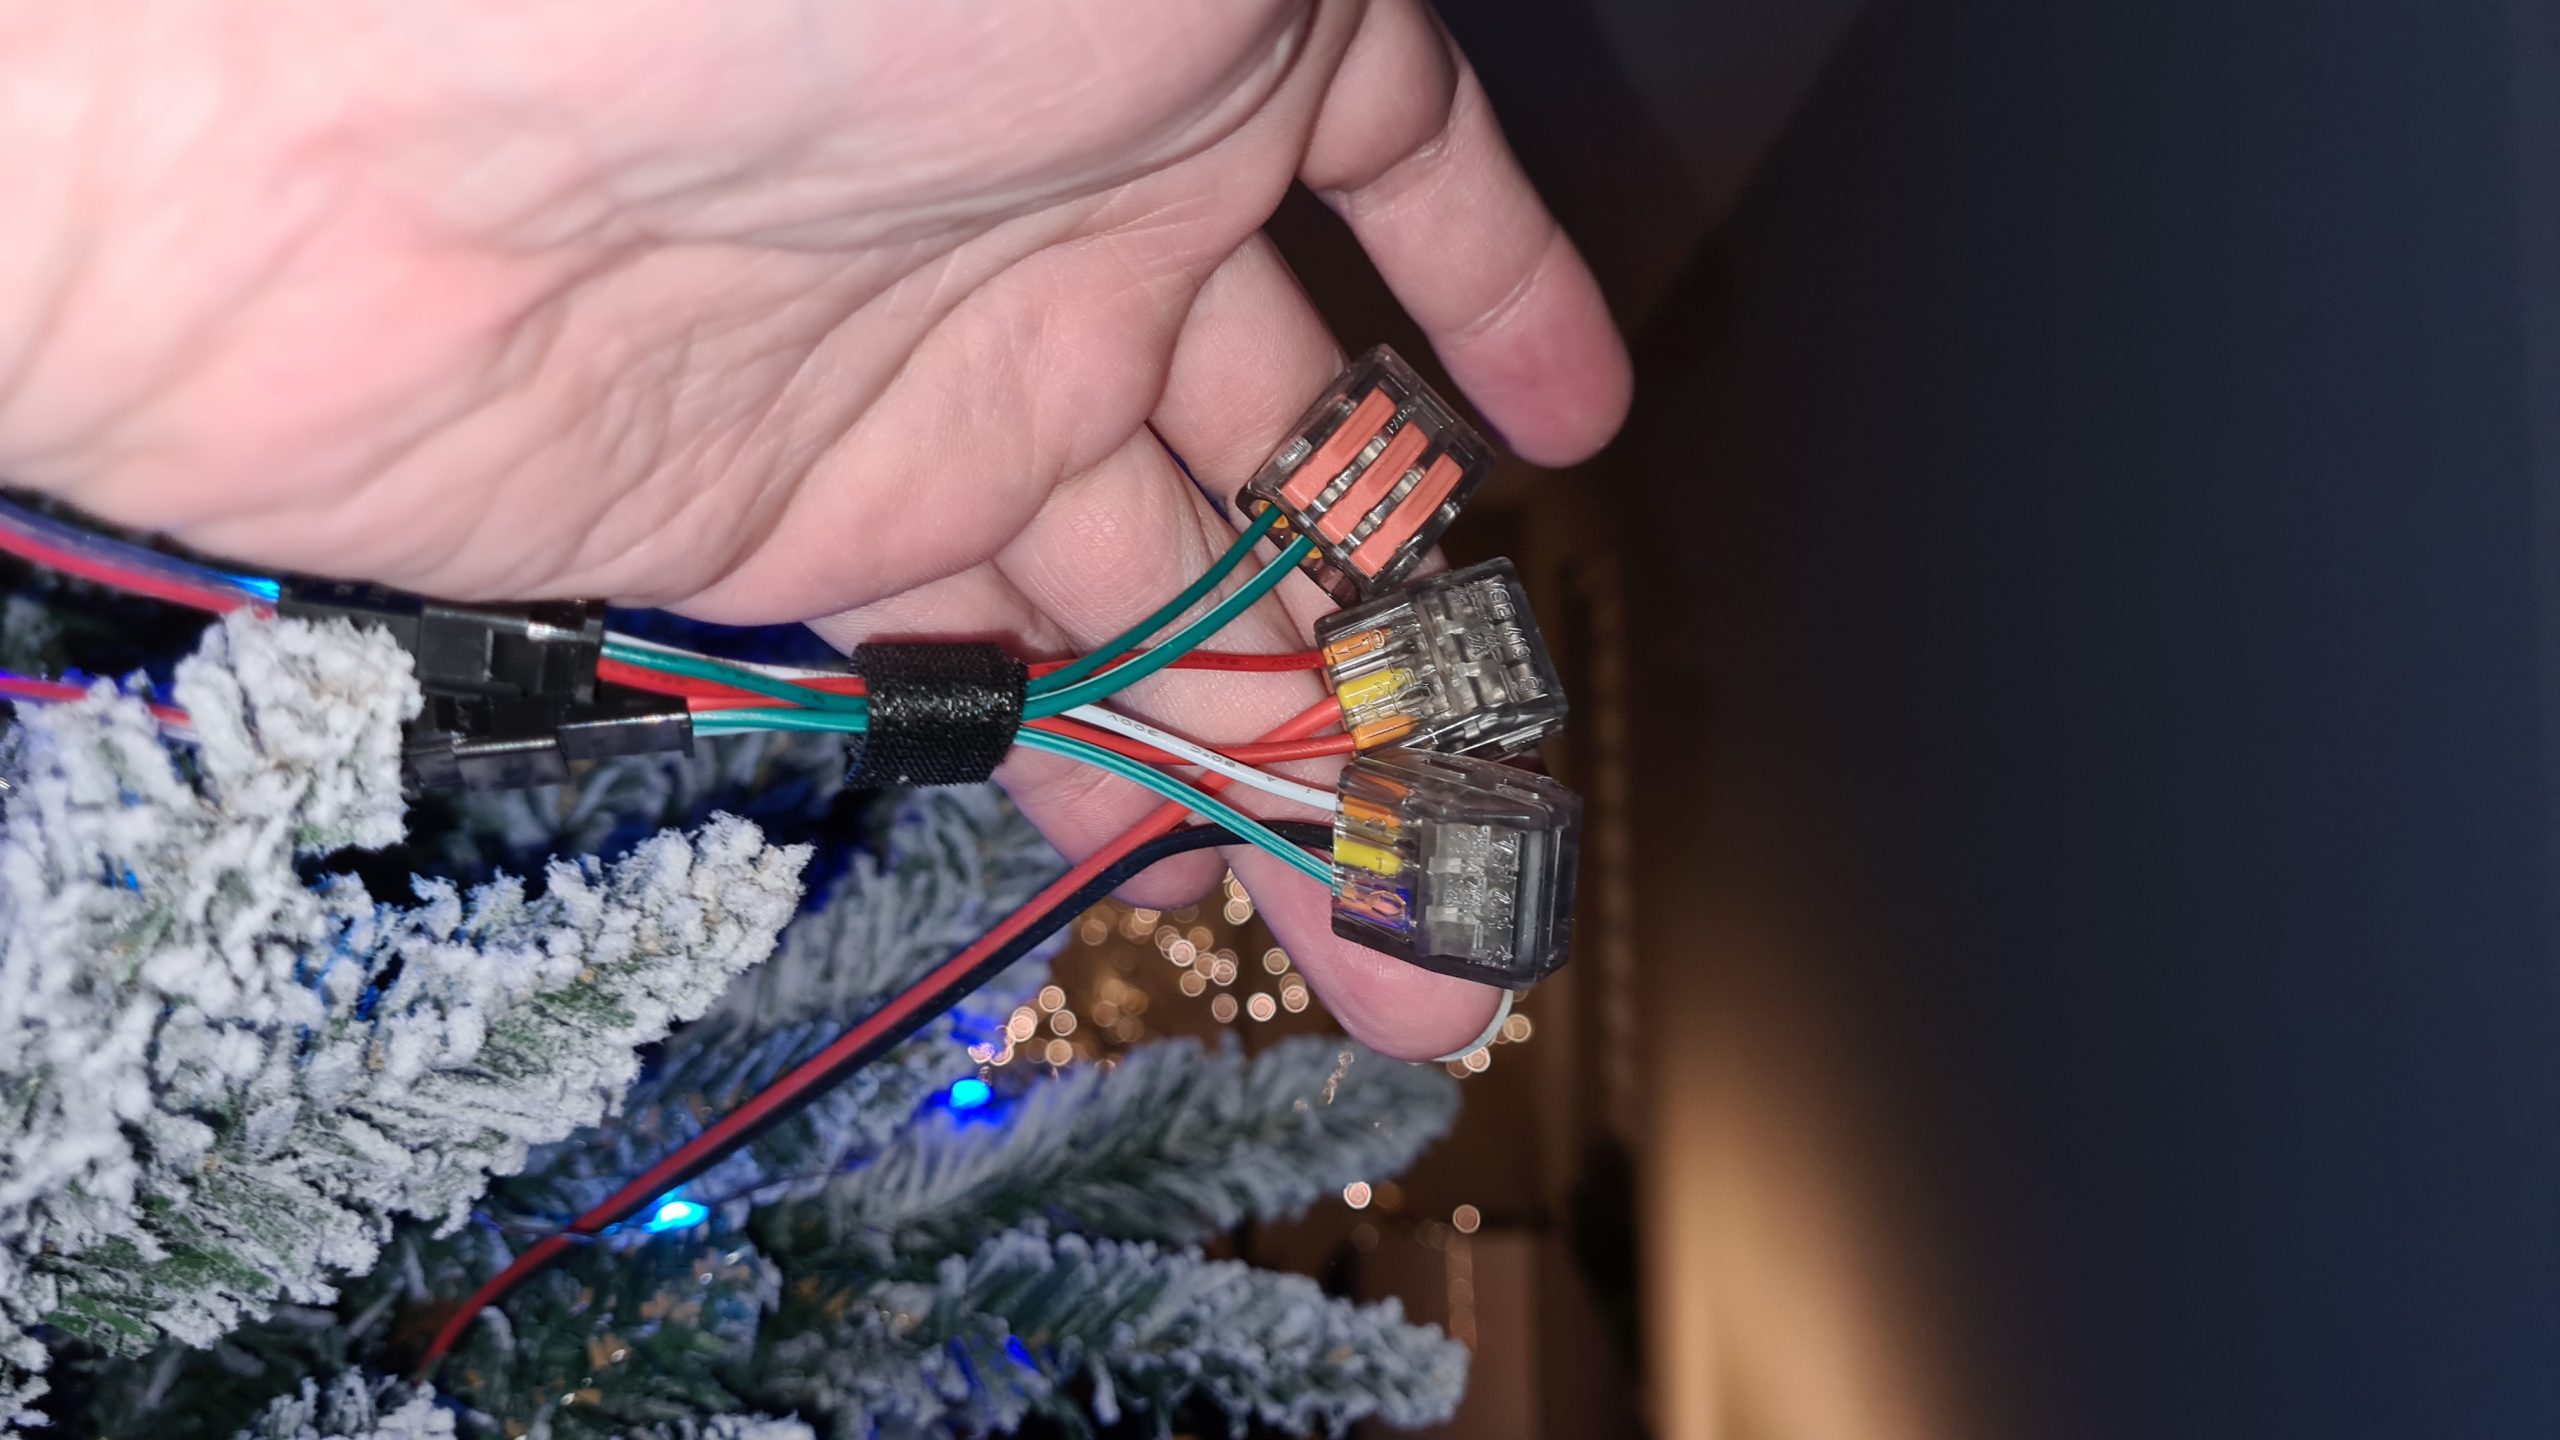
Power Injection Point
To inject power we make a few power injection points as shown above. These look a bit bulky but since they are hidden inside of the tree, they blend out of sight quite easily and in my opinion it’s not a problem at all!
An injection point consists of the following:
3x WAGO block
1x Female 3 pin JST SM pigtail
1x AWG18 +/- wire back for power injection
(wire ferrules for all cables)
Total Wires
In my case I ended up with 4 positive wires, 4 negative wires and 2 data wires that went into the controller.
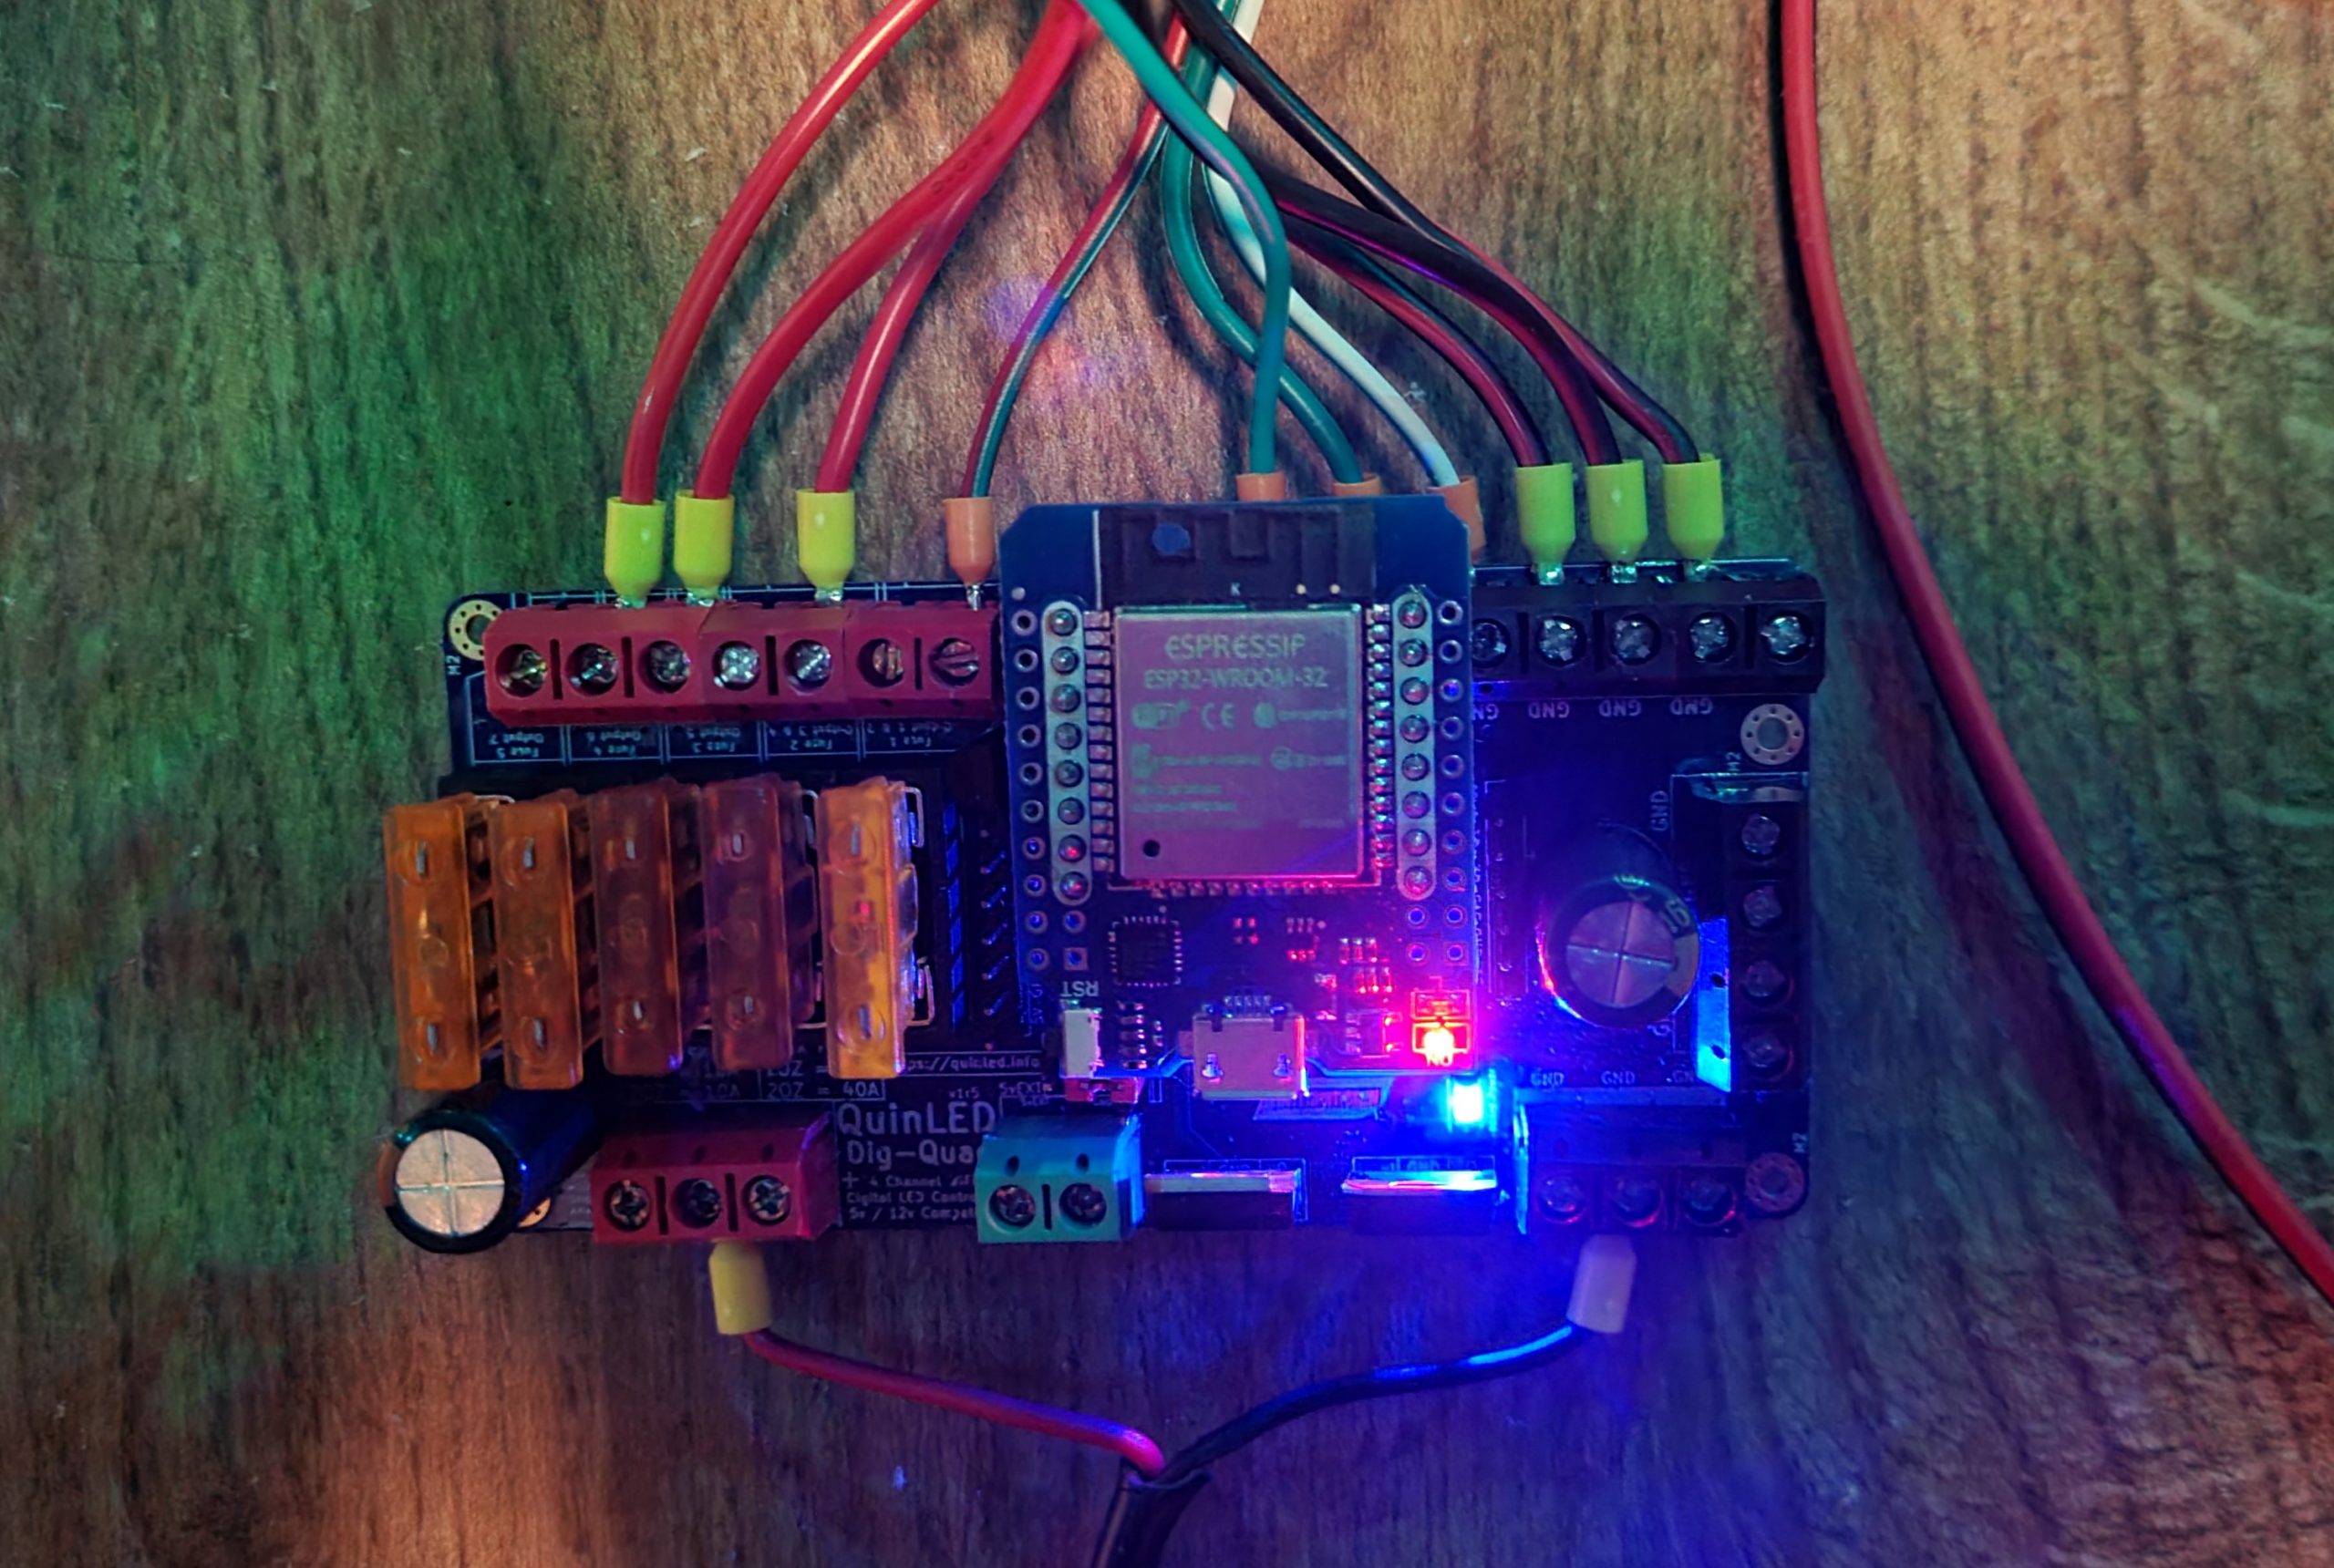
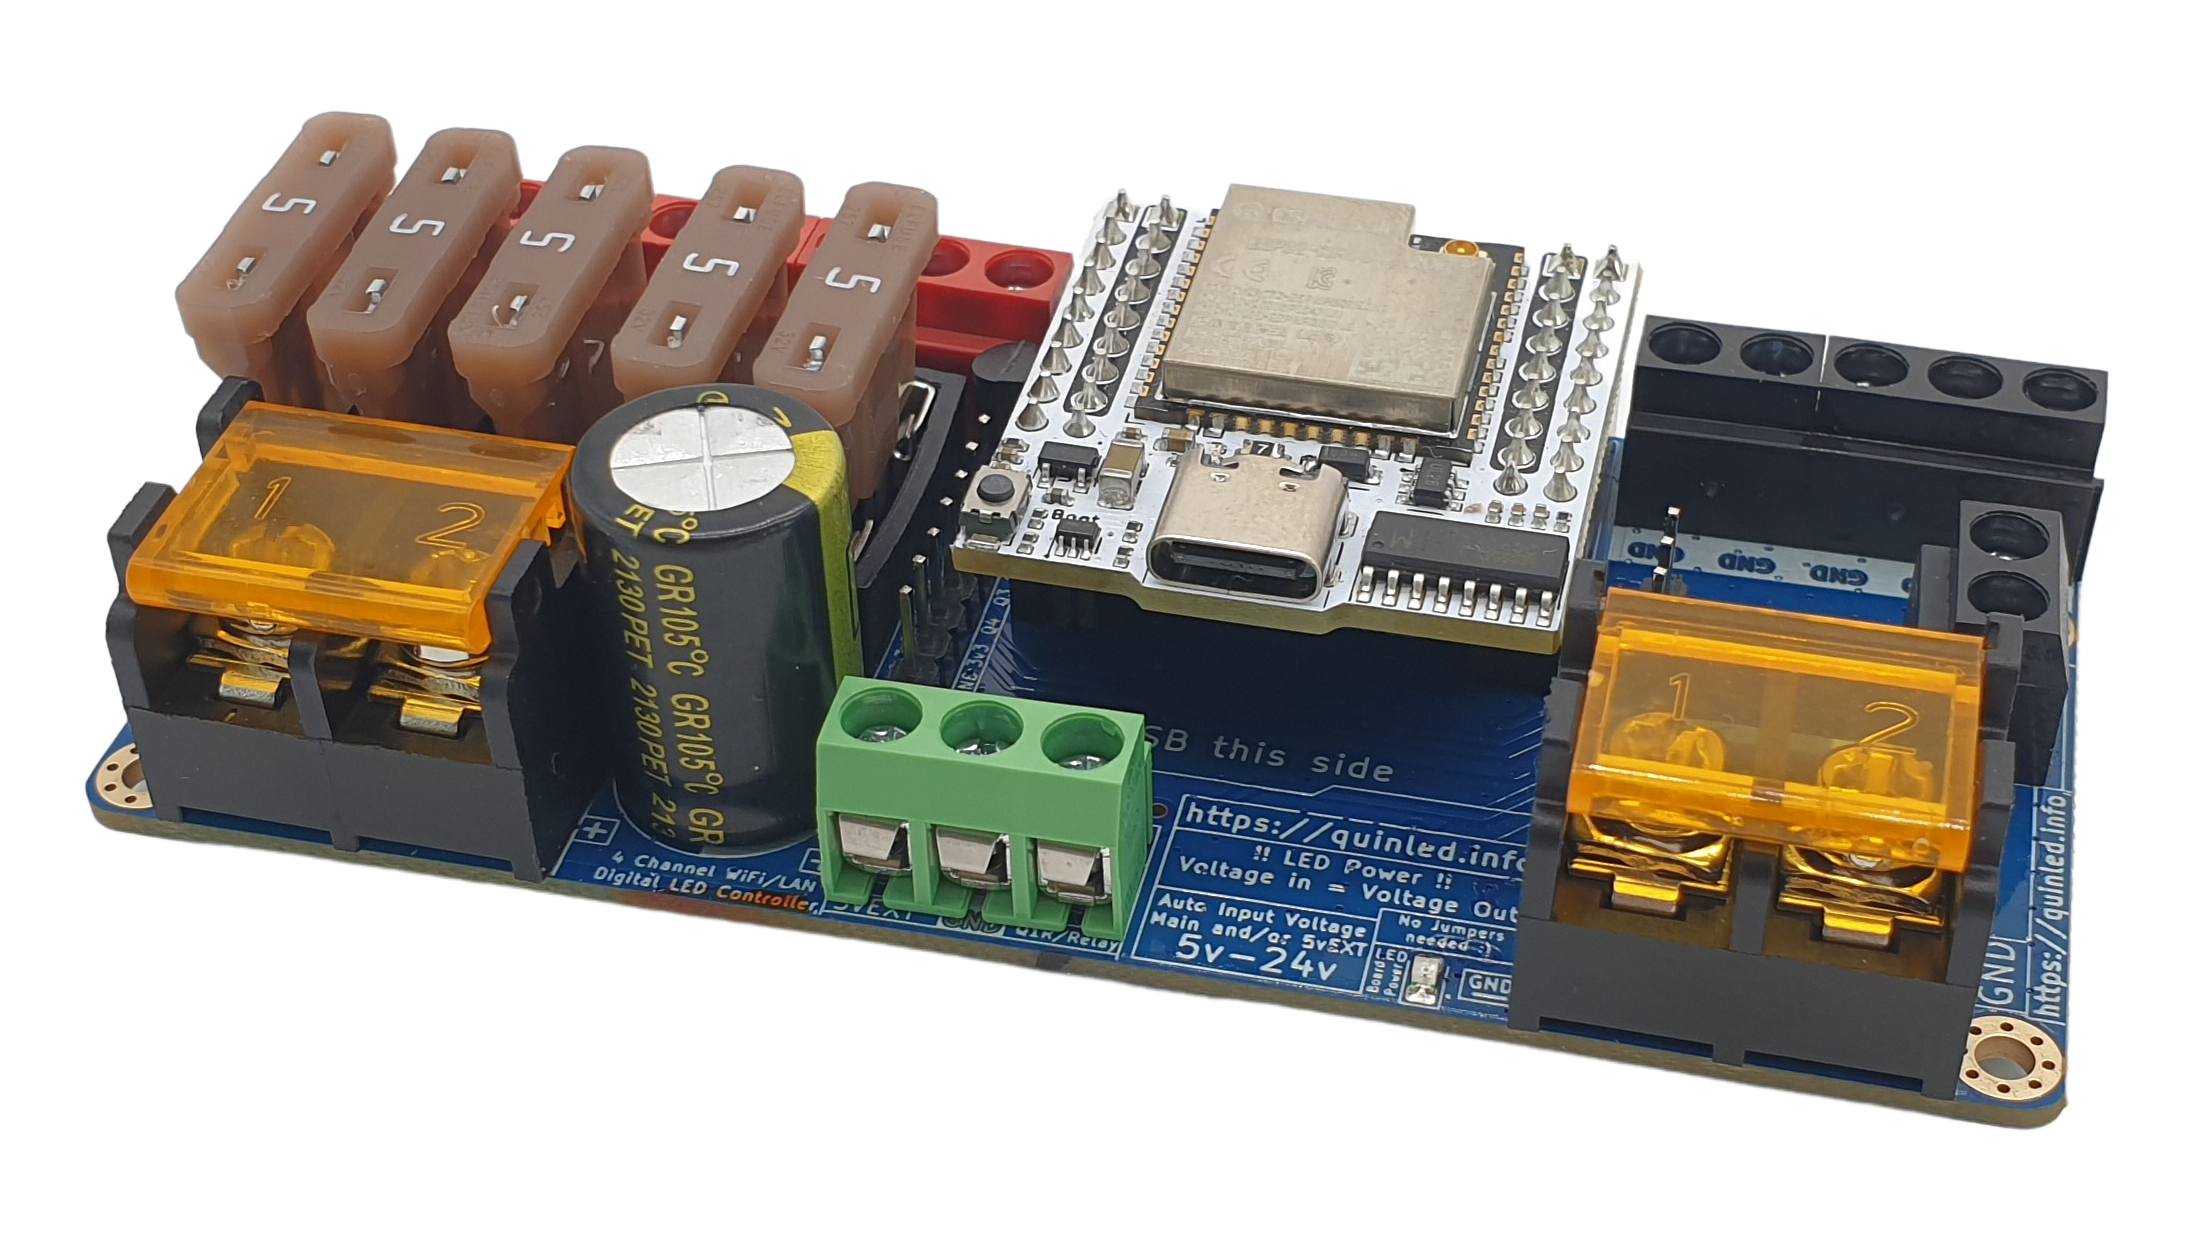
LED Controller
As mentioned earlier, the controller I used this year was my QuinLED-Dig-Quad controller available as a DIY project or fully ready to go and pre-assembled! Although with the amount of power and LEDs that are being connected a QuinLED-Dig-Uno could work fine too, since there are 4 sets of power wires and I had to resort to using 2 data ports, the Dig-Quad did make things a lot easier and cleaner since it integrates many power output terminals with fuses and multiple data output capable!
Power Supply
As a power supply I used a simple 5v 10A brick style power supply, that gives me up to 50w, measuring the tree and set to full white (as much as possible with current injection scheme) I see a max usage of about 36w, running a single color I see about 16w and effects generally run around the 20w mark.
Because I’m using this with one of my QuinLED boards, I did chop off the barrel style connector. Yes there are “converter” blocks to go from barrel to 2-wire but I don’t advise using those above 5Amps, which this setup could pull in excess off.
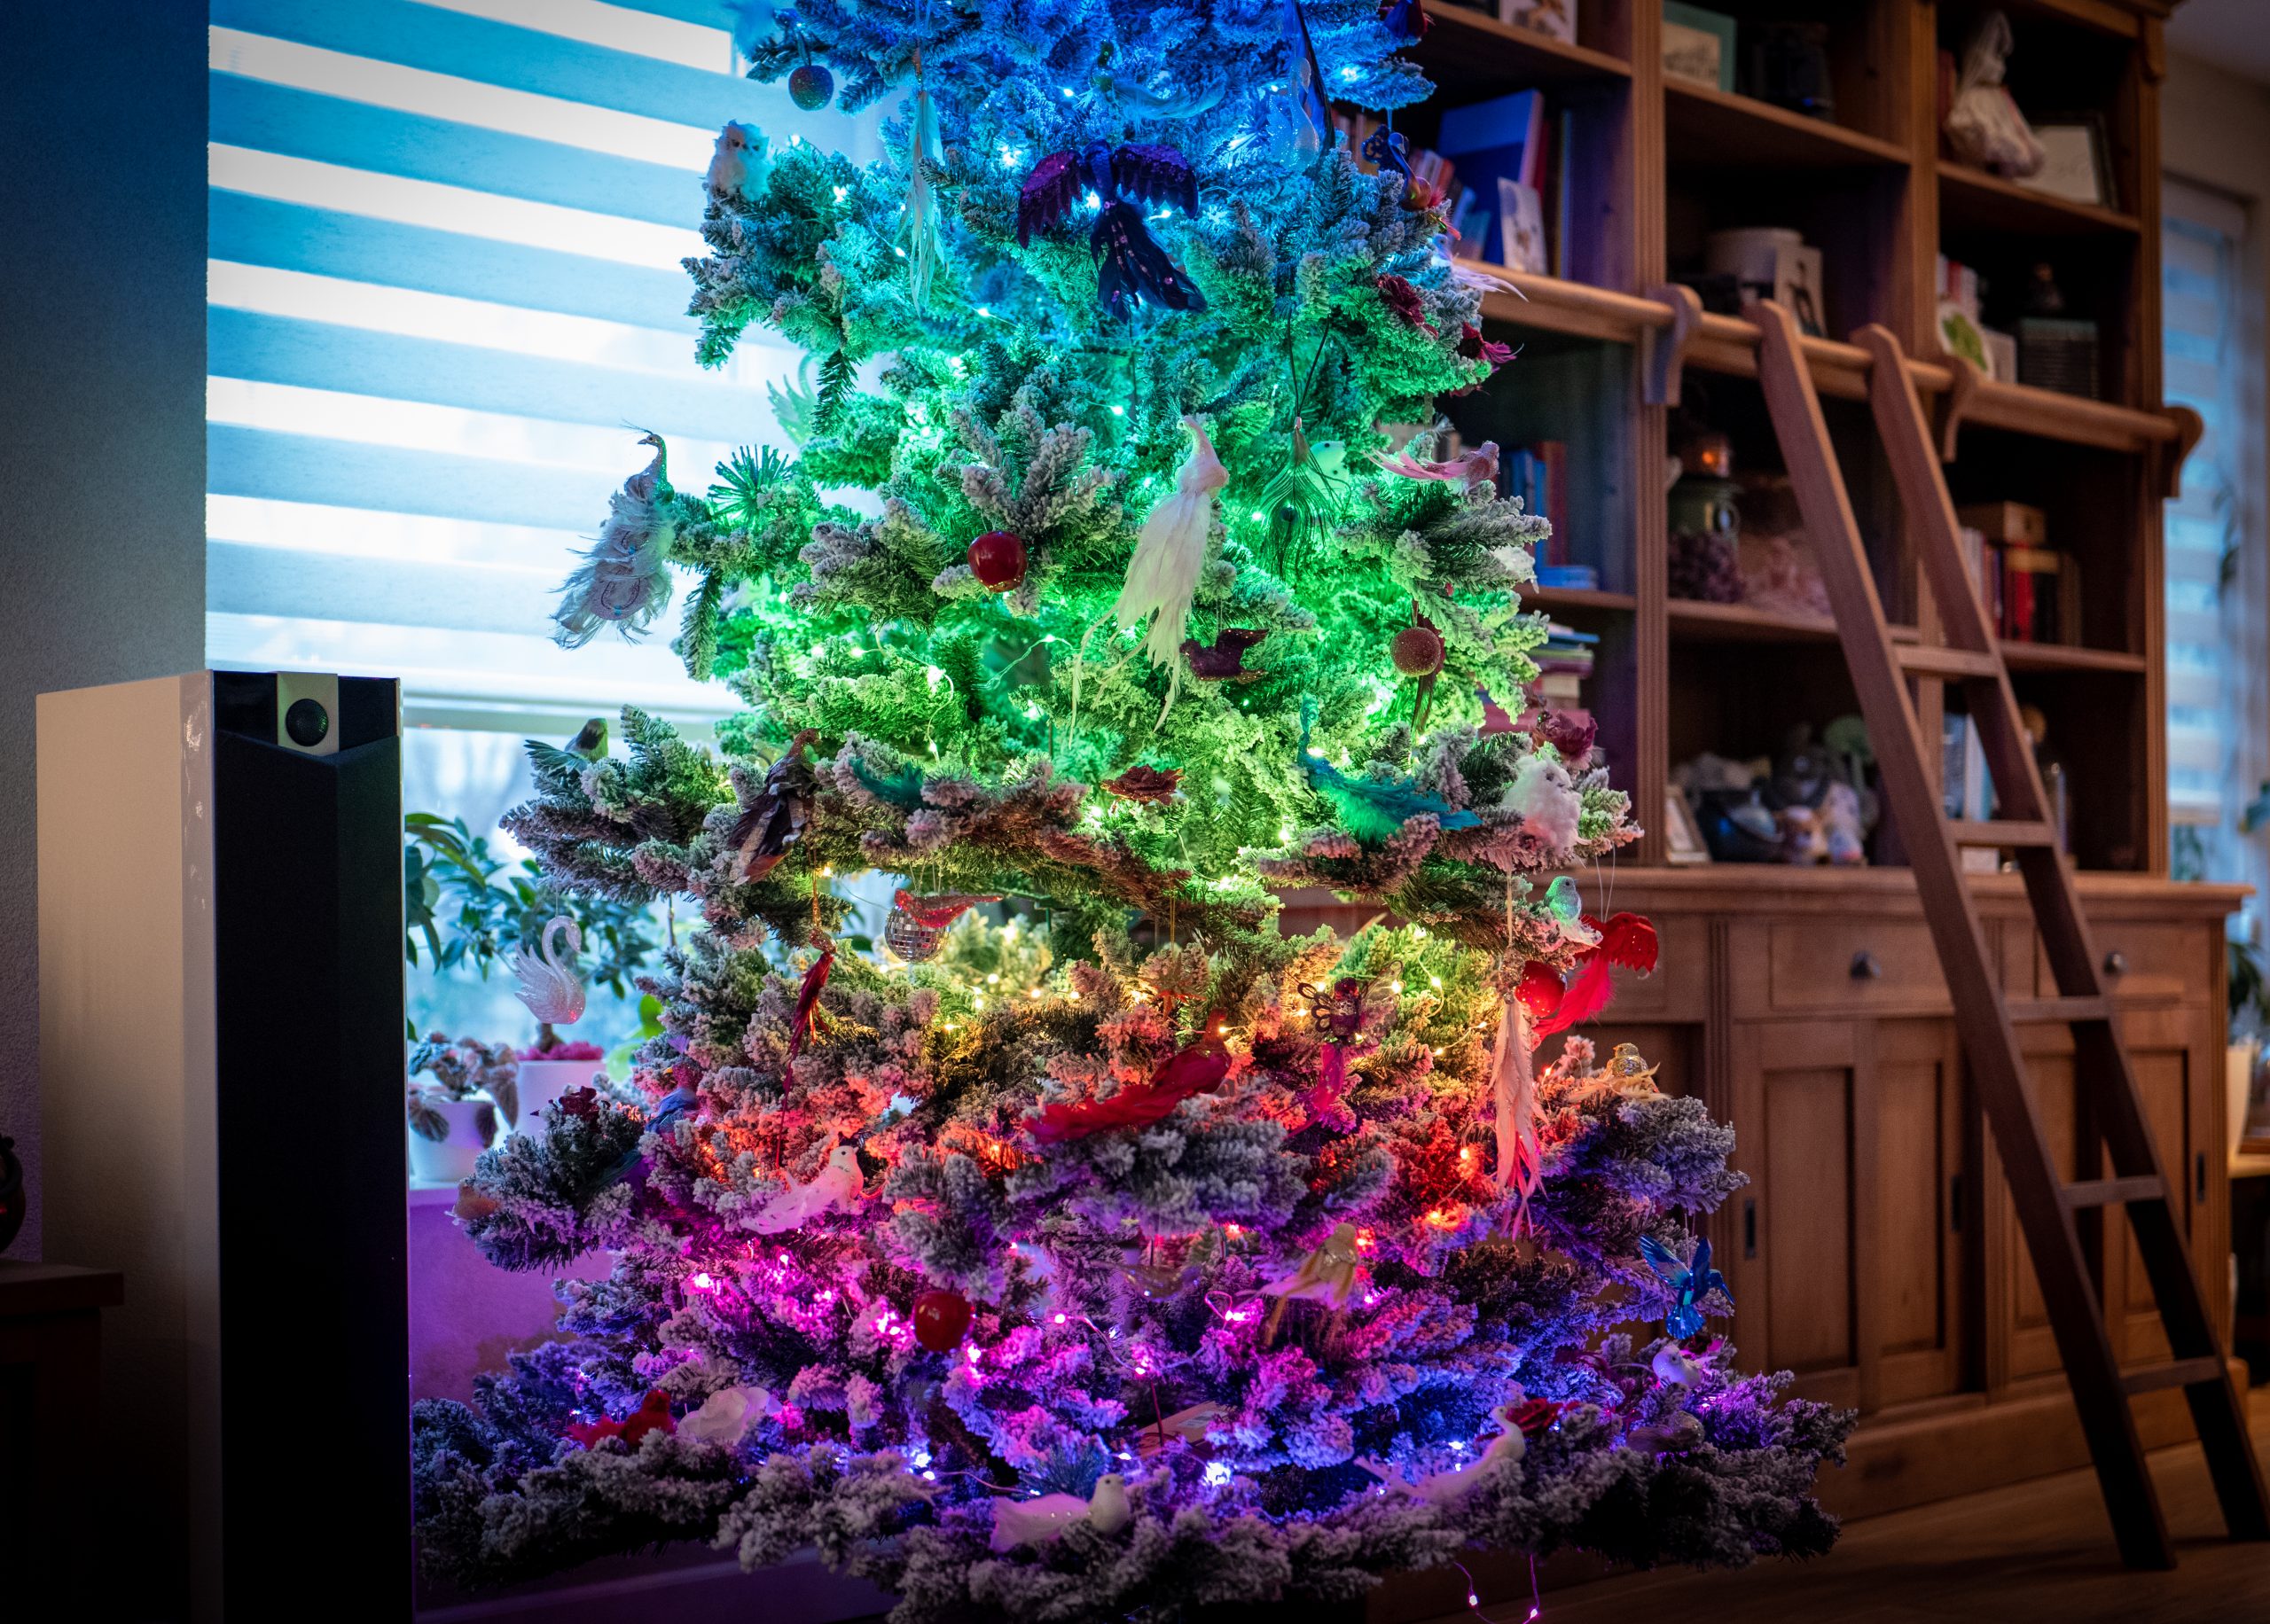
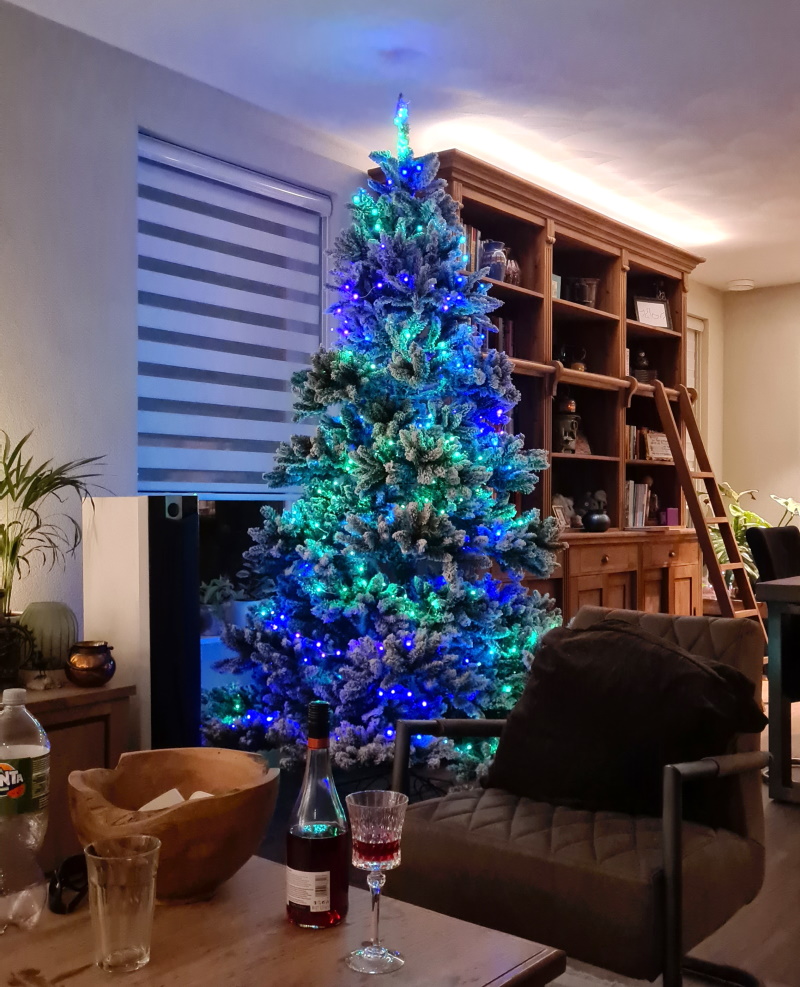
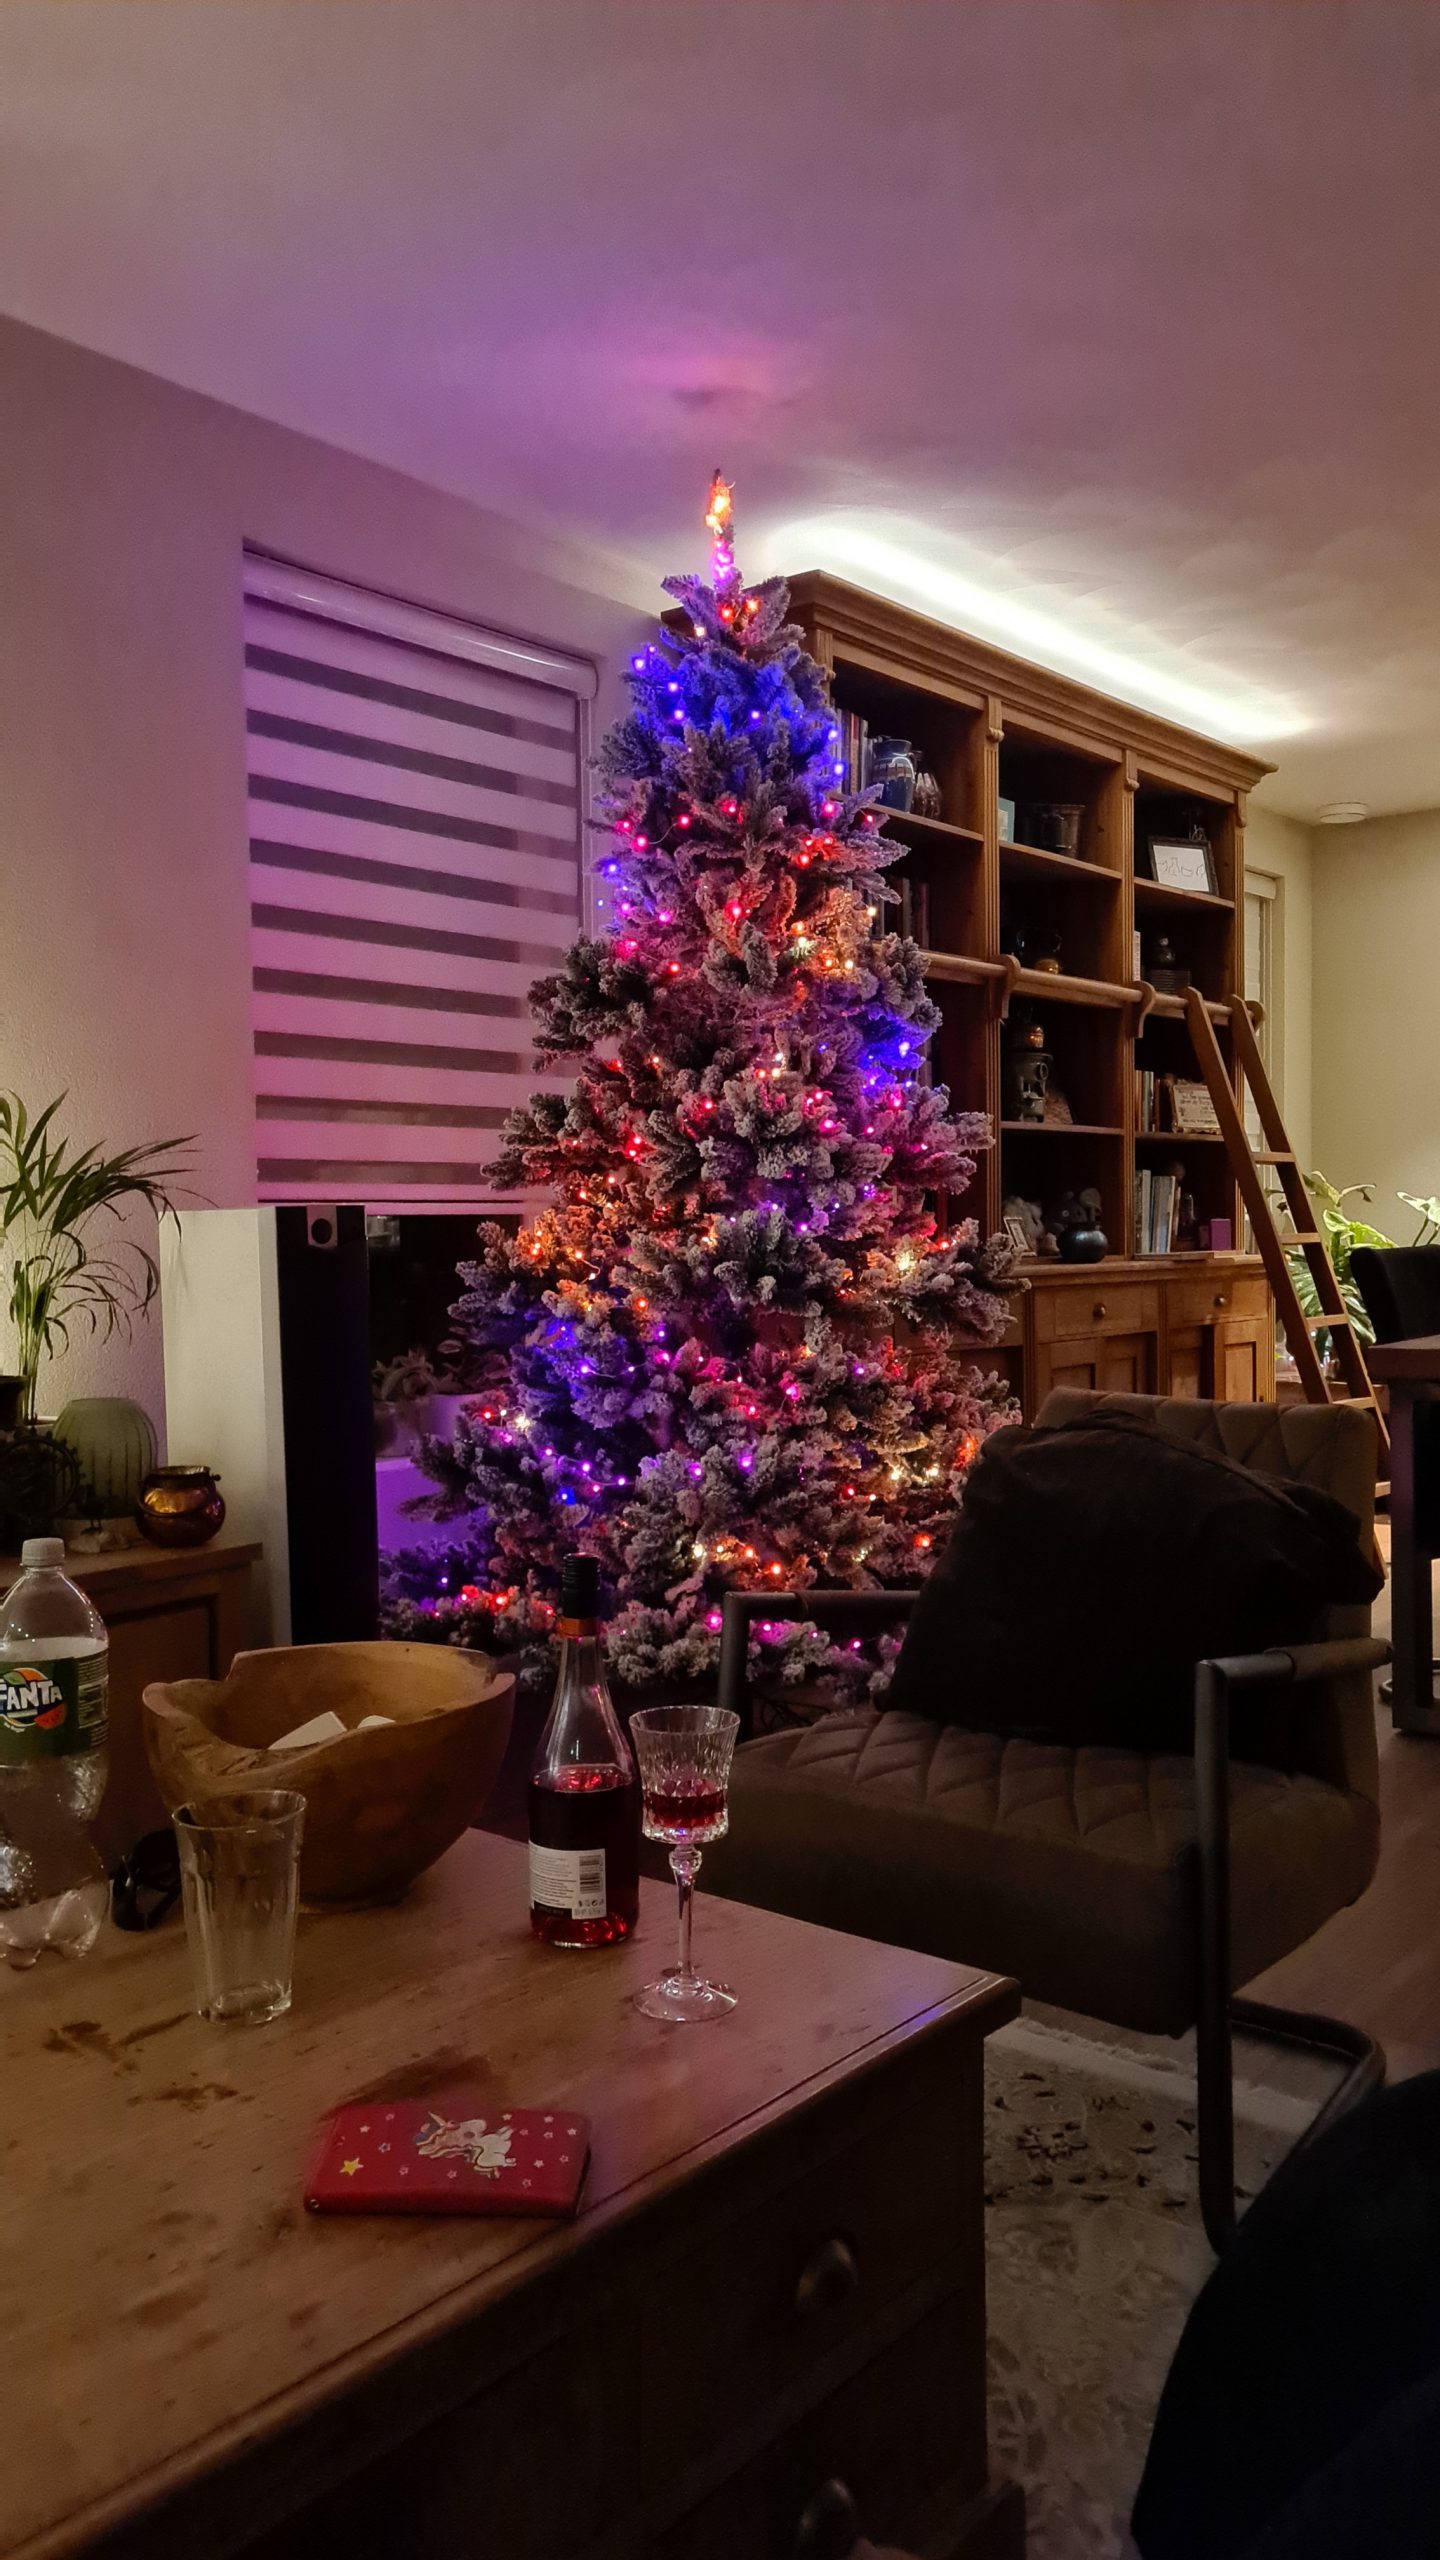
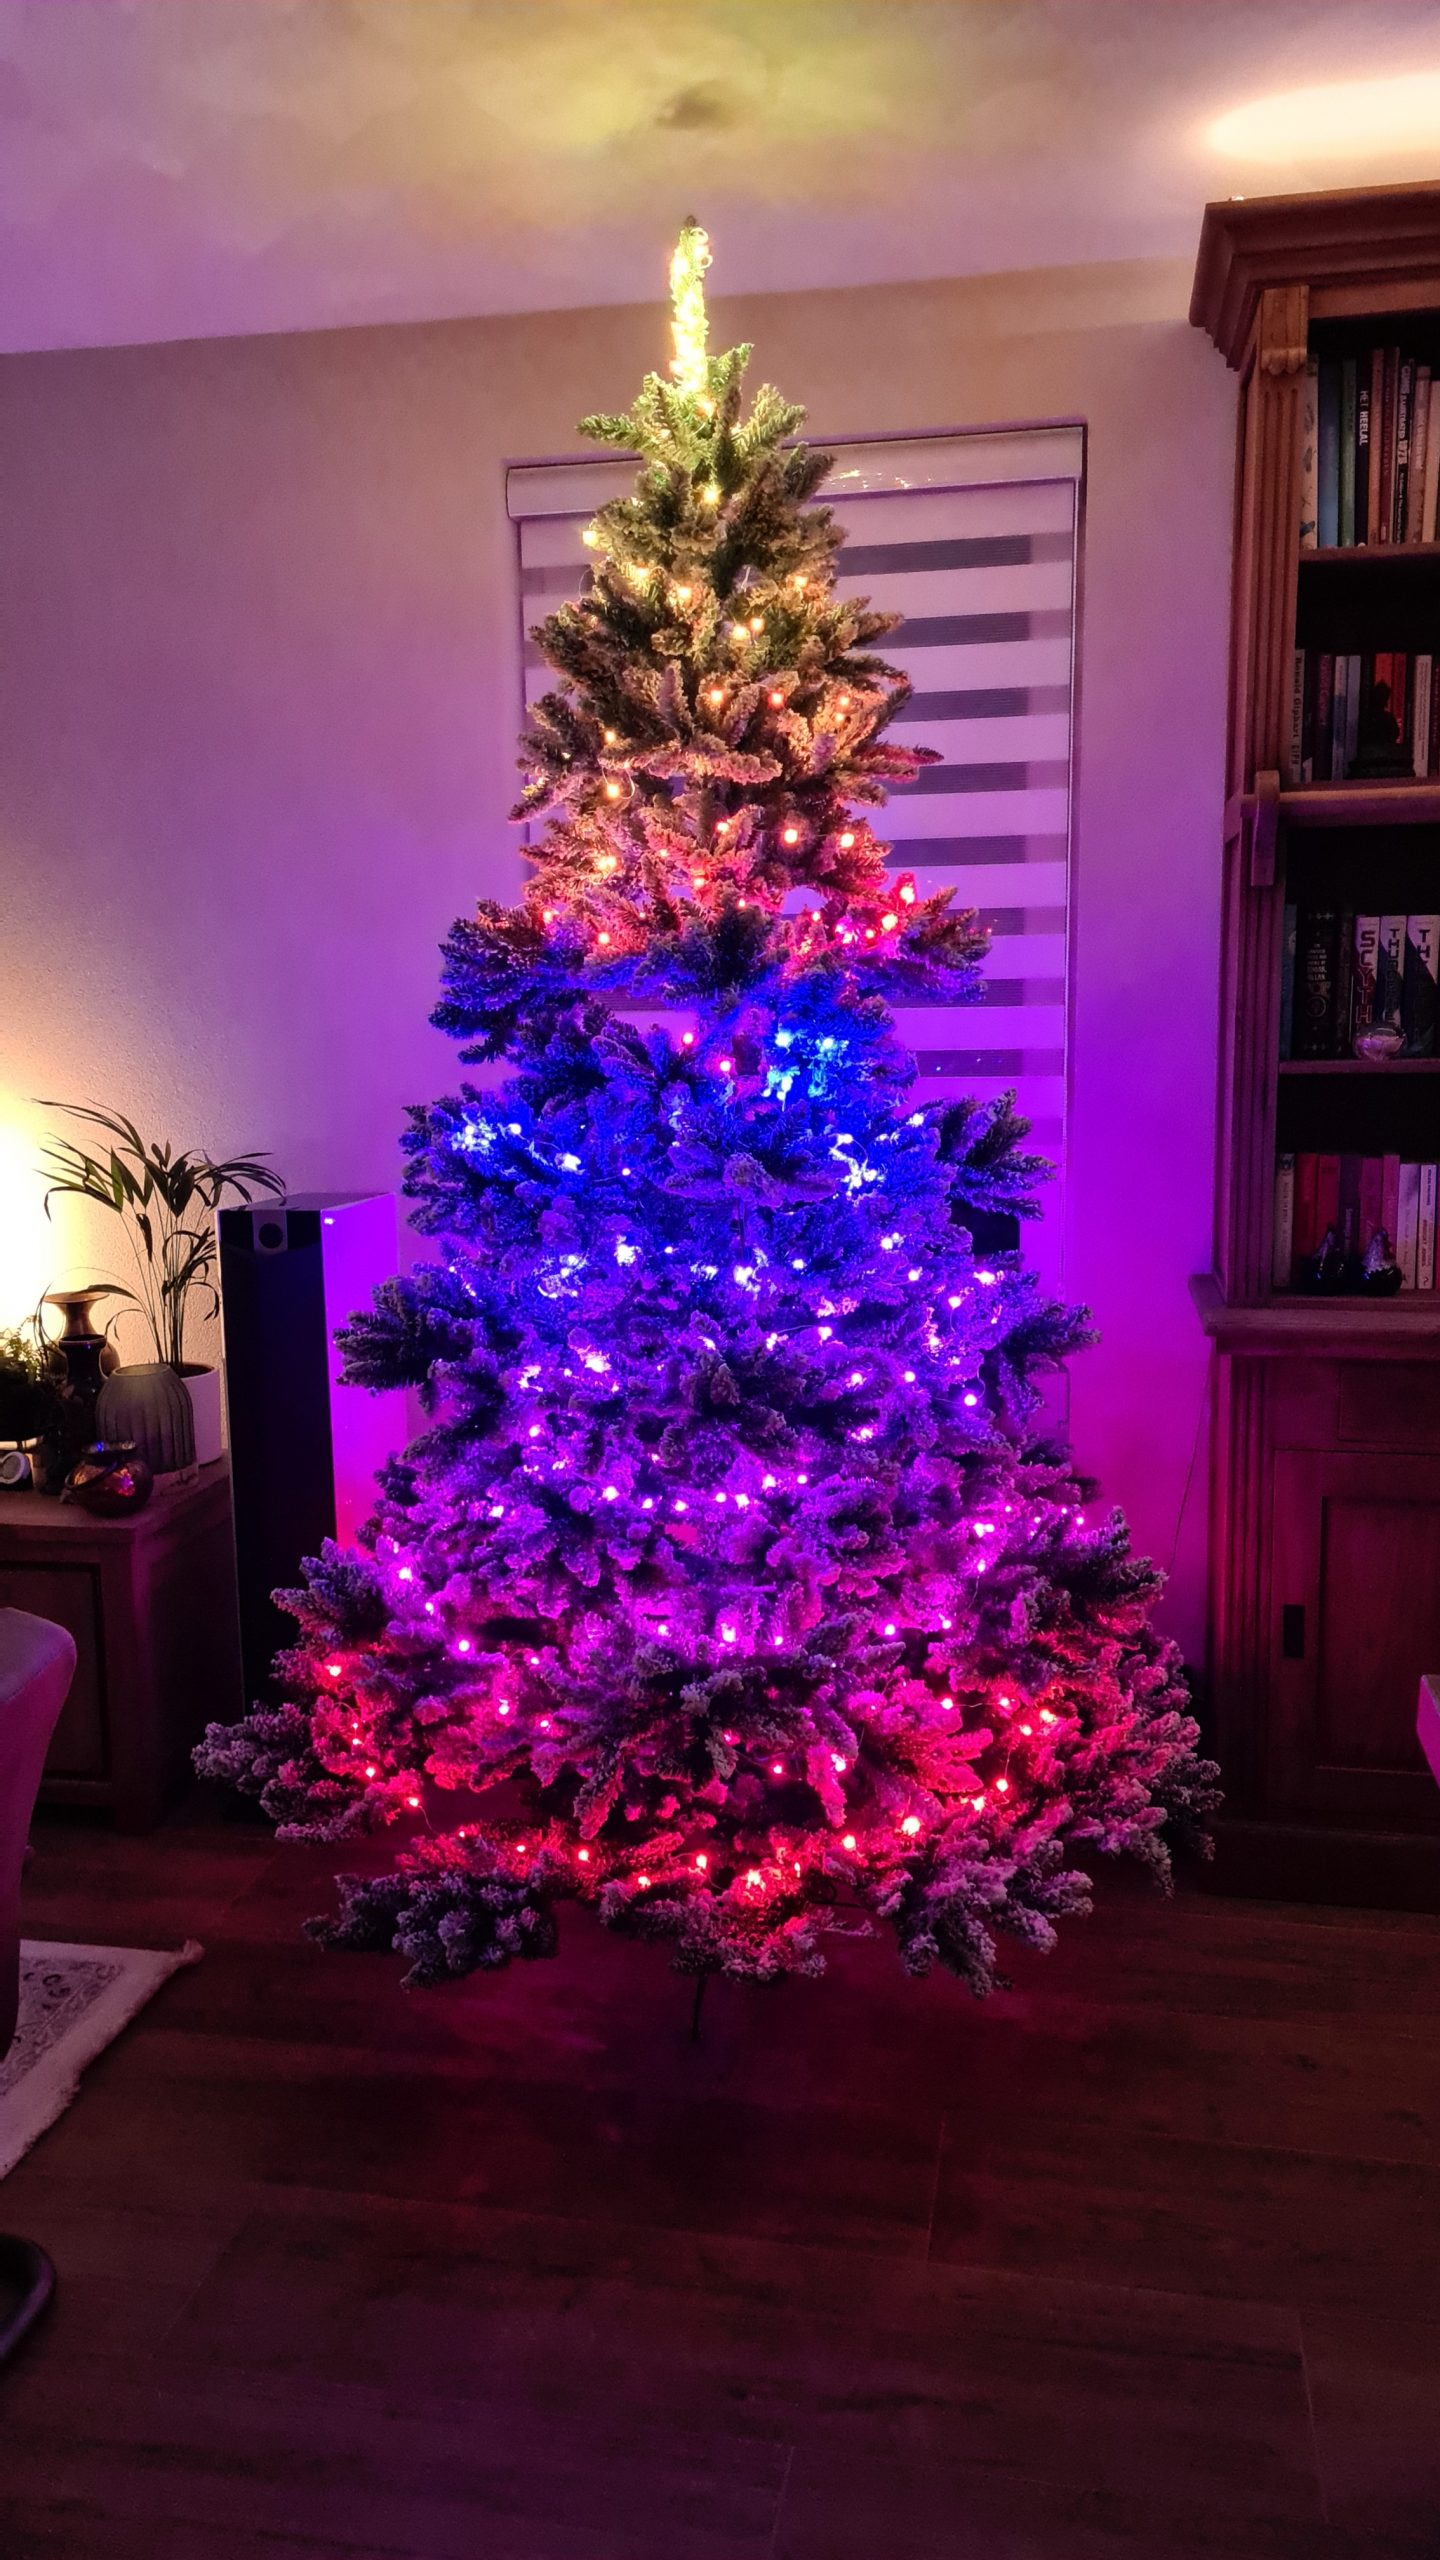
End Result
The end result is awesome, there are lots of effects that look really good! The tree this year doesn’t have any ornaments yet (we’ll be adding those soon) but the fake snow that’s on this one already makes the LEDs really pop. Once we add sparkly ornaments and such which reflect the light all kinds of ways, that makes it look even more awesome!
First, here is a video of the end result of last year:
Ending remarks
With the above recipe you can add some really nice custom and addressable LEDs to your tree too. As mentioned in the beginning, it is a bit fiddly to install with the tiny wires and having to do power injection, but on the other end you can prepare the power injection points before starting and only need to measure the amount of wire needed to reach the controller while installing. And since it’s a Christmas tree, the foliage and ornaments generally hide all the injection points and wires perfectly making for a fairly easy install, with awesome results!
If you have any questions left, please leave them on a YouTube video or consider joining the Discord server, we also love seeing results!