QuinLED-Dig-Quad with DC-DC converter
(instead of dual linear converters)
Pre-Assembled v2 and v3 comes with custom integrated DC-DC circuit, DIY v3 also uses DC-DC converter from Dig-Uno
Normal setup
In the normal setup I’ve made for the QuinLED-Dig-Quad_v1 I used 2x Linear dropper (7809 and 7805) in cascade to drop the voltage from 12v to 5v. The upside of this is that it’s cheaper then using a buck converter, the downside is a little bit more heat but I felt this was worth it during the design and all the testing I’ve done. Trying to get you the most for the least cost!
Using QuinLED-Dig-Uno DC-DC converter
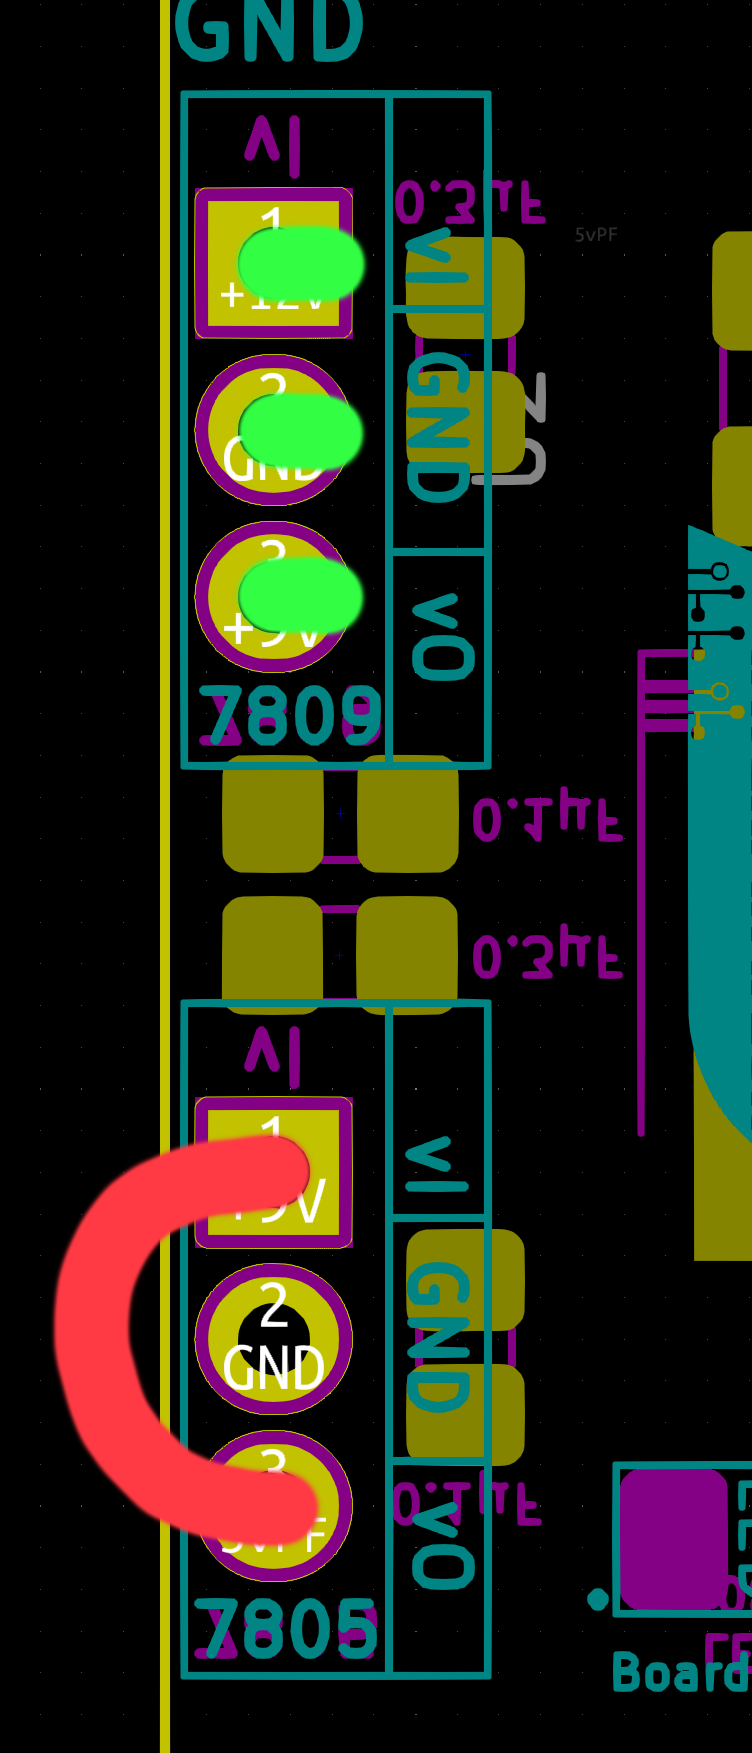
In the design I did take into account that you can use the Dig-Uno DC-DC converter (which is a buck converter) if you wanted to. I have an image below illustrating how this is done.
Regarding capacitors surrounding the Linear converter spots, these can skipped without any negative effect. If you do decide to keep them, and/or are maybe upgrade to make the board 24v compliant, make sure they are rated for at least 35v since you are inputting 24v so the standard rating of 16v isn’t enough anymore. All other SMD caps on the board are in the 5v circuit and are also still needed.
Green = Pins of the DC-DC converter
Red = Connection wire (something small, not a lot of current).
That’s it!
Everything else still keeps working the same way, so make sure to set the jumper to 5v or 12v for instance! And as said the DC-DC converter will generate less heat while doing the 12v -> 5v work, so if every bit counts, or you still have lots of the DC-DC converts lying around, this might be a good option for you.

