Tools and Equipment
Next to the components needed for the boards themselves you are also going to need some tools and equipment to solder and hook-up the board. Below will be a convenient list with the tools and equipment I can recommend! It will also feature some additional items like screws, wires or anything else related to the QuinLED project. Get what you need! 🙂
Index table
Hand Tools
![]()
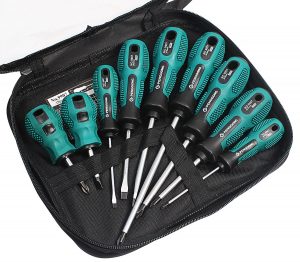
Screw drivers
Screw drivers in all sorts and sizes always come in handy. Although most people have some lying around, for the QuinLED boards you are going to need small sizes with + and – heads. If you have watched my videos you’ve probably seen the kit I’m using and you can find it here:
![]() 9 Piece Aliexpress screw driver set (I use this one personally, very nice kit!)
9 Piece Aliexpress screw driver set (I use this one personally, very nice kit!)
![]() Xiaomi High Quality Bit Set screwdriver kit (Use this one often, very nice kit!)
Xiaomi High Quality Bit Set screwdriver kit (Use this one often, very nice kit!)
![]() Wowstick electrical screw driver (Awesome little tool!)
Wowstick electrical screw driver (Awesome little tool!)

![]()
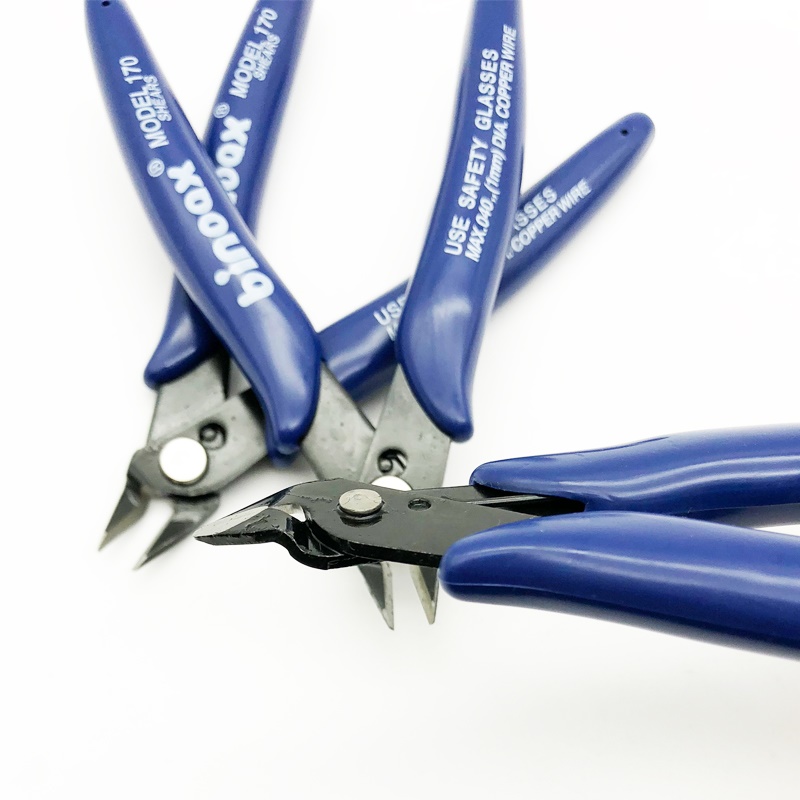
Angled snips
During the building of the boards you are going to need some snips or cutting tool. I use angled types so you can reach the pins better! Very useful cutter which makes nice sharp and straight cuts.
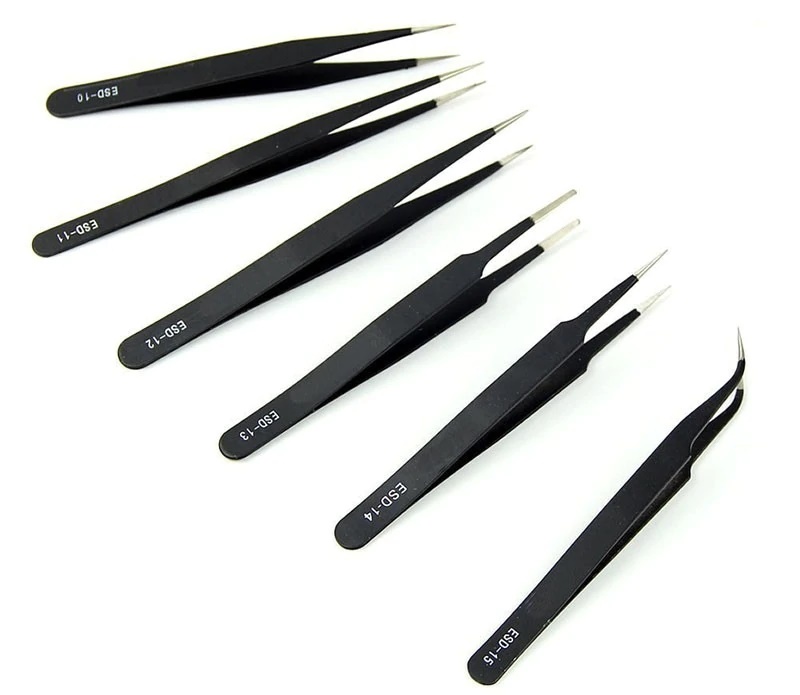
Tweezers
Most of the resistors, caps and diode’s I use are mostly in SMD 0805 size. Although this size can still be soldered by hand, a set of good tweezers helps A LOT with that proces. I use a kit you can find here:
![]()
Better Quality Ceramic Tweezers
When you are working with little SMD components more often a better set of tweezers can really help. Recently I’ve been using a set of the below Ceramic tweezers and I really like them, if you like quality tools, get some of these instead of the cheaper one’s!
![]()
Set of nice ceramic tweezers (I use these personally)

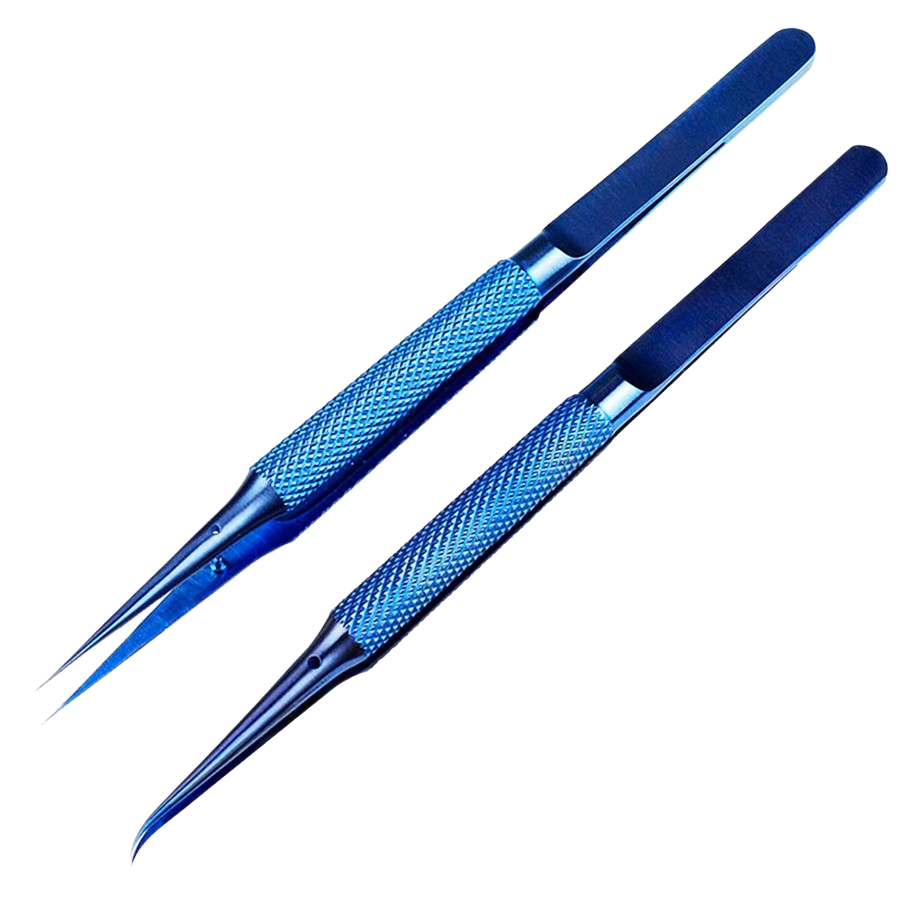
Best Tweezers for SMD work
I’ve recently switched to these Titanium tweezers, they have VERY fine points and feel very nice in the hand to work with, a bit expensive but really recommended!
I generally use the bent version!
![]()
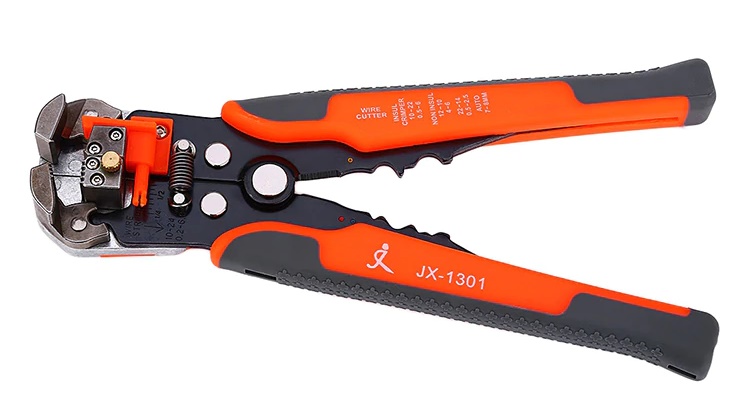
Automatic Wire Stripper
How did I ever live my life before owning one of these. Incredibly strips all kind of gauges wire perfectly every time. If you don’t have one, if anything from this list, buy this!
![]()
Simple automatic wire stripper
![]()
Better automatic wire stripper (I use this one personally)

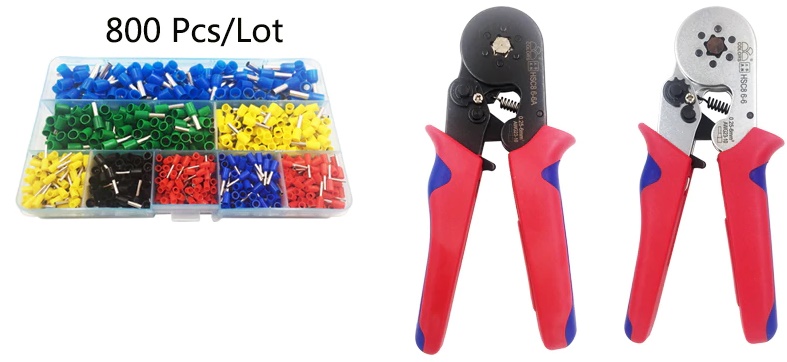
Ferrule crimping tools
A lot of wire is of the stranded variety, to make sure you get a perfect fit that holds I recommend using wire ferrules on the ends of stranded cable, they provide for a much better surface contact in screw terminals.
The ferrule crimpers come in a 4 sided and 6 sided variant, I like the 6 sided best myself.
![]() Ferrule crimping pliers + ferrule set
Ferrule crimping pliers + ferrule set
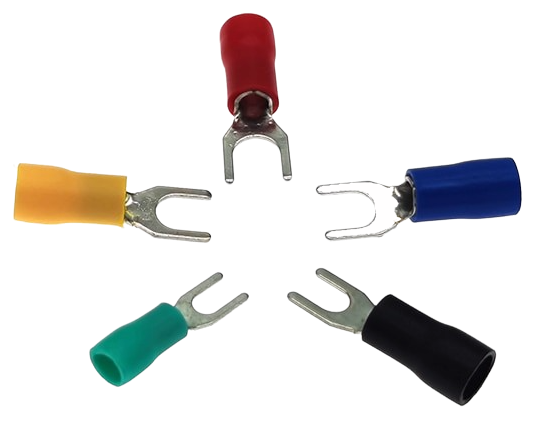
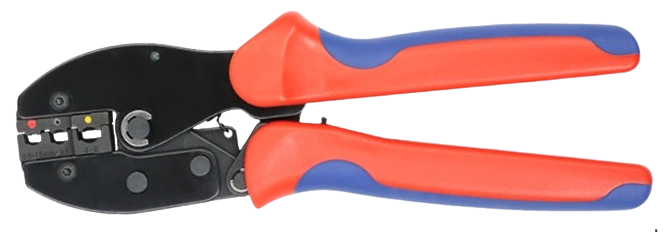
Connector crimping tool and fork/ring crimps
Good for two options:
- Connecting wires, sometimes you want to be able to connect and disconnect wires (especially if they are longer). Crimped on male and female ends are perfect for this, they come pre-insulated so even when disconnected there is no chance of them touching and can handle a good amount of current!
- Crimping fork or ring crimps onto cables (especially good to use for input wires to all my boards using a barrier terminal)
![]() Fork Style Crimps (Get SV 5.5-4 for Dig-Quad/Octa and Meanwell PSU)
Fork Style Crimps (Get SV 5.5-4 for Dig-Quad/Octa and Meanwell PSU)
![]() Ring Style Crimps (Get RV 5.5-5 for Dig-Octa Power-7HC)
Ring Style Crimps (Get RV 5.5-5 for Dig-Octa Power-7HC)
![]()
Connecting wires (male and female side)
Wires and accessories
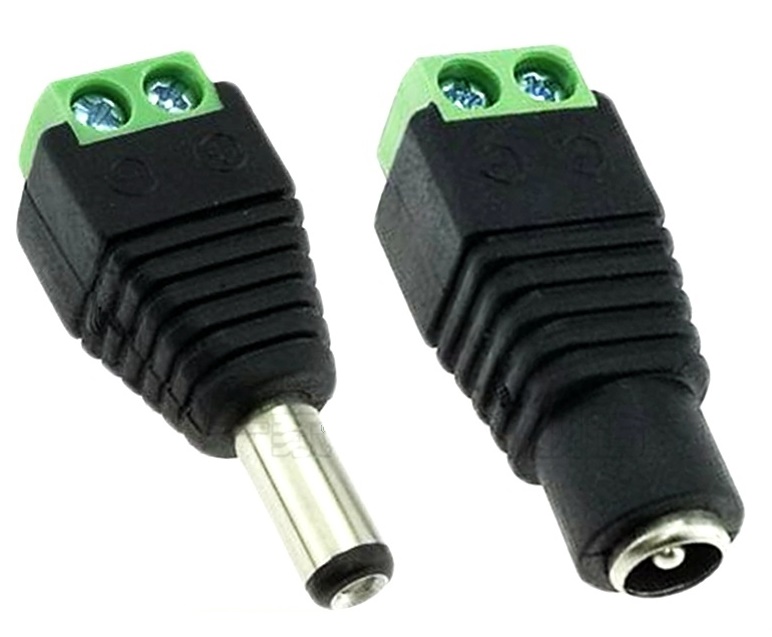
Terminal to Barrel Plug
I use screw terminals on all of my designs because when screwed down they form an excellent connection. But when you want to disconnect and connect more often or use different power supplies the screw terminals can quickly become annoying. For this I use little plugs which convert from barrel to terminal and the reverse!
I quickly use a lot of these so I’ve included a link to a 50 pairs pack, very handy!
Warning: Do not use these if continuous power is above 3-5Amps, they can become too hot! This makes them more suited for 12v then 5v.
![]() 5 pairs Male Female 5.5 x 2.1mm DC barrel plugs
5 pairs Male Female 5.5 x 2.1mm DC barrel plugs
![]()
100 pairs Male Female 5.5 x 2.1mm DC barrel plugs
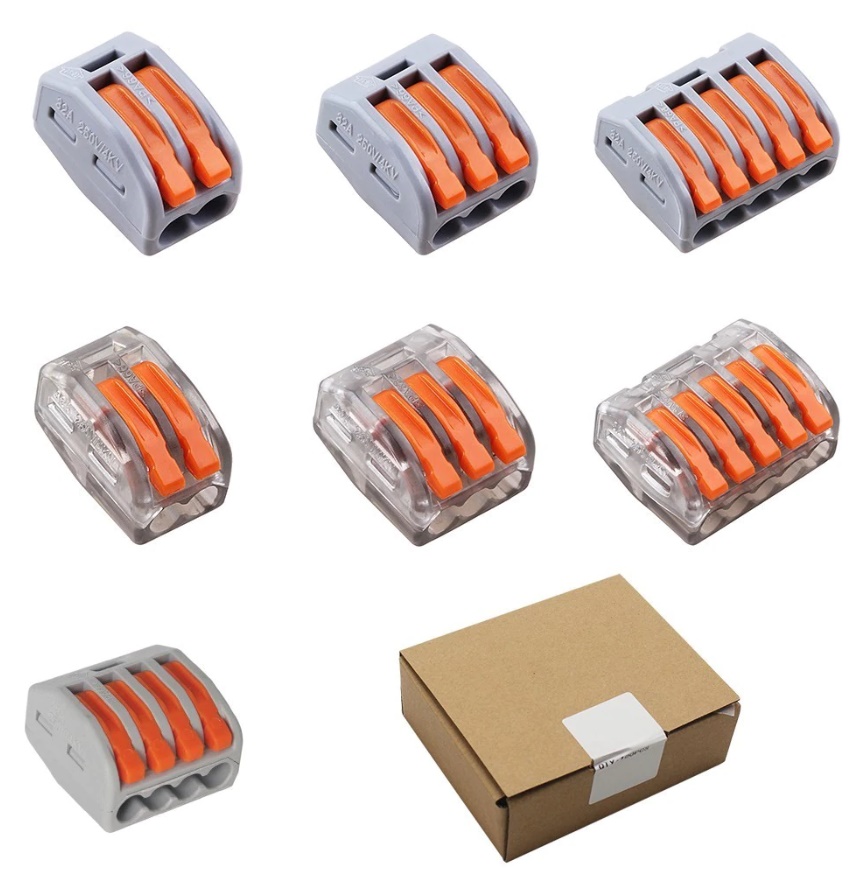
Connector blocks
To connect all kinds of wires (AC or DC) together, solid or stranded I use the following connector blocks. They work for everything and are even good enough to use them in a permanent installation, highly recommended!
I advise to get a lot of the 3pin blocks and a few 5pin blocks, they make your life a whole lot easier!
![]() 100pcs 2pin, 3pin or 5pin connector block
100pcs 2pin, 3pin or 5pin connector block
![]() WAGO connector kit (includes several sizes)
WAGO connector kit (includes several sizes)
![]() Special 2 wire split connection blocks (Aliexpress only)
Special 2 wire split connection blocks (Aliexpress only)
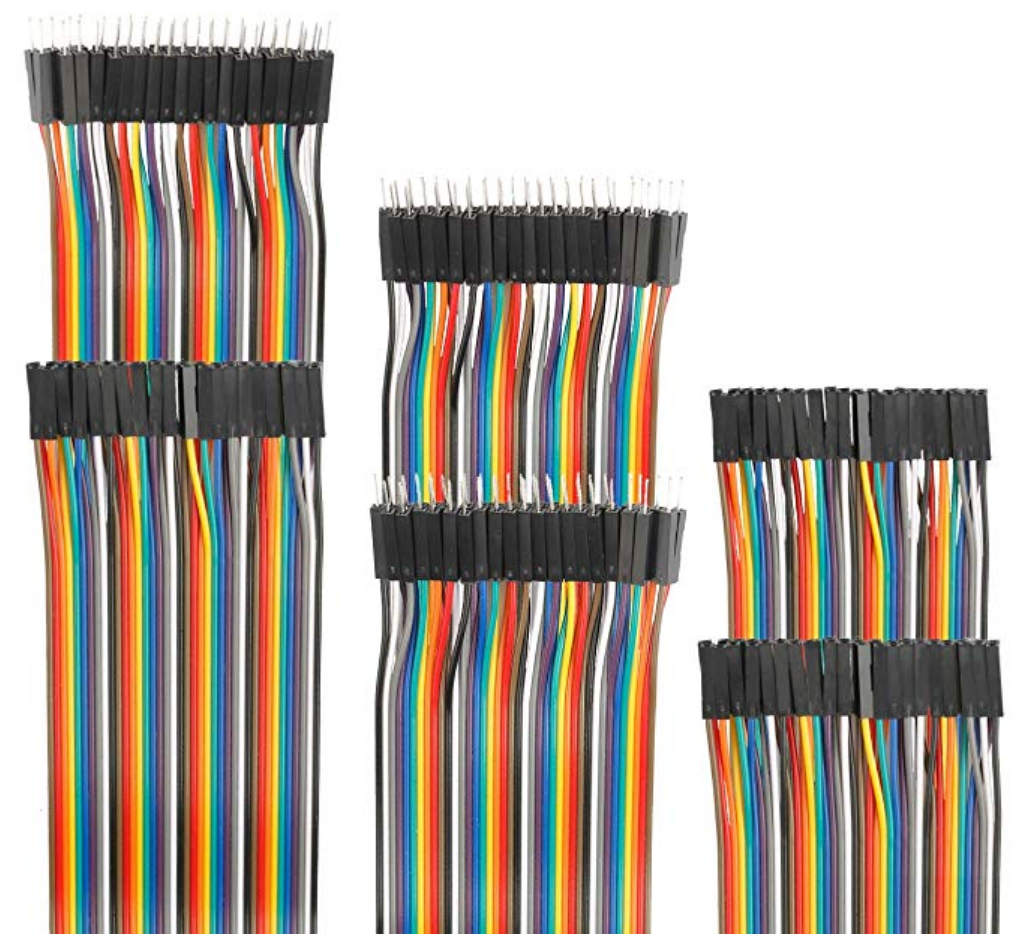
Dupont wires
Dupont wires are useful in a lot of situations! They come in male-male, male-female and female-female variants and can be used directly on pin headers used on most QuinLED modules. They can also be used to make connections with breadboards or loads of different external modules such as relays, motion sensors, etc.. They can’t carry very much power but are well suited as signal wires or to power small modules.
They are cheap and basically you need to make sure to always have some in your collection! Here is a link to a kit which includes all above mentioned types:
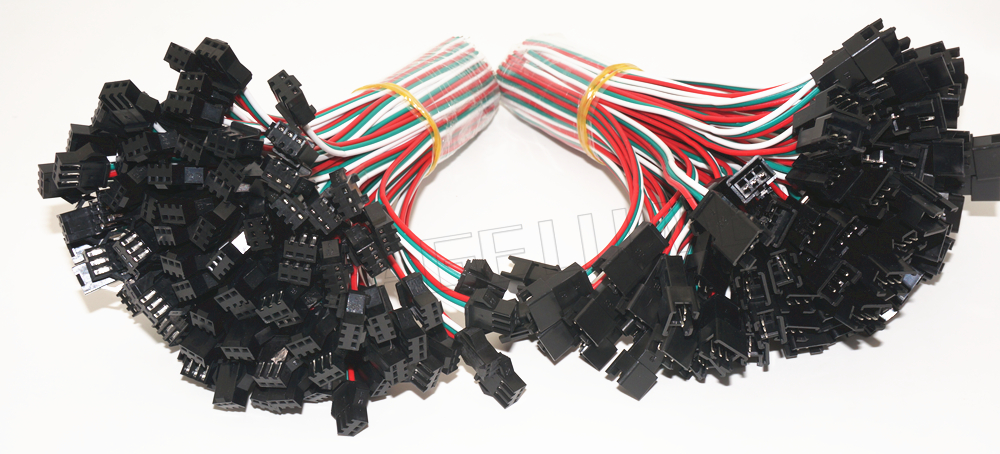
3 pin LED cable leads
To connect most generic WS2812b or SK6812 LED strip you need a 3 pin connector. Easy to connect to the often factory soldered on connector! But as with most of these connectors, don’t try to push a giant amount of amperage through these little cables, use beefier cables for that!
![]() Set of male and female connectors with short leads
Set of male and female connectors with short leads
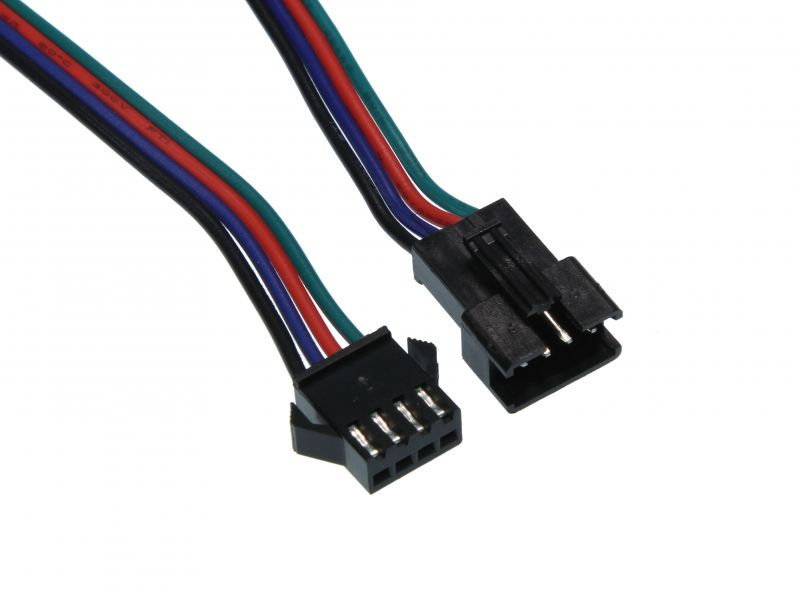
4 pin LED cable leads
To connect digital LED strip such as APA102 or ws2815 strip you need more than 3 pins. That’s where these 4 pin JST connector sets come in! Very easy to quickly connect and disconnect LED strip. Again, the same warning as above, don’t try to push too many Amps through these little cables, use thicker wires for longer lengths!
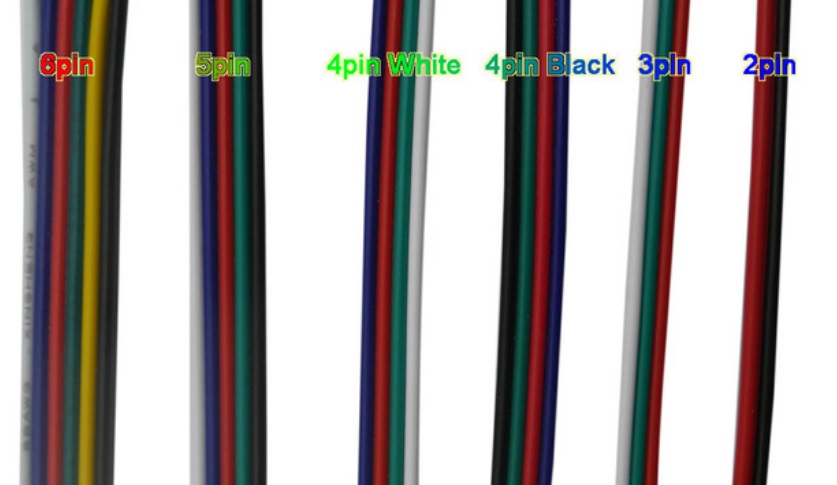
Multi-color LED cable
To use analog or digital LED cable further away from the controller you can use these multi-pin extension cables. They work well for low amperage setups like connecting 1 meter of RGB+CCT or ws2815. If you are connecting longer strips, make sure to use seperate thicker gauge (see below) power cables!
![]() 3pin, 4pin, 5pin or 6pin wires (5m to 100m)
3pin, 4pin, 5pin or 6pin wires (5m to 100m)
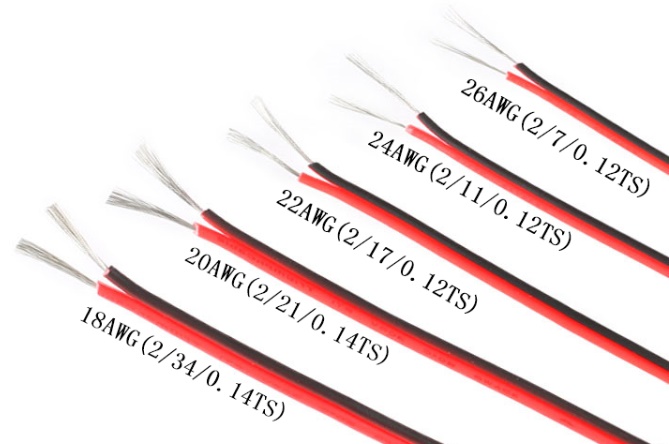
2 Color Wire
To connect LED strip or lights to your new QuinLED controller you are going to need some wires, especially longer lengths or high power (long strip) needs a decent gauge of wire. Tip, sometimes speaker wire is cheaper then electrical wire in the same gauge, in the end they both contain copper!
Once your LED strips get longer, adding multiple power injections becomes more important both for analog strips and for digital LED strips! Especially for 5v digital LED strip, make sure you get a good thickness cable, this livestream can really help with that!
Here are some examples:
![]() 10 meters simple 2 wire electrical wire (multiple gauges)
10 meters simple 2 wire electrical wire (multiple gauges)
![]() Variable length of thick speaker wire
Variable length of thick speaker wire
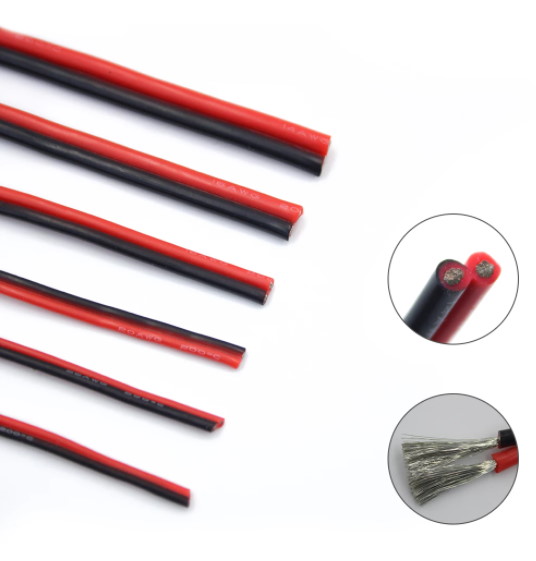
High Quality wire
I like using higher quality stuff even though it isn’t always needed. Silicone wire is a lot more flexible then normal PVC wire and can also withstand a lot more heat. AWG18 and thicker (AWG16, AWG14, AWG12) is great for power injection. Sometimes you need a thicker gauge to transport say 5v longer distances. Make sure to also get some AWG18 size since that is generally the thickest wire you can solder onto a strip directly.
So AWG18 or bigger is recommended for power carrying wires, AWG24 is generally good for signal wires.
![]() Various sizes High Quality Red/Black silicone wire (Good for power delivery wires)
Various sizes High Quality Red/Black silicone wire (Good for power delivery wires)
![]() Multi kit available from AWG18 to AWG30 (Great for signal wires)
Multi kit available from AWG18 to AWG30 (Great for signal wires)

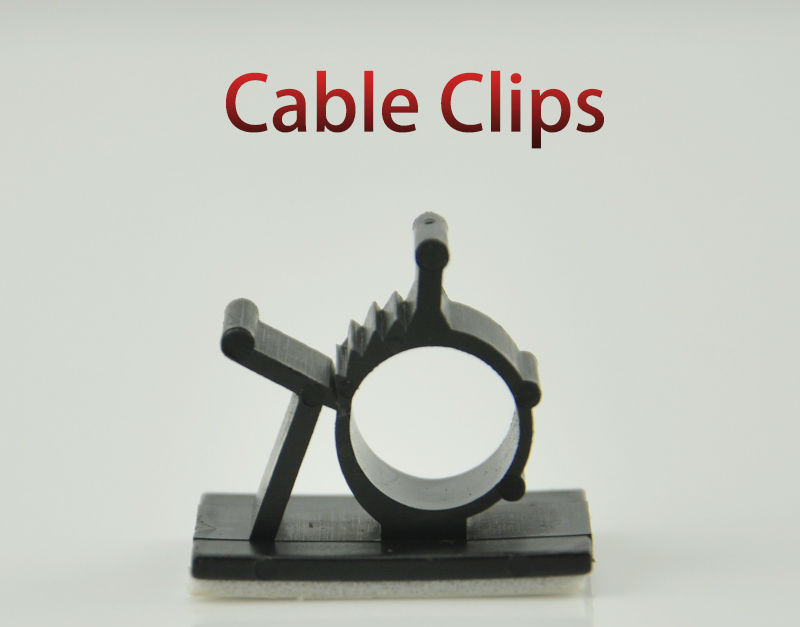
Wire Clips
I use these wire clips everywhere, they come with a very good thick glue pad and it will stick to most things. Very easy to bunch or hide away a few (or lots) of wires, get a bunch of them in different sizes, trust me, you’ll be using them for everything for years!
![]() Different size clips you can select
Different size clips you can select
Heat shrink Tubing (with glue)
If you are going to be doing projects with LED strip you want to be able to attach cable to it yourself, for instance for double feeding the cable or connecting thicker wire then comes stock. Using some heat shrink tube over these connections protects the connection and also insulates it from accidental contact. I like to use heat shrink that has a glue inside that automatically gets released when the heat shrink heats up. This forms a very tight and permanent bond allowing it to function as a bit of strain relief.
Over the years I’ve found that 9.5mm heatshrink that shrinks 3:1 works very well for 10mm and 12mm wide LED strip! Using a clear heatshrink also means there is no problem covering one of the LEDs.
![]() 3:1 9.5mm clear heatshrink with glue
3:1 9.5mm clear heatshrink with glue
![]()
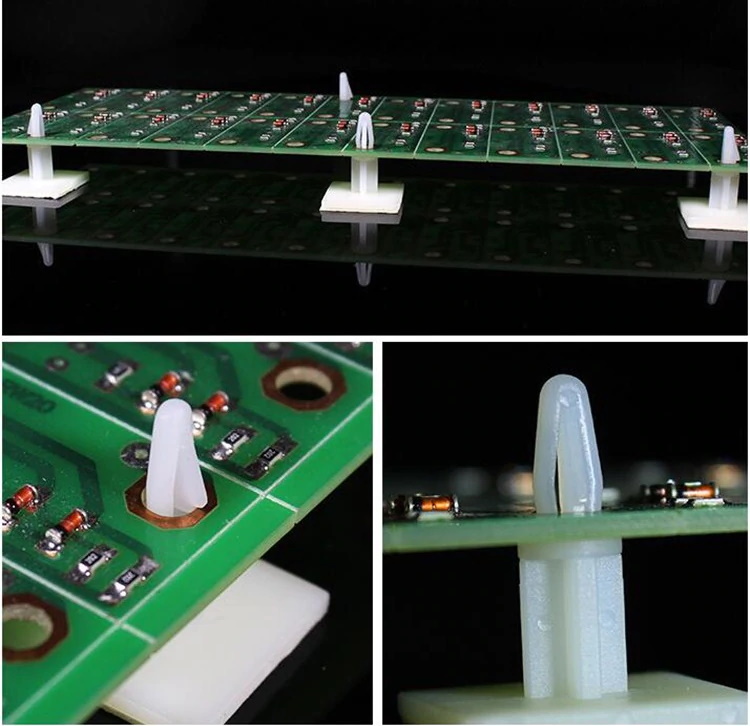
Plastic glue Stand-offs
When mouting down one of my boards it’s often a good idea to give is a little bit of breathing room on the bottom. With lots of Amps running through them, a little bit or airflow over the top + bottom keeps them cool.
To make it easy, I’ve used glue on plastic stand offs! They should work for all of my boards, although the boards with M2 holes (Like Dig-Uno) might be a bit of a tight fit.
![]()
100pcs Plastic Stand off (various heights)
Soldering Equipment
Most importantly you are going to need a soldering station. Now these come in a lot of different forms and shapes. It’s best to buy a middle of the road, temperature controlled soldering station. You both have cheaper options and (a lot) more expensive solutions, but value for money is in the soldering stations
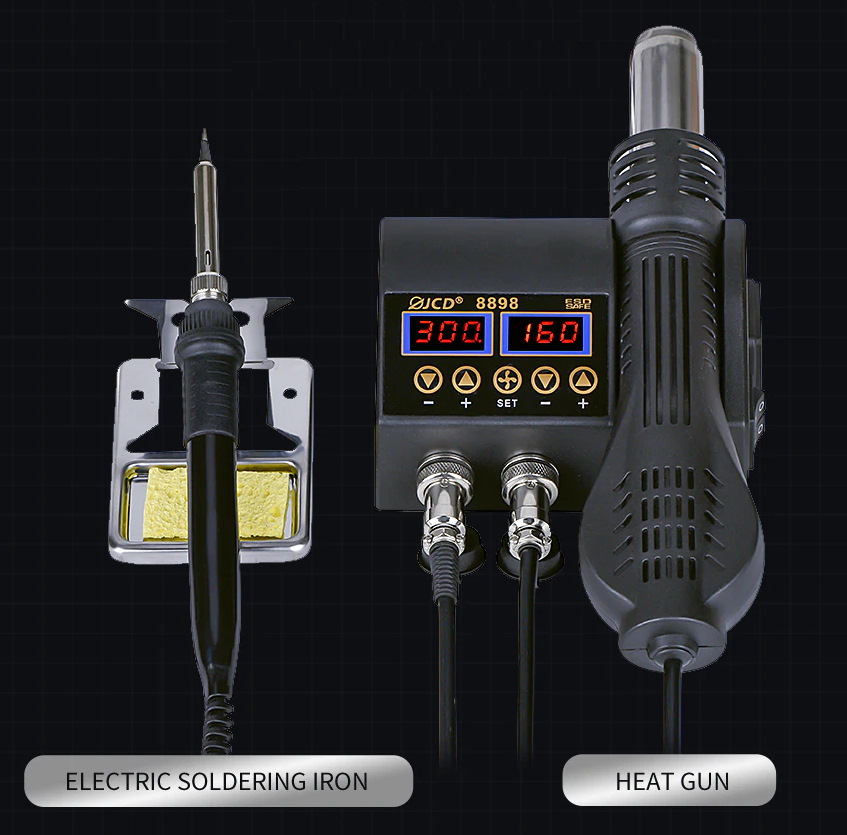
Decent Hot Air + Soldering Iron station!
Recently we did a test of a combined Hot Air + Soldering iron station and it turns out it’s excellent for a very reasonable amount of money. If you are starting out and you are looking for a decent iron and either want hot air or aren’t even sure you’d like it, I can really recommend getting this combined station!
![]() JCD 2 in 1 750w Hot Air + Soldering Iron Station
JCD 2 in 1 750w Hot Air + Soldering Iron Station
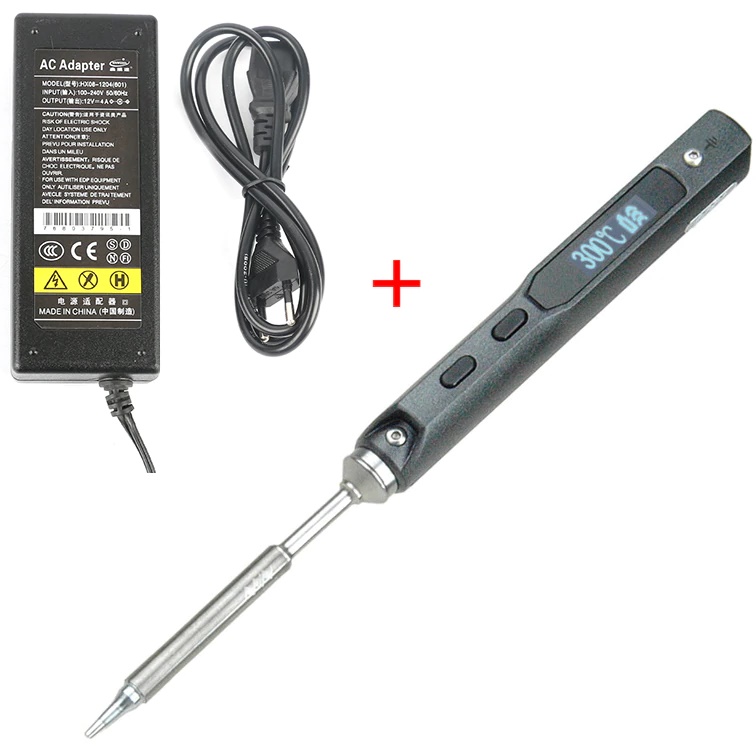
Better and Portable Soldering Iron
A step up to around the 50$ to 60$ mark you come into the territory of soldering stations/irons and better temperature controlled irons. The TS100 is an example of this and even features customizable firmware and is a great iron to have in your back pack on the go!
![]() TS100 Soldering Iron + Power Adapter
TS100 Soldering Iron + Power Adapter
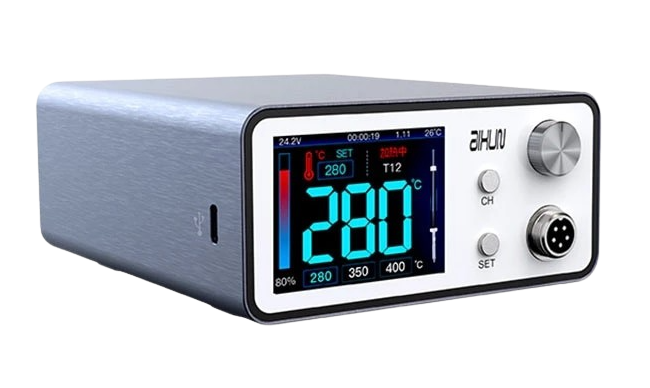
Premium High Power Station with JBC 245 tips
Some of my DIY boards have big copper planes and can be hard to solder with lower power irons and stations. The ultimate high end station is one I recently tested during a Quinboxed and is this station can really put out some power, heats the tip in 4 seconds and allows you to do even the toughest solder jobs. With the very easily interchangeable tips it can do both bulk joints and fine or drag soldering!
![]() Aixun T3A 200w Soldering Station (Get the JBC 245 version!)
Aixun T3A 200w Soldering Station (Get the JBC 245 version!)
![]() Much better stand for the T3A with 245 handle (If you solder a lot and use multiple tips, very nice!)
Much better stand for the T3A with 245 handle (If you solder a lot and use multiple tips, very nice!)
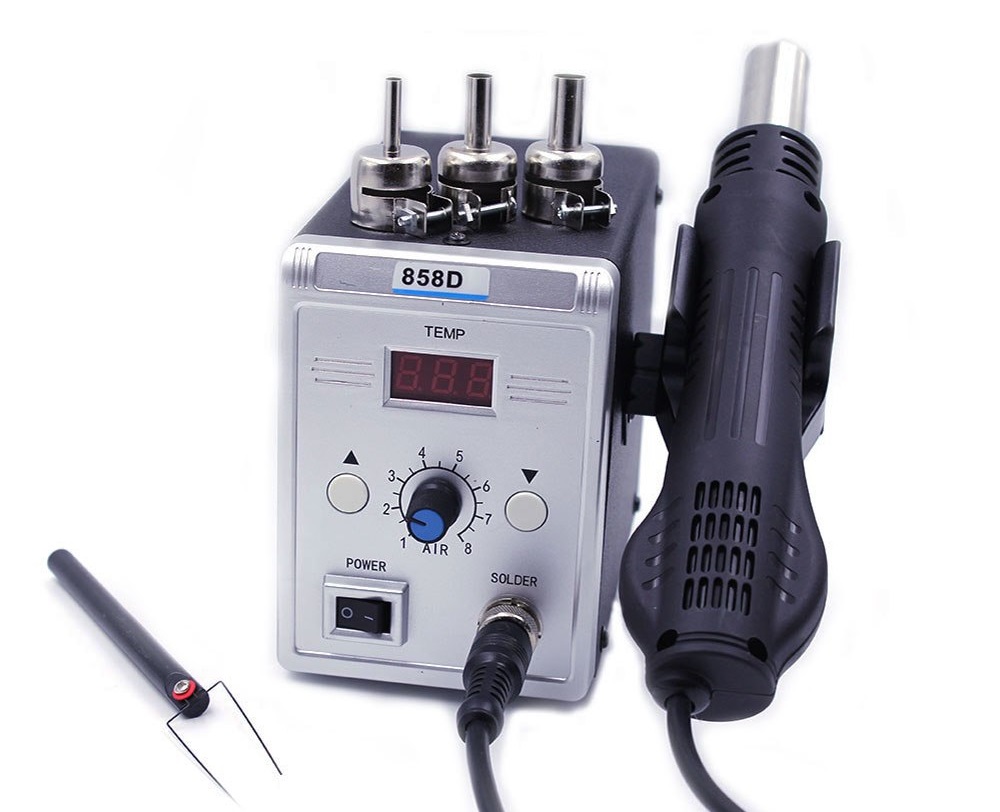
Hot Air SMD station
Next to normal soldering irons there is also something called hot air soldering stations. These aren’t used for through hole components but for SMD (Surface mount) components. Most of the QuinLED modules are based in through-hole but some components are SMD because of convenience and routing reasons. However, every component I use is hand solder-able using a normal soldering station. If you however intend to build a lot of boards with SMD components (such as QuinLED-Quad) a Hot Air station may be nice to have.
I recently bought one of these cheap air soldering stations and they actually work surprisingly well. Maybe not suited for big time production work but for home soldering they are perfect!
![]() Cheap Hot Air SMD Soldering Station
Cheap Hot Air SMD Soldering Station
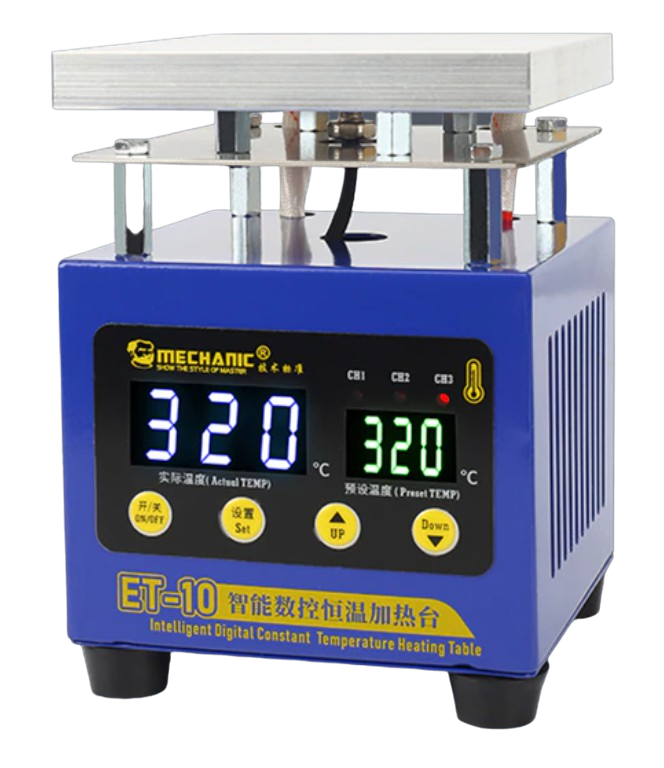
Heat Plate
If you’re doing more SMD work then a few capacitors or resistors it’s highly recommended to use an Oven or Heat Plate. Myself I use a little heat plate because it takes up much less space then an oven and works really well! I showed it off during this livestream, and it’s my preferred way to build boards with SMD components. If you want to do some re-work and other thigs the hot air station above is still advised just like also having a soldering iron. But the heat plate is basically a must for doing “Advanced DIY” as I call it.
The 10cm x 10cm version can go above 300c which makes it perfect to do the actual soldering, not just assist with it. The biggest versions cannot go this high and are intended to be used together with a hot air station.
![]()
10cm x 10cm heatplate that can get above 300c
Soldering consumables
To solder you are going to need some tin wire to melt into your soldering joints. Most of the QuinLED stuff is built around THT and uses this type of wire, if you are also going to do SMD soldering with a hot air gun, also pick up some soldering paste
Solder wire
I mostly use 0.6mm soldering wire with resin (so you don’t need extra flux). I use the BEST version from Aliexpress myself since I like it a lot! (2023-09)

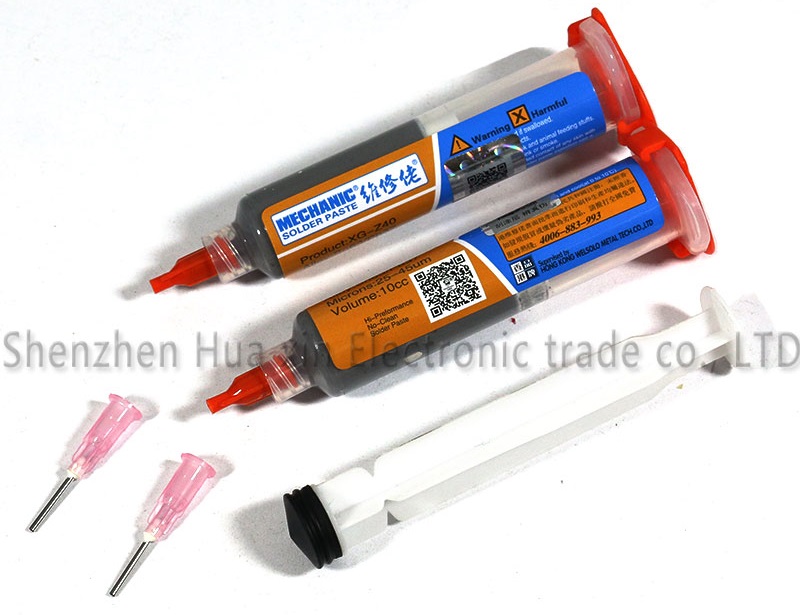
Soldering paste
For soldering with a hot air gun, make sure you also have some tweezers!
![]() 1 or 2 tubes of SMD soldering paste
1 or 2 tubes of SMD soldering paste
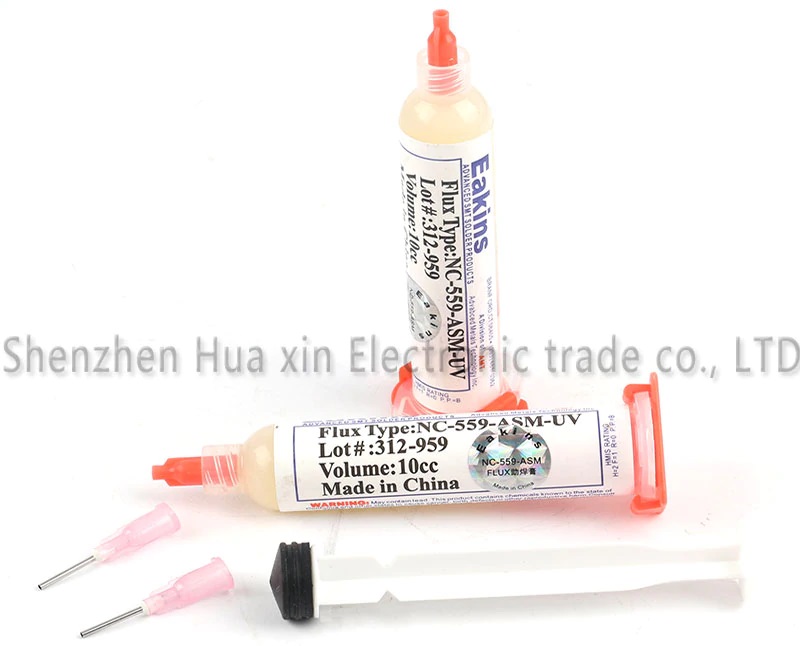
Extra Flux
Sometimes, especially when soldering small pins, you need some extra flux to make sure everything flows correctly
![]() Tube of soldering flux + apply needle
Tube of soldering flux + apply needle
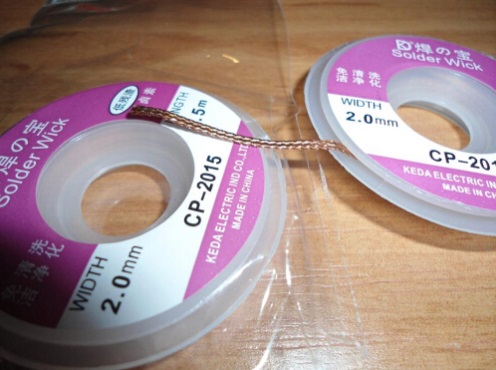
Solder wick
Or as I like to call it, “mistake wire”. If you get too much solder in the wrong place, this can help you clean it up!
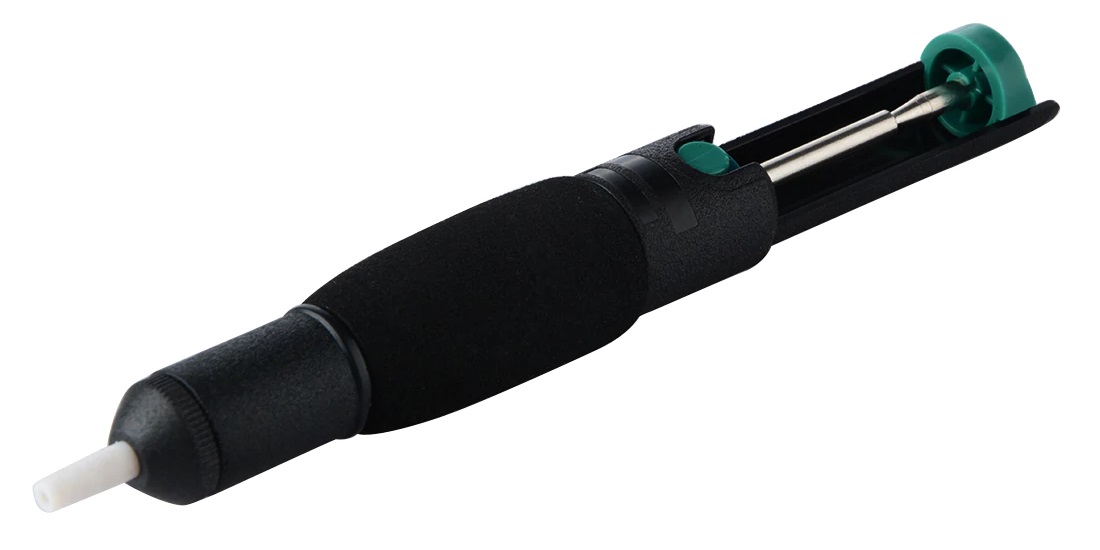
Solder suction pump
For Through hole components just using wick isn’t enough sometimes. A solder sucker can help with that! Good to have in your tool arsenal
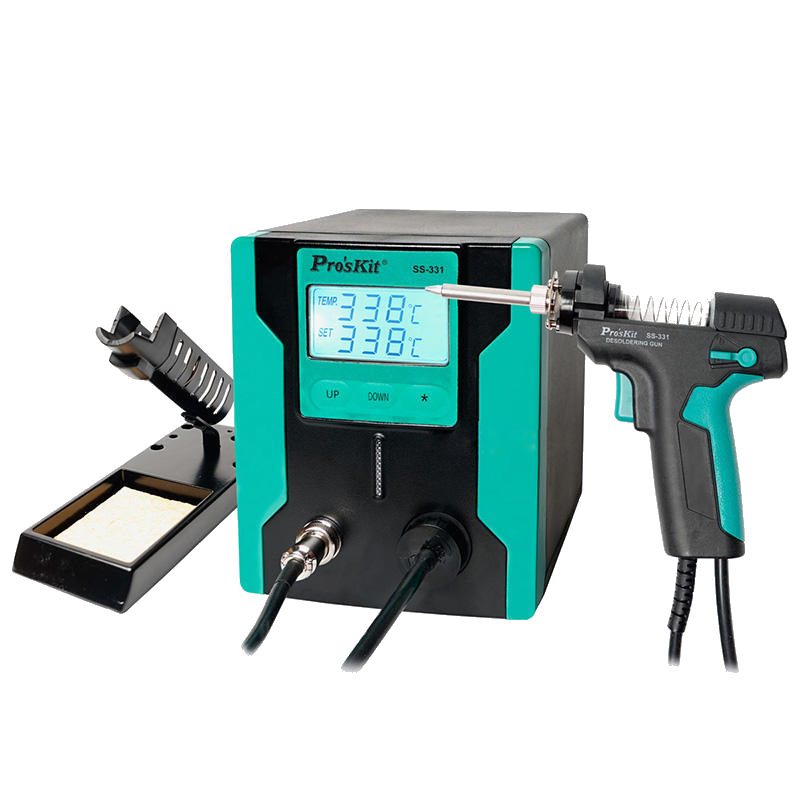
Electric Desoldering Pump
I did a video review about this electric desoldering pump, if you make a lot of mistakes or want to get some components back, it works quite well!
![]()
Testing Tools
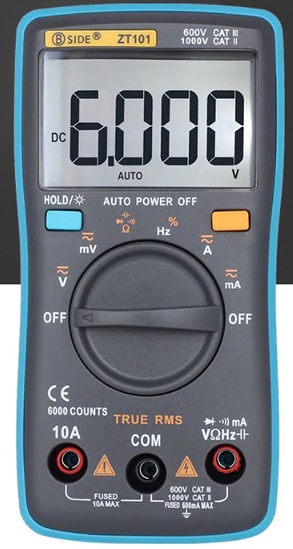
Multimeter
During the setup of a QuinLED you will need to measure some voltages to set the DC-DC converter to 5v, a multimeter is easiest to use for that!
![]() Decent multimeter with leads included
Decent multimeter with leads included
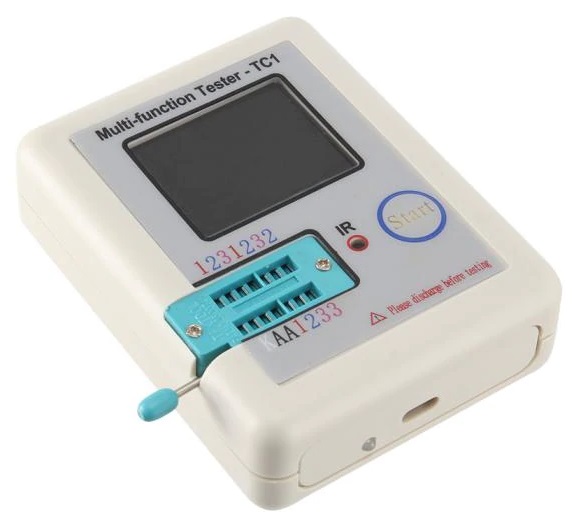
MOSFET/Diode measuring
Want to know if the MOSFETs you got are correctly triggering below 3.3v? Use one of these little testing boxes, it can show you before you solder it on the board!
![]() Tester with color screen and built-in battery!
Tester with color screen and built-in battery!
![]()
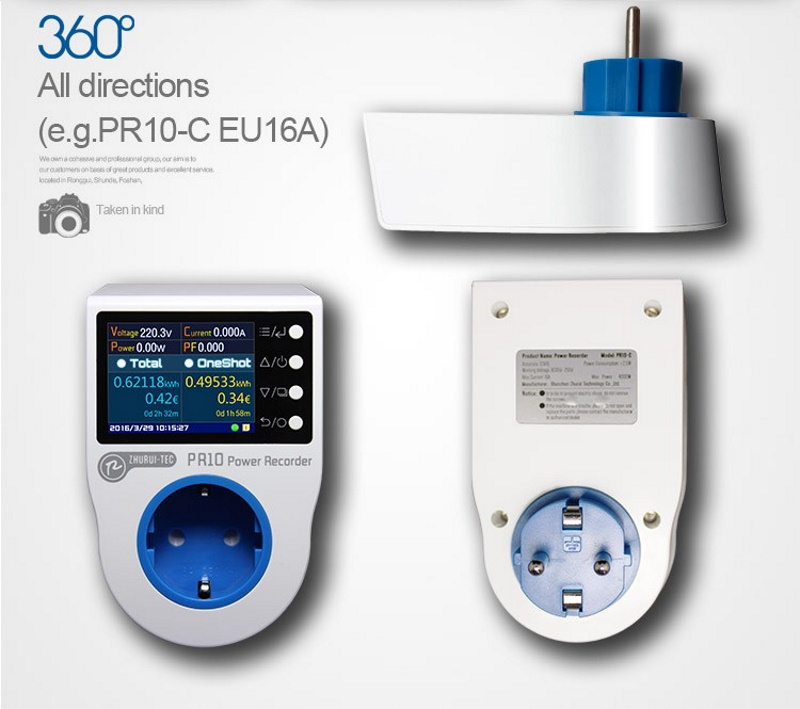
110v/230v Accurate Power Measuring plug
I’ve shown the PR-10C power measurement plug in lots of my videos, it’s a bit on the expensive side but it’s the best plug-in power measure device I know. If you even want to measure power, this is the plug to get!
(No WiFi or remote connectivity, see below)
![]()
PR-10C Energy Measurement plug (You can choose country style)
DL24 Electronic Load Tester
These Electronic loads are awesome, I’ve used them many times to test up to 25Amps @5v or 10Amps @ 12v. Because they have big input terminals they have no problem accepting up to 12AWG with ferrules which means you can actually use cables thick enough to not have too much voltage drop going into your tester.
“Why do you use 5 and not one big tester”? I get this question sometimes and the answer is that I often test with 5v or 12v. With those low voltages you need a lot of copper and thus thick cables and thick traces on a PCB. So while you might see a 600w tester online it’ll only have a single terminal which can handle the same size wire as this 150w max tester. So with a single tester although it could handle 600w @ 24v (25Amps) it certainly won’t do 125Amps @ 5v (125Amps). And thus the solution is to use lots of testers which each get their own cables and that way share the load, these DL24 are excellent for that!
I also really love the color display. It makes for a very clear and easy to read display during the tests! Highly highly recommended!
![]() DL24 Electronic Load Tester (includes accessories)
DL24 Electronic Load Tester (includes accessories)

Misc
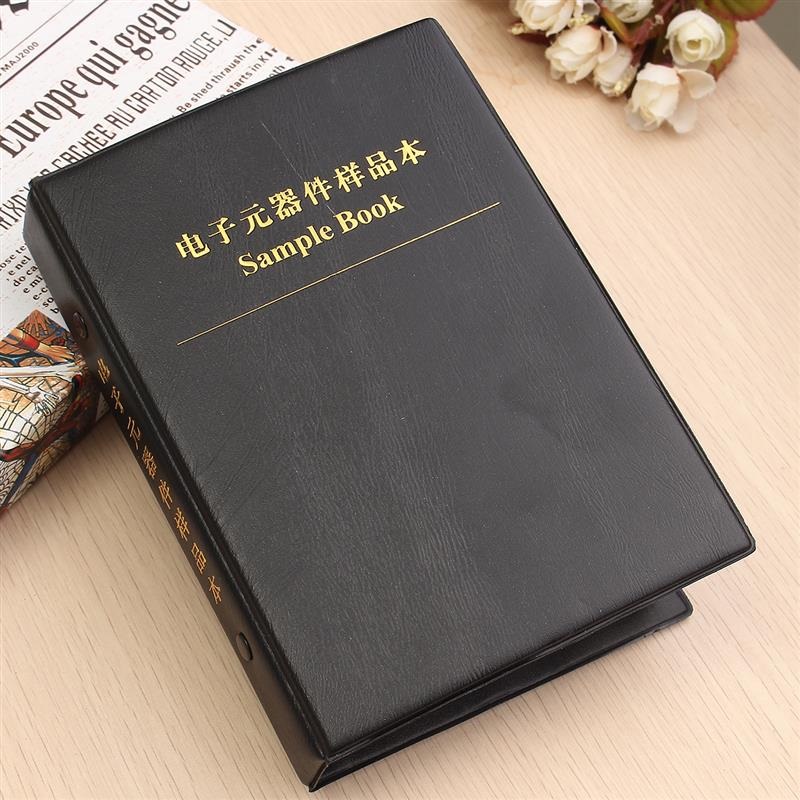
0805 Sample books
When you do a lot of DIY project you often needs lots of different values SMD capacitors and resistors. The below linked books contain ample capacitors and resistors in the commonly used 0805 format, you’ll never miss out again!
Anything else?
And that’s it, I believe those are all the tools you might need next to the components from the component list. Make sure to check out my articles about Great Quality White Analog LED strip, Analog RGB(W) LED Strip or Digital LED strip or what kind of power supply you can use!